100
Dubbing only desired scenes
– Digital program editing
Opmerkingen
•De titels, schermaanduidingen en de inhoud
van het cassettegeheugen kunnen niet worden
overgekopieerd.
•Bij aansluiting met een i.LINK kabel (DV-
aansluitsnoer) kan bij bepaalde modellen
videorecorders het kopiëren niet altijd goed
verlopen.
Dan kunt u het onderdeel CONTROL beter
instellen op “IR” in het instelmenu van uw
camcorder.
•Voor het monteren van digitale videobeelden
kunnen de bedieningssignalen niet via de
LANC aansluiting worden verzonden.
Stap 1: Aansluiten van de
videorecorder
Voor het aansluiten kunt u zowel een gewoon
audio/video-aansluitsnoer als een i.LINK kabel
(DV aansluitsnoer) gebruiken.
Gebruikt u een gewoon audio/video-
aansluitsnoer, dan maakt u de aansluitingen
zoals aangegeven op blz. 95. Gebruikt u een
i.LINK kabel (DV aansluitsnoer), dan maakt u de
aansluitingen zoals aangegeven op blz. 97.
Bij aansluiting met een i.LINK kabel (DV-
aansluitsnoer)
Met deze volledig digitale aansluiting worden de
beeld- en geluidssignalen in digitale vorm
verzonden, hetgeen de beste kwaliteit oplevert.
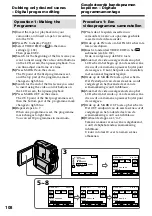
Stap 2: De videorecorder
instellen op kopiëren via een
audio/video-aansluitsnoer
Voor het monteren met de videorecorder zendt u
het bedieningssignaal via infrarode stralen naar
de afstandsbedieningssensor van de
videorecorder.
Als u de apparaten aansluit via een audio/video-
aansluitsnoer dient u de onderstaande
instellingen (1) t/m (4) te maken om te zorgen
dat het infrarode bedieningssignaal juist wordt
doorgegeven.
Geselecteerde bandopnamen
kopiëren – Digitale
programmamontage
Notes
•You cannot dub the titles, display indicators, or
the contents of cassette memory.
•When you connect with an i.LINK cable (DV
connecting cable), you may not be able to
operate the dubbing function correctly,
depending on the VCR.
Set CONTROL to IR in the menu settings of
your camcorder .
•When editing digital video, the operation
signals cannot be sent with LANC .
Step 1: Connecting the VCR
You can connect either the A/V connecting cable
or the i.LINK cable (DV connecting cable).
When you use the A/V connecting cable, connect
the devices as illustrated in page 95. When you
use the i.LINK cable (DV connecting cable),
connect the devices as illustrated in page 97.
If you connect using an i.LINK cable (DV
connecting cable)
With digital-to-digital connection, video and
audio signals are transmitted in digital form for
high-quality editing.
Step 2: Setting the VCR to
operate with the A/V
connecting cable
To edit using the VCR, send the control signal by
infrared rays to the remote sensor on the VCR.
When you connect using the A/V connecting
cable, follow the procedures below, (1) to (4), to
send the control signal correctly.
Содержание Digital Handycam DCR-PC8E
Страница 192: ...Sony Corporation Printed in Japan ...


