1-10 (E)
BCU-100 MM
5. Rebooting and version confirmation
(1) Execute the following command to reboot the BCU-100.
reboot [ENTER]
(2) Wait until the login prompt message is displayed, then log on with user: root, password: sjx-300.
(3) Execute the following command to mount the USB memory.
mount -t vfat /dev/sda1 /mnt [ENTER]
(4) Execute the following command to move to the directory where the USB memory is mounted.
cd /mnt [ENTER]
(5) Execute the following command to confirm that the firmware is upgraded.
sh bcu100-x.xx-update.sh list [ENTER]
n
Input the upgrade version name in the place of x.xx of the above command name.
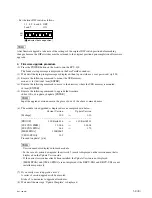
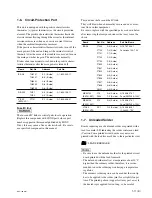
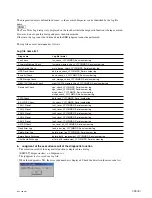
(6) Confirm that the following message is displayed.
Current Version
Update Version
[Package]
:
1.10
– – – – – – – – – – – – – – – – – – – – – – – – – – – – – – – – – – – – – – –
[PROOF]
:
1.10 Build 981
[SYSCON FIRM] :
1.00.08
[SYSCON FPGA] :
1.70
[MEM FPGA]
:
1.00B0065
[VIF-40 FPGA]
:
1.05
n
.
Confirm that the version number that is shown as the Current Version of the [Package] is exactly the
same version number of the executed firmware upgrade data.
.
Confirm that nothing is displayed in the Update Version column of each module.
.
[MEM FPGA] and [VIF-40 FPGA] are not displayed if the BKCU-EX1 and BKCU-VD1 are not
installed respectively.
6. Exit procedure
(1) Execute the following command to exit the Maintenance mode.
poweroff [ENTER]
(2) Return the front DIP switches to the original position.
(3) Remove the USB memory.
(4) Disconnect the RS-232C serial cross cable
(5) Attach the front panel to the original position.
(6) Press the POWER button to run the BCU-100.


