BCU-100 MM
1-5 (E)
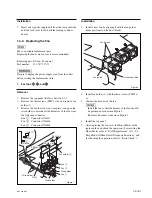
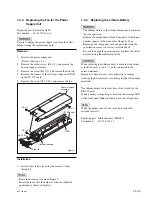
K3
x
5
K3
x
5
K3
x
5
PS3
x
35
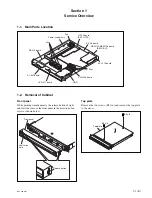
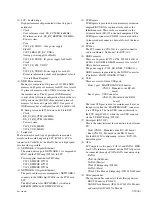
PS-743 board
Front lid
Chassis (upper)
assembly
CN501
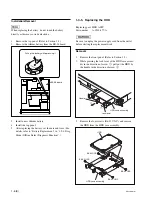
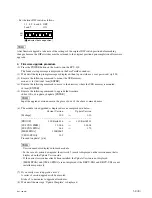
Figure 1
Harness position
Installation
1.
Install a new fan by reversing the removal steps 1
through 5.
m
.
Route the harness as shown in Figure 1.
.
Install the fan so that the harness of the fan should be
positioned as shown in Figure 1.
1-3-4. Replacing the Lithium Battery
w
.
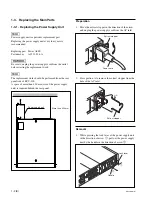
The lithium battery is the critical component to maintain
the safe operation.
Replace the component with the Sony part of which part
number appears in the manual developed by Sony.
Replacing the component with any part other than the
specified ones may cause fire or electric shock.
.
Be sure to unplug the power supply cord from the outlet
before starting the replacement work.
c
When replacing the lithium battery, ensure that the battery
is installed with “
+
” and “
_
” poles connected to the
correct terminals.
Improper connection may cause explosion or leakage
resulting in physical injury or in damaging the surrounding
materials.
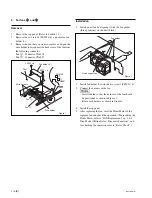
The lithium battery for the real time clock is used for the
BE-28 board.
When a battery voltage drop is detected, the message LED
on the front panel blinks in blue to warn the voltage drop.
n
When the battery runs out, the clock data cannot be
retained correctly.
Replacing part: Lithium battery (CR2032)
Part number:
!
1-528-174-11
1-3-3. Replacing the Fan for the Power
Supply Unit
Replacing part: Power Fan ASSY
Part number:
!
A-1528-326-A
w
Be sure to unplug the power supply cord from the outlet
before starting the replacement work.
Removal
1.
Remove the power supply unit.
(Refer to Section 1-3-1.)
2.
Remove the seven screws (K3
x
5), and remove the
chassis (upper) assembly.
3.
Remove the screw (K3
x
5), and remove the front lid.
4.
Remove the harness of the fan from connector CN501
on the PS-743 board.
5.
Remove the screw (PS3
x
35), and remove the fan.


