background image

Locking and protecting your phone

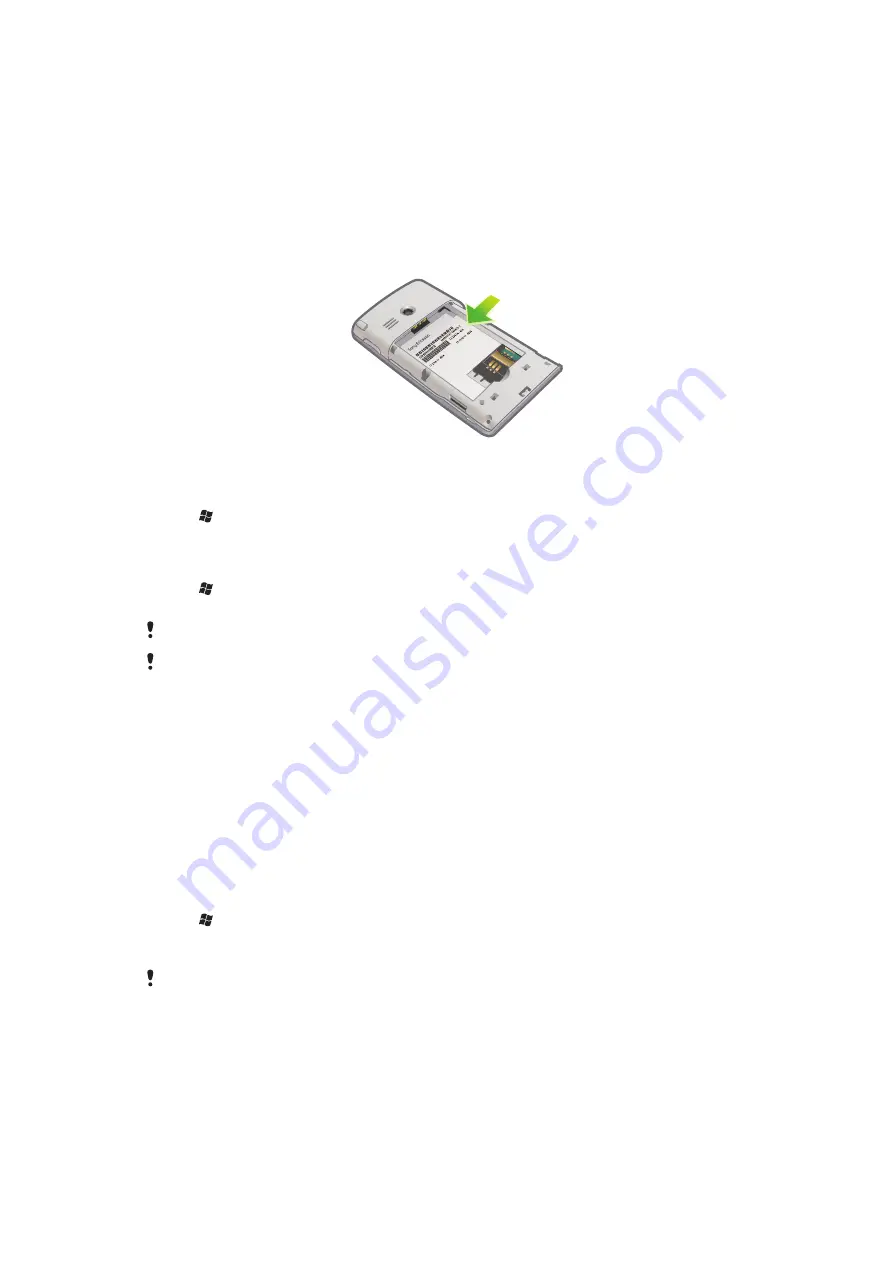
IMEI number

Keep a copy of your IMEI (International Mobile Equipment Identity) number in case your
phone is stolen.

To view your IMEI number

You can find the IMEI number under the battery.

To view your IMEI number in the phone

1

Tap   > 

Settings

 > the 

System

 folder.

2

Tap 

Device Information

 > the 

Identity

 tab to view the IMEI number.

To encrypt data on your storage card

1

Tap   > 

Settings

 > the 

System

 tab > 

Encryption

.

2

Mark the 

Encrypt files placed on a storage card

 check box.

Encrypted files can be read only on the phone that encrypted them.

Remember to backup Encrypted files before you use 

Master Reset

, or update the ROM system

software, to be able to access the encrypted files on the storage card afterwards. Use Microsoft®
ActiveSync® or Windows Mobile® Device Center to transfer files between your storage card and
computer. After the procedure, copy your files back to the storage card.

SIM protection

This lock only protects your subscription. Your phone will work with a new SIM card. If the
lock is on, you have to enter a PIN (Personal Identity Number).

If you enter your PIN incorrectly three times in a row, the SIM card is blocked and you need
to enter your PUK (Personal Unblocking Key). Your PIN and PUK are supplied by your
network operator.

To activate SIM protection

1

Tap   > 

Settings

 > 

Personal

 > 

Phone

 > the 

Security

 tab.

2

Mark the 

Require PIN when phone is used

 check box.

3

Tap 

OK

.

Your PIN is supplied by your network operator.

72

This is an Internet version of this publication. © Print only for private use.

Содержание Aspen

Страница 1: ...Sony Ericsson Aspen Extended User guide ...

Страница 2: ...tion Manager 14 Owner information 15 Internet and messaging settings 15 Networks 15 Handling content with the File Explorer in the phone 16 Searching information 16 Entering text 16 Settings 17 Recommended accessories 18 Updating your phone 20 SlideView 21 Panels 22 Switching between panels and applications 22 Managing panels 22 Auto panel switching 23 Panel manager settings 23 Sony Ericsson panel...

Страница 3: ...icrosoft ActiveSync 35 Synchronizing wirelessly with a Microsoft Exchange Server 37 Messaging 40 SMS and MMS 40 E mail 41 Windows Live Messenger 44 Getting connected 45 Bluetooth technology 45 Wi Fi 47 Internet sharing 48 Web browser 50 Before browsing the Web 50 Browsing the Web 50 Menu options 50 Zooming 51 Managing favorites 51 History pages 52 Accessing other functions when browsing 52 Applica...

Страница 4: ...ur phone and a computer 68 Media Go 68 Location services 70 Using the internal GPS receiver 70 FastGPS 70 Google Maps 70 Getting driving directions 71 Locking and protecting your phone 72 IMEI number 72 SIM protection 72 Phone protection 73 Antivirus 73 Troubleshooting 74 Resetting the phone 74 I cannot use Internet based services 74 Legal information 75 Index 77 4 This is an Internet version of t...

Страница 5: ... not supported by all networks and or service providers in all areas Without limitation this applies to the GSM International Emergency Number 112 Please contact your network operator or service provider to determine availability of any specific service or feature and whether additional access or usage fees apply User guide in the phone An extended User guide and a help function are available in y...

Страница 6: ...nectors facing each other To insert a memory card 1 Remove the battery cover 2 Insert the memory card with the gold colored contacts facing down To remove a memory card 1 Remove the battery cover 2 Press the edge of the memory card to release and remove it 6 This is an Internet version of this publication Print only for private use ...

Страница 7: ...phone is also activated when you receive a call or a message To turn on flight mode 1 Tap Settings Connections Communication Manager 2 Tap Flight To turn on phone mode 1 Tap Settings Connections Communication Manager 2 Tap Phone Automatic turn off Automatic turn off function helps you to set the phone to turn off automatically You can also set the backlight to turn off automatically if your phone ...

Страница 8: ...een the Alignment tab 2 Tap Align Screen 3 Use the stylus and tap each target firmly and accurately You need to align the screen in order to align the touch points on it 8 This is an Internet version of this publication Print only for private use ...

Страница 9: ... Touch screen 5 Connector for charger USB cable 6 Selection key 7 Call key 8 SlideView key 9 Navigation key 10 End call key 11 OK key 12 Stylus 12 13 16 14 15 13 Volume key 14 Loudspeaker 15 Camera lens 16 Strap holder To use the strap hole 1 Remove the cover 2 Wrap the strap around the strap hole 3 Attach the cover 9 This is an Internet version of this publication Print only for private use ...

Страница 10: ...owing a level below 100 percent even though the battery is fully charged To save energy you can unplug the charger from the wall socket when the phone is fully charged Q A S D E R F V B G T W Z X C 4 5 6 Y U I O O K P H J K L N M 7 8 9 0 S y m a u 1 2 3 2 1 To charge the phone using the power adapter Connect the phone to a power outlet using the USB cable provided and the power adapter To charge t...

Страница 11: ...You can tap an icon in the status bar to get more information or to start an application 20 40 The following status icons may appear on your status bar GPRS available Wi Fi function enabled HSDPA available Scanning for available Wi Fi network connections EDGE available Wi Fi network connected 3G UMTS available Signal strength GPRS in use No signal HSDPA in use Phone radio turned off 3G UMTS in use...

Страница 12: ... N M 7 8 9 0 Sym au 1 2 3 Q Q A A S S D D E E R R F F V V B B G G T T W W Z Z X X C C 4 5 Y Y U U I H N N M M 7 8 9 1 2 3 6 U U I O H H 0 6 K K L L Sym S au a O O O O P P OK K J J 0 0 6 I O O H To highlight or open an item tap the item To copy rename or send a file touch and hold down the file or folder Select the preferred action from the options dialog To scroll up or down flick your finger or s...

Страница 13: ... Screen the Text Size tab 2 Move the slider to increase or decrease the text size To decrease the screen brightness 1 Tap Settings System Backlight and Power Management the Backlight tab 2 Drag the slider to decrease the brightness Regional settings The style in which numbers currency dates and times are displayed is specified in regional settings To change regional settings 1 Tap Settings System ...

Страница 14: ...nd want to save battery power To turn off connections 1 Tap Settings Connections Communication Manager 2 Tap next to Phone or Power save depending on your selected communication profile 3 Turn off the connections you do not need Using Wi Fi technology Bluetooth technology and Microsoft Direct Push technology consumes battery power Turning these functions off will save the battery power Power savin...

Страница 15: ...changed manually To download Internet settings 1 Tap Settings Connections Ready To Run 2 Tap Start to download and set To configure Internet settings manually To get the required information for manual configuration of Internet settings please contact your service provider 1 Tap Settings Connections Connections 2 Under My ISP tap Add a new modem connection 3 Enter a name for the connection then se...

Страница 16: ...lder Select Menu New Folder Open a file Tap the file Copy cut or paste a file or folder Tap the file or folder then select Menu Edit Rename a file or folder Tap the file or folder then select Menu Rename Delete a file or folder Tap the file or folder then select Menu Delete Go directly to a folder Use the drop down boxes in the top left and top right of the screen Searching information You can sea...

Страница 17: ...rd and tap OK Text correction options Text correction helps you enter text faster by suggesting words as you enter letters You can set different options in the text correction menu for example spell correction next word prediction auto append and auto substitution To set text correction options 1 Tap Settings Personal Keyboard Text correction 2 Select options For more information about the differe...

Страница 18: ...va applications such as games and tools to your phone Managed Programs See the installation history for programs managed in your phone Memory Check the phone memory allocation status and memory card information You can also stop currently running programs Master Reset Reset all settings to manufacture default Regional Settings Set the regional configuration to use including the format for displayi...

Страница 19: ... 4 or 8 GB SD card Car charger AN300 For more information go to www sonyericsson com support 19 This is an Internet version of this publication Print only for private use ...

Страница 20: ...supported USB cable Make sure you back up and save all data contained in your phone before you start updating the phone To use the Update Service application 1 Connect your phone to the computer using the USB cable 2 Computer Go to www sonyericsson com update from the Web browser of your computer 3 Follow the instructions to install the latest available Update Service application in your phone 20 ...

Страница 21: ...e activity tap one of the icons 4 To go back to the previous view tap the bar on the left 5 To go back to the SlideView main view tap the bar on the left or press You can also use the navigation key to navigate SlideView To switch between an application and SlideView 1 From any application press 2 Tap in SlideView to go back to the application If you are not using any application tapping in SlideV...

Страница 22: ...tion you started from the Start menu press to return to the most recently used panel Managing panels When you open a panel the following icons appear Favorites view All panels view Auto Panel switching Settings To open and close panel views Q W E R G H J K L F D S A C V B N M X Z 1 4 7 8 9 0 5 6 2 3 T Y U I O P Sym au Q Q Q Q W W W W E E E E R R R R T T T T Y Y Y Y U U U U I I I O O O O P P P A A ...

Страница 23: ...w select a panel 2 Tap Favorite Auto panel switching Auto panel switching changes the current panel automatically at a selected time 9 00 13 00 17 00 1 3 2 1 Timeline 2 Added panels in timeline 3 Available panel list To change the time in the timeline In Auto panel switching view tap or To add panels to the timeline Drag the panels you want from the available panel list to the timeline To remove p...

Страница 24: ...questions There are quick links to the User guide support related news and mobile Web support MS Today panel The MS Today panel gives you access to all basic phone features such as communication media and browsing You can personalize this panel to suit your individual preferences To personalize the Home panel 1 Tap Settings Home 2 Adjust the settings according to your preferences Spb Mobile Shell ...

Страница 25: ...u will never miss an event as you stay synchronized in real time with all your social activities You need a Facebook account to use this panel If you are logged in to Facebook you can access Facebook through SlideView by pressing YouTube panel The YouTube panel gives you easy access to the most popular videos on YouTube The videos are displayed as a list of thumbnails from today last week or last ...

Страница 26: ...the keyboard 3 Press To end a call To end an ongoing call press To make a call from Contacts 1 Tap Contacts 2 Scroll to the contact you want to call 3 Tap the contact to see all the contact s phone numbers 4 Scroll to the phone number you want to call and tap it The Call History You can view information about answered dialled and missed or rejected calls such as phone numbers date time and call le...

Страница 27: ...y numbers on the SIM card To make an emergency call 1 Press 2 Dial the local emergency number or look it up on the SIM card if available 3 Press Speed Dial You can use Speed Dial to speed up dialing to the contacts that you call most frequently You can store speed dial numbers in positions 2 to 99 position 1 is reserved for your voicemail If you for example want to call the contact you have stored...

Страница 28: ...be entered for this feature Conference calls With a conference call you can have a joint conversation with up to five people To set up a conference call 1 Make a call 2 Put the call on hold and make a new call or accept a new incoming call 3 Tap Menu Conference Adding a contact to Contacts after a call This feature means you can save a new phone number automatically to Contacts after a call Before...

Страница 29: ...itional info tap Info at the top of the screen Edit the information and tap OK 8 When you are finished tap OK To search for a contact 1 Tap Contacts 2 Tap Enter a name and enter the first few letters of the contact name A list of contacts matching the letters appears 3 Scroll through the list and tap the desired contact You can also scroll the contact list directly or tap one of the letter boxes o...

Страница 30: ...r and tap To send contact information using Bluetooth wireless technology 1 Tap Contacts 2 Tap Select Contacts Several 3 Tap the contacts you want to send 4 Tap Send Contact Beam The phone starts scanning for other Bluetooth enabled devices 5 In the list of devices tap the device you want to send the contact information to SIM contacts You can save contacts on the SIM card Due to the limited memor...

Страница 31: ...er and if you have completed your first synchronization with the server For more information on synchronizing contacts with your computer or a Microsoft Exchange Server see Synchronizing on page 34 To find contacts in the Company Directory 1 Synchronize with the Microsoft Exchange Server if you have not done so previously 2 Tap Contacts 3 Tap Company Directory 4 Enter part of or the full contact n...

Страница 32: ...e an appointment 1 Press then tap Calendar 2 Tap the appointment you want to delete 3 Tap Delete To manage appointment reminders When an appointment reminder appears tap to dismiss the reminder or tap and select an option To send an appointment using Bluetooth wireless technology 1 Make sure the receiving device has Bluetooth turned on and that it is set as visible 2 Press then tap Calendar 3 Tap ...

Страница 33: ...ap Remove attendee 9 When you have finished adding attendees tap OK and continue editing the appointment 10 To select an option for another field such as Status or Sensitivity tap the name of the field and select an option 11 When you are finished tap OK Yes to send the meeting request To reply to a meeting request 1 Press then tap Messages Outlook 2 Tap the meeting request 3 To check your availab...

Страница 34: ...nd the Sony Ericsson Web site www sonyericsson com user You can then access edit and add information from any computer with an Internet connection A Sony Ericsson account is required to access the synchronized information at www sonyericsson com user This account can be created and set up from your phone or you can create one at www sonyericsson com user The Sony Ericsson Sync application can be s...

Страница 35: ...ired 2 Follow the on screen instructions to install the software 3 Phone Connect the phone to the computer using the USB cable that comes with the phone and wait for a few seconds 4 Computer A synchronization setup wizard automatically starts and guides you through the creation of a synchronization partnership and the selection of the information types that you want to synchronize To set up a sync...

Страница 36: ...ynchronized You can change which information to synchronize from your phone You can also delete a Microsoft Outlook account from your phone Before changing the synchronization settings in your phone make sure it is disconnected from the computer To change which information is synchronized 1 Tap ActiveSync 2 Tap Menu Options 3 Mark the check boxes for the items you want to synchronize 4 To change s...

Страница 37: ...ny or organization must have an e mail server that is running Microsoft Exchange Server with Microsoft Exchange ActiveSync Setting up a Microsoft Exchange Server connection Before you can start to synchronize with or access information from a Microsoft Exchange Server you need to set up a Microsoft Exchange Server connection in your phone You may need the following information from your network ad...

Страница 38: ... download Microsoft Outlook e mails and other information to your phone To start a wireless Microsoft Exchange Server synchronization manually 1 Tap ActiveSync 2 Tap Sync Automatic synchronizations with a Microsoft Exchange Server using Direct Push You can use Direct Push technology to receive new e mail messages in your phone as soon as they arrive in your inbox on the Microsoft Exchange Server T...

Страница 39: ...the screen Changing which information is synchronized You can change which information to synchronize from your phone You can also delete a Microsoft Outlook account from your phone Before changing the synchronization settings in your phone make sure it is disconnected from the computer To change which information is synchronized 1 Tap ActiveSync 2 Tap Menu Options 3 Mark the check boxes for the i...

Страница 40: ...nter the recipient phone numbers or for multimedia messages only e mail addresses manually or tap To to add recipients from Contacts 5 Tap the text area and enter your text 6 To insert a picture video or audio file tap Insert and select an option 7 Tap or Send You can also create a text or multimedia message from the Text application in the menu To change the message view 1 Tap Text 2 To select wh...

Страница 41: ...Reception and Roaming Reception respectively The phone connects to the Internet when downloading multimedia messages To minimize data costs you should only download multimedia messages automatically when you are connected to your home network To add a signature for outgoing text and multimedia messages 1 Tap Text 2 Tap Tools Options 3 Tap the left or right arrow repeatedly to scroll to the Account...

Страница 42: ... an address from Contacts 5 Enter the subject 6 Tap the text area and enter the message text 7 To add an attachment tap Insert and select an option 8 Tap To check for new e mail messages 1 Press then tap Messages 2 Tap the desired e mail account then tap To read a received e mail message 1 Press then tap Messages 2 Tap an e mail account then tap the desired message To save a received e mail messag...

Страница 43: ...for messages 5 Scroll to the Address tab If desired change the settings for using contacts addresses 6 Scroll to the Storage tab If desired change the settings for message storage and automatic deletion of messages 7 To confirm tap OK To delete an e mail account from your phone 1 Tap E mail 2 Use the navigation key to scroll to an existing e mail account 3 Tap Menu Delete Microsoft Exchange Server...

Страница 44: ...ges by sending messages with restricted permissions using Information Rights Management IRM For more information please contact your Microsoft Exchange Server administrator Windows Live Messenger You can communicate online using Windows Live Messenger and your existing Windows Live ID To set up Windows Live Messenger in your phone 1 Tap Messenger 2 Tap Sign in and follow the instructions in your p...

Страница 45: ...rtnership is a relationship you create between your phone and another Bluetooth enabled device in order to exchange information in a secure manner To create a Bluetooth partnership 1 Tap Settings Bluetooth 2 On the Devices tab tap Add new device Your phone searches for other Bluetooth enabled devices and displays them in the box 3 Tap the desired device in the list then tap Next 4 Specify a passco...

Страница 46: ...abled devices and displays them in the box 4 Tap the name of the Bluetooth headset then tap Next Your phone automatically pairs with the Bluetooth headset 5 Tap Advanced 6 Tap the name of the Bluetooth headset then check that the Hands Free checkbox is marked If your headset is a stereo headset also check that Wireless Stereo is marked 7 Tap Save 8 Tap Done When the Bluetooth stereo headset is con...

Страница 47: ...here beamed items are stored may be C Documents and Settings your_username My Documents in Microsoft Windows XP or C Users your_username My Documents in Microsoft Windows Vista To beam a file to a computer 1 Before you can begin to beam information make sure to turn on Bluetooth functionality in your phone Also you need to set your phone to visible and create a Bluetooth partnership with the compu...

Страница 48: ...ndows XP version 4 5 or later on the computer To set up your phone as a USB modem 1 Tap Internet Sharing 2 In the PC Connection list select USB 3 In the Network Connection list select the name of the connection that your phone uses to connect to the Internet 4 Connect the USB cable between your phone and the computer 5 Tap Connect Using your phone as a Bluetooth modem You can connect your phone to...

Страница 49: ...To end the Internet connection Tap Disconnect on the Internet sharing screen 49 This is an Internet version of this publication Print only for private use ...

Страница 50: ...ion on how to connect to a Wi Fi network Browsing the Web To open the browser Tap Internet Explorer To go to a Web page 1 In the browser tap 2 Tap the text field and enter the Web address 3 Tap To search for a Web page 1 In the browser tap 2 Tap the text field and enter a search term 3 In the list find and tap Search for To exit the browser 1 In the browser tap 2 Tap 3 Tap Exit Menu options These ...

Страница 51: ...ge Set the start page for the browser Browsing History See information about previously viewed Web pages Privacy and Security Change settings for scripts cookies and unsecured pages Languages Select the language you prefer to use when you read Web pages Other Enable playing sounds or show pictures To change your home page 1 When you are viewing the Web page you want to use as your home page tap 2 ...

Страница 52: ...ory pages You can view and go to Web pages you have previously visited To browse previously visited Web pages 1 In the browser tap 2 Tap 3 Tap History 4 Tap a page in the list To clear browsing history 1 In the browser tap 2 Tap 3 Select Tools Options Browsing History 4 Select an option 5 Select Clear Accessing other functions when browsing While you are browsing the Web you can switch to other ap...

Страница 53: ...oving applications You can remove programs that you have installed You cannot however remove programs that come with the phone To remove an application 1 Tap Settings System Remove Programs 2 In the Programs in storage memory list select the program you want to remove and tap Remove 3 Tap Yes If another confirmation message appears tap Yes again Green ideas from the EcoMate application Would you l...

Страница 54: ...lications Manage favorites There are more options available in the menu button at the bottom of the screen Games Your phone contains preloaded games You can also download games from for example www sonyericsson com playnow and www sonyericsson com fun using a computer and from m playnow com using your phone Help texts are available for most games To play a game Tap Games 54 This is an Internet ver...

Страница 55: ... that were not taken by the camera Camera photo files in the phone memory are stored in File Explorer My Device My Documents My Pictures DCIM Camera photo files on the memory card are stored in File Explorer My Device Storage Card DCIM Non camera photo files in the phone memory are stored in File Explorer My Device My Documents My Pictures Non camera photo files on the memory card are stored in Fi...

Страница 56: ... Tap Menu Beam 6 Follow the instructions on the screen To use a photo as a contact photo 1 Tap Pictures Videos 2 Tap the drop down box in the top left of the screen 3 Browse to the photo file 4 Highlight the photo file 5 Tap Menu Save to Contact 6 Select a contact To use a photo as MS Today panel background 1 Tap Pictures Videos 2 Tap the drop down box in the top left of the screen 3 Browse to the...

Страница 57: ... The music player appears as a mini player in SlideView 2 You can now use SlideView or other applications while your music is playing To use the music player in the background 1 When listening to music tap 2 Select another application 3 Press to return to the music player To use the music mini player In SlideView tap the tab in the bottom center part of the screen to display the mini music player ...

Страница 58: ...e playlists You can download and install the Media Go application on your computer from www sonyericsson com support For more information on how to transfer files from your computer see Transferring content on page 68 TrackID technology TrackID technology is a music recognition service You can search for the title artist and album name for a track you hear playing through a loudspeaker For best re...

Страница 59: ...onyericsson com support To play a video 1 Press to open SlideView 2 Tap Media Videos 3 Scroll to a video and tap to play it Video player controls Tap the screen to pause the video and access the following controls 1 4 6 2 7 8 3 5 1 Close the video player 2 Timeline marker Tap the timeline to jump to any part of the video clip 3 Elapsed time 4 Mute the sound 5 Volume marker Tap to increase or decre...

Страница 60: ...s the streaming meda file or link 3 On the Web page tap the file or link 4 The streaming media file automatically opens and starts to play During playback use the button controls to play pause zoom in or out adjust the sound volume and more To view streaming content in the YouTube application 1 Tap YouTube 2 Follow the instructions that appear Help is available from within the YouTube application ...

Страница 61: ...rwards 15 Fine tune forwards To search for radio channels 1 When the radio is open tap or The search stops when a channel is found 2 Tap or to continue searching To fine tune the frequency When the radio is playing tap or To adjust the radio volume When the radio is open drag the volume marker or tap the volume bar Saving channels as presets When you find a radio station you can save it as a prese...

Страница 62: ...View tap the tab in the bottom center part of the screen to display the mini radio view Tap or to jump between preset channels Tap the tab to hide the mini radio view Tap in the left part of the mini radio view to open the full radio view Switching between headphones and speaker You can listen to the radio either through a portable handsfree or headphones or through the speaker in the phone The ra...

Страница 63: ...L Z Z Z Z X X X X C C C C V V V V B B B N N N M M M S Sy a a au OK 02193 X 1 0 00 01 45 3 5 4 1 2 8 6 7 9 10 11 1 Zoom level 2 Brightness level 3 Select camera settings 4 Exit the camera 5 Zoom 6 Select the still camera 7 Select the video camera 8 View photos and videos 9 Switch between still and video camera 10 Take a photo Record a video 11 Adjust brightness To exit the camera Tap To view photos...

Страница 64: ...trol icons are not displayed in the viewfinder tap the screen to view them To adjust the brightness of a photo In the viewfinder press the navigation key left to decrease the brightness Press the navigation key right to increase the brightness The brightness level appears beside To use zoom Press the volume key To use a photo as a contact photo 1 When you have taken a photo and you are in review m...

Страница 65: ...ged For more information on how to use GPS technology see Using the internal GPS receiver on page 70 To enable geotagging 1 Activate the camera 2 If the still camera is not selected tap 3 Tap Settings GPS 4 Tap ON 5 To return to the viewfinder tap Back Tips on using the camera Rule of thirds Don t place your subject in the middle of the frame By placing it a third of the way in you achieve a bette...

Страница 66: ...ailable transfer methods To delete a video you have just recorded When you have recorded a video and you are in reviewing it tap Recording videos in poorly lit environments You can record videos at night or in poorly lit environments by using the twilight feature to extend the exposure time Due to the longer exposure time you must hold the camera still or place it on a stable surface to avoid a bl...

Страница 67: ...hone 1 Activate the camera 2 If the video camera is not selected tap 3 Tap Settings Microphone 4 Select an option 5 To return to the viewfinder tap Back 67 This is an Internet version of this publication Print only for private use ...

Страница 68: ...Windows 7 1 Make sure you have Windows Mobile Device Center installed on your computer 2 Connect your phone to the computer using the USB cable 3 Computer Select Windows Mobile Device Center from the start menu 4 Click File Management Browse the contents of your device The files and folders on your phone and the phone memory card are shown 5 Move or copy files or folders between your phone and the...

Страница 69: ...omputer Select Media Go from the start menu to start the Media Go application 4 Select which files you want to transfer to or from the memory card The file structure of your computer and your phone memory card can be accessed from the Media Go application interface 5 Drag and drop the files between your phone memory card and the computer 69 This is an Internet version of this publication Print onl...

Страница 70: ...t time you use the GPS receiver it may take up to 10 minutes before your location is found If you want to get an approximate position fast you could use the Fast GPS application You do not have to turn on the GPS receiver manually The location based services and applications you are using will automatically enable the internal GPS receiver when needed Some location services use the Internet Data r...

Страница 71: ... also makes it easy to find restaurants people events and weather information Sony Ericsson does not warrant the accuracy of any directional services including but not limited to turn by turn navigational services See the Gokivo Web site www gokivo com for more information on the Gokivo application To start Gokivo Tap Gokivo 71 This is an Internet version of this publication Print only for private...

Страница 72: ...to be able to access the encrypted files on the storage card afterwards Use Microsoft ActiveSync or Windows Mobile Device Center to transfer files between your storage card and computer After the procedure copy your files back to the storage card SIM protection This lock only protects your subscription Your phone will work with a new SIM card If the lock is on you have to enter a PIN Personal Iden...

Страница 73: ...l antivirus software A trialversion of the F Secure Mobile Security antivirus application comes pre installed in your phone It automatically scans files when they are accessed When an infected file is detected the antivirus application immediately quarantines it to protect all other data on your phone To activate the F Secure Mobile Security antivirus application you need a subscription that suppo...

Страница 74: ...one 1 Remove the battery cover and the stylus Locate the small hole see picture 2 Insert a thin object into the hole and press down briefly The content of your phone will not be deleted To reset the phone and delete all phone content Select Settings System Master Reset I cannot use Internet based services Make sure your subscription includes data downloads and that the Internet settings in your ph...

Страница 75: ...tware and Services PLAYSTATION is a trademark or registered trademark of Sony Computer Entertainment Inc YouTube Picasa Gmail Google and Google Maps are trademarks or registered trademarks of Google Inc Ericsson is a trademark or registered trademark of Telefonaktiebolaget LM Ericsson Adobe Reader and Photoshop are trademarks or registered trademarks of Adobe Systems Inc F Secure Mobile Security i...

Страница 76: ... 1 ii and FAR 52 227 19 c 2 as applicable Other product and company names mentioned herein may be the trademarks of their respective owners Any rights not expressly granted herein are reserved All illustrations are for illustration only and may not accurately depict the actual phone This User guide contains simulated screen images 76 This is an Internet version of this publication Print only for p...

Страница 77: ...F favorites radio channel 61 Web page 51 File Explorer 16 file transfer 68 fine tuning FM radio frequency 61 FM radio 60 overview 61 G games 54 geotagging photos 65 Google Maps 70 GPS 70 H handwriting 16 hot spot 47 I IMEI number 72 instant messaging 44 Internet see Web Internet Explorer 50 Internet settings 15 Internet sharing 48 K keyboard 16 L location services 70 lock screen 12 SIM card 72 loo...

Страница 78: ...jecting a call with an SMS text message 27 reset 74 S screen lock 72 lock pattern 72 searching music using TrackID technology 58 radio channels 61 track information 58 self timer 65 camera 65 sending photos 56 videos 60 setting up e mail 41 settings e mail 43 Internet 15 messaging 15 setup e mail 42 shuffle tracks 57 SIM card 5 72 locking 72 unblocking 72 sleep mode 7 SlideView Media 55 mini radio...

Страница 79: ... sending using Bluetooth 60 storage 64 suitable for multimedia messages 66 viewing 63 watching on YouTube 60 viewing photos 55 volume music 57 radio 61 W Web 50 browsing 50 favorites 51 history 52 menu options 50 view options 51 zooming 51 Wi Fi 47 Windows Live Messenger 44 Y YouTube 60 79 This is an Internet version of this publication Print only for private use ...

Отзывы: