Chapter 4:
Setup and Operation
37
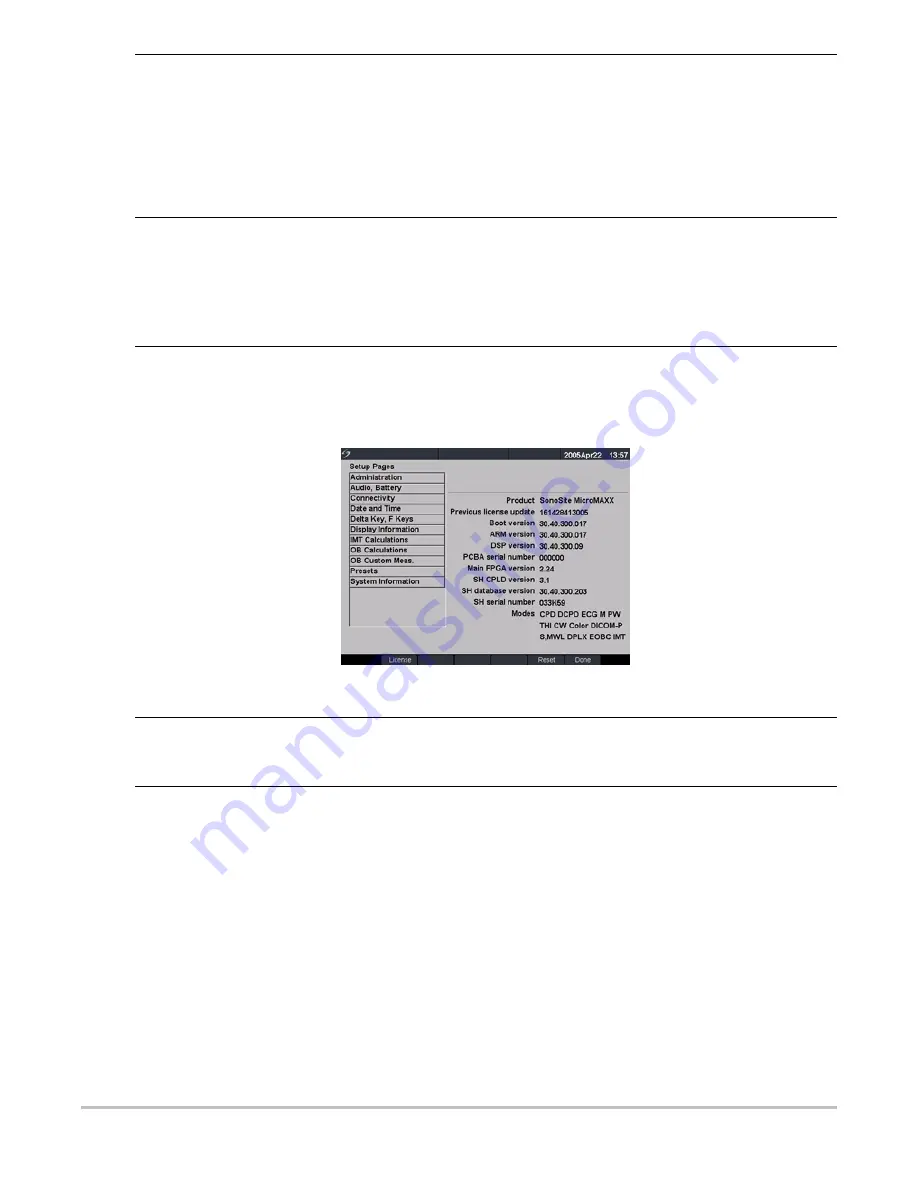
System Information
Figure 19 Setup Screen: System Information
Save Key
1
Press the
Setup
key.
2
Select Presets.
3
In the Save key list, select Image Only or Image/Calcs to designate the function
of the Save key.
• Selecting Image Only allows the
Save
key to save the image to the
CompactFlash card.
• Selecting Image/Calcs allows the
Save
Key to save the image to the
CompactFlash card and to save the current calculation to the report.
Dynamic Range
1
Select the desired exam type.
2
Press the
Setup
key.
3
Select Presets.
4
Select the desired dynamic range setting (-3, -2, -1, 0, +1, +2, +3).
Note: Negative numbers show higher contrast images and positive numbers show
lower contrast images.
Reset
Select Reset from the on-screen menu to return settings for this setup page to
factory default.
System Information
1
Press the
Setup
key.
2
Select System Information from the on-screen menu.
Note: To install a license key see
“Install License Key” on page 47
Change to Default
Settings
1
Turn the system off.
2
Connect the system to AC power. See
“Operate System Using AC power” on
.
3
Simultaneously press and release
1
and the
Power
key.
The system beeps several times and then the image display appears with all
default settings.
Note: Default settings cannot be changed by the user. Default settings are set at
the factory.
Содержание MicroMaxx
Страница 1: ...MicroMaxx Ultrasound System Service Manual ...
Страница 6: ...vi ...
Страница 10: ...4 Chapter 1 Introduction ...
Страница 56: ...50 Chapter 5 Cleaning and Disinfecting ...
Страница 60: ...54 Chapter 6 Troubleshooting Troubleshooting Flow Diagrams Display Figure 6 2 Display Flow Diagram ...
Страница 61: ...Chapter 6 Troubleshooting 55 Control Panel Figure 6 3 Control Panel Flow Diagram ...
Страница 62: ...56 Chapter 6 Troubleshooting System Figure 6 4 System Flow Diagram ...
Страница 63: ...Chapter 6 Troubleshooting 57 Battery Figure 6 5 Battery Flow Diagram ...
Страница 72: ...66 Chapter 7 Replacement Procedures Figure 7 10 Power Supply Screws Screws 7 ...
Страница 85: ...Appendix A Parts List 79 Figure A 1 Power Supply P05471 Figure A 2 Speaker Assembly P03872 ...
Страница 89: ...Appendix A Parts List 83 Figure A 8 Main PCB Assembly P05472 ...
Страница 92: ...86 Appendix B Service Event Report ...
Страница 98: ...92 Index ...


