


10
Figure 32
Figure 31
Figure 30
Figure 29
security lock
port access
cover
side panel
raise release latch
screw
screw
Installation—QuickSilver 001 and 00 Models
This section covers the installation of the Encore/ST G4 Duet into
Power Mac G4 QuickSilver 2001 and QuickSilver 2002 models. If you
are installing this product into an AGP Graphics or Gigabit Ethernet
model, go back to page 3. If you are installing this product into a
Digital Audio model, go back to page 6.
Shut Down and Open Computer
1.
Shut down your Power Mac. If the computer has been on for a
while, allow 20 minutes for it to completely cool before begin-
ning the installation.
2.
If you need to move the computer to a different area where you
can work freely, disconnect any connected cables, move the com-
puter, then reconnect the power cord to the computer and an
electrical outlet.
3.
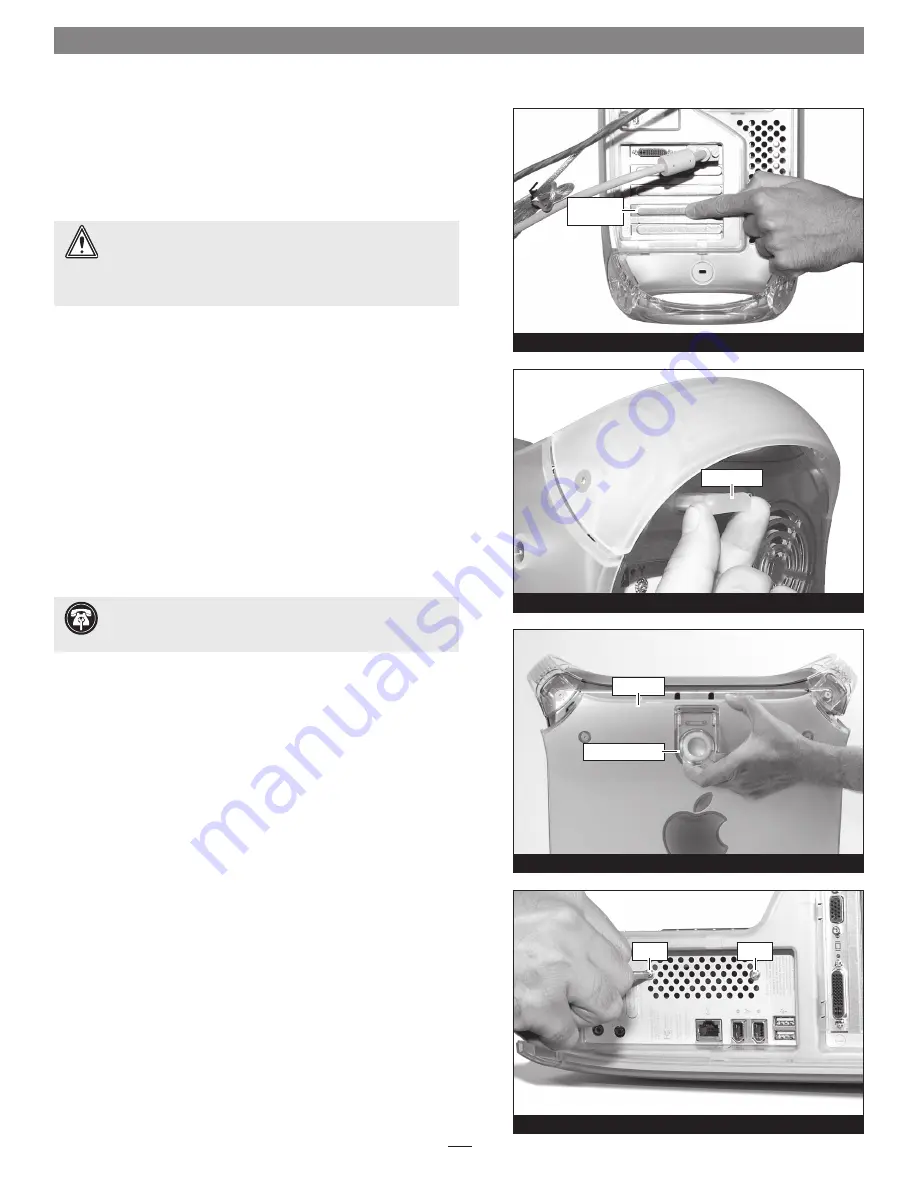
Touch a port access cover on the back of the computer to dis-
charge any potential damaging static electricity
(Figure 29)
.
4.
Disconnect the power cord from the computer.
5.
Locate the security lock at the back of the computer
(Figure 30)
.
If it is not already pressed in, press it in now.
6.
With the right side of the case facing you, open your Power Mac
by lifting the release latch and lowering the side panel away from
the computer’s case
(Figure 31)
.
Remove Fan Assembly
1.
With the back of the computer facing you, remove the two indi-
cated screws
(Figure 32)
.
WARNING:
When handling computer products, take care to
prevent components from being damaged by static electricity;
avoid working in carpeted areas. Handle processor upgrade cards only
by their edges and avoid touching connector traces and component
pins. Also, avoid touching the logic board and any of its components.
Support Note:
To avoid generating a static charge in your
body, do not walk around the room until after you finish
installing the Encore card and close the computer.
Содержание Encore ST G4
Страница 2: ...This page left intentionally blank ...