


11. The Administrator
Whichever update method is used it is very important that
any PC used to connect to Net-Log is set for the right Time
Zone. Otherwise, the conversion between UTC and local
time that Net-Log-Win performs for all time related data,
will be incorrect. This is set in the PC Control Panel setting
for Date/Time.
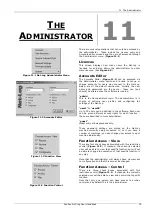
It is possible to force a clock update for either of the two
clock options by selecting the Administrator menu (
Figure
11.1
), and then Update Onboard Clock. If you are using
the PC clock option and you want to keep the Net-Log
clock accurate to within 10 seconds, you will need to do
this every 2-3 days.
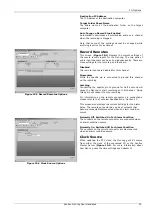
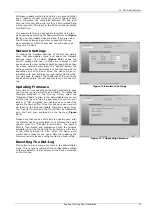
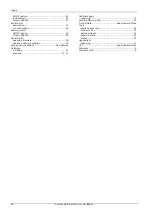
Network Settings
To change the Network Settings of the Net-Log simply
enter the administrator menu and select the Network
Settings menu. The screen (
Figure 11.6
) shows the
current settings and next to these are a series of edit
boxes where the new settings should be typed. When they
have been entered simply press the “Update” button, the
settings will then be downloaded to the Net-Log and the
application will shut down. Once the Net-Log has re-
initialised with new settings you can restart Net-Log-Win.
You may need to change the IP Address of the unit in the
device editor before you can attempt to log onto the Net-
Log.
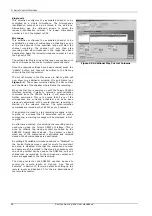
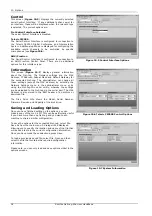
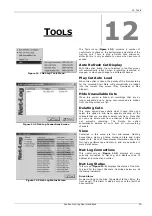
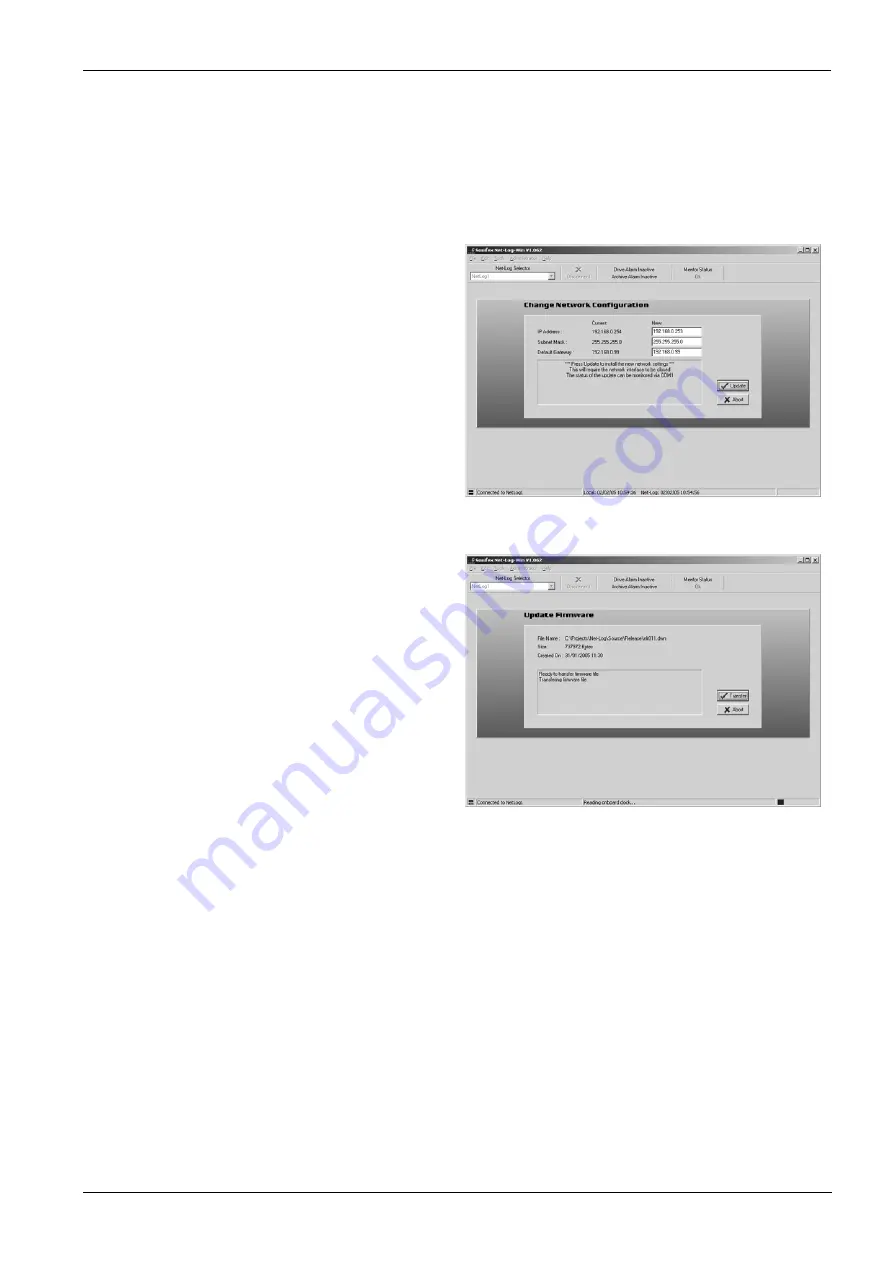
Updating Firmware
From time to time updates will be made available to keep
the Net-Log running smoothly and reliably. To update the
firmware contained in the Net-Log simply select the
“Firmware Update” option in the Administrator menu, you
will then be given a warning and asked to confirm your
action. If “Ok” is pressed, you will then have to select the
update file (.dwn suffix). Once this has been done you will
be taken to the Net-Log Update Firmware screen. Press
the “Transfer” button and the file will then be transferred
onto the hard drive contained on the Net-Log (
Figure
11.7
).
Please note that you can still abort the update even after
the transfer has been completed. To commence the actual
update, press the “Transfer” button again. The System
ROM is then erased and programmed with the updated
software (shown by the Record Control button on the front
of the Net-Log being lit), after which the Net-Log will
restart and is ready for use again. Note that updating the
firmware can also be done using the Net-Log serial utility.
Resetting The Net-Log
This option is a sub menu of system in the administrator
menu. This is used to restore all the configuration settings
to factory defaults. It also deletes all the tracks contained
on the Net-Log.
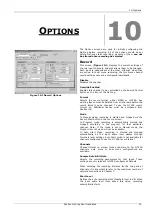
Figure 11.6 Network Settings
Figure 11.7 Upgrading Firmware
Sonifex Net-Log User Handbook
37
Содержание Net-Log
Страница 1: ...Sonifex Net Log User Handbook...
Страница 6: ...Contents Sonifex Net Log User Handbook...
Страница 10: ...License Form Sonifex Net Log User Handbook 4...
Страница 16: ...1 Introduction Sonifex Net Log User Handbook 10...
Страница 24: ...3 Net Log Set up Installation Sonifex Net Log User Handbook 18...
Страница 32: ...5 Recording Sonifex Net Log User Handbook 26...
Страница 36: ...6 Playing Downloading Sonifex Net Log Win User Handbook 18...
Страница 48: ...9 Serial Control Interface Sonifex Net Log Win User Handbook 30...
Страница 56: ...11 The Administrator Sonifex Net Log Win User Handbook 38...
Страница 62: ...13 Technical Specification Sonifex Net Log Win User Handbook 44...
Страница 64: ...14 Glossary Sonifex Net Log Win User Handbook 46...