


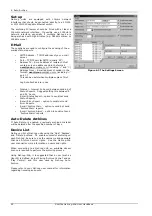
6. Playing & Downloading
The start time, start date and duration can be altered to
get the exact piece of audio required. You can also use the
end date and time controls to set the effective duration of
the required audio. Highlight the hour, minute, second,
day, month, or year and by using the up and down spin
wheels to alter the value. Alternatively, you can enter the
required value directly.
The file size is calculated as you change the duration and
is displayed below the time and date selection boxes.
To download a complete track, ensure the “Select audio
by cut” check box is ticked and select the track to
highlight it ready for downloading. Multiple tracks can be
selected by holding down the Ctrl key on the keyboard
and clicking on additional tracks.
Once you have made your selections for play download,
press the “Start” button, and if a destination file has been
selected the download will start. Otherwise you will be
asked to specify a destination file and then the download
will start automatically.
The file name for the download can be automatically
generated by selecting the “Generate file name from cut
details” check box. In this mode, the file name will be
based in the start date, start time and duration of the
selected piece of audio. When the “Start” button is
pressed, the file is created automatically and the download
will begin. To use this option, you must have a default
directory selected. Press the “Default directory” button to
choose the directory where the file will be placed.
For tracks recorded using the MPEG format, the file is
created with either a .wav or .mp2 suffix depending on the
file type selected. For G.729A tracks, the file extension will
be .g7a (see Play File for file type description). MPEG
recordings can be played either with the embedded player
(
Figure 6.3
), Windows Media Player or any other capable
software. G.729A recordings however, can only be played
on the embedded player, as Windows Media Player does
not support this format.
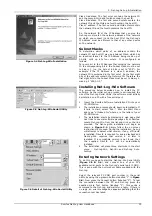
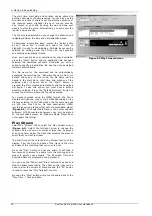
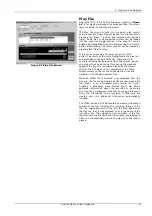
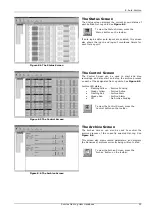
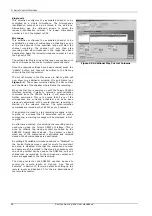
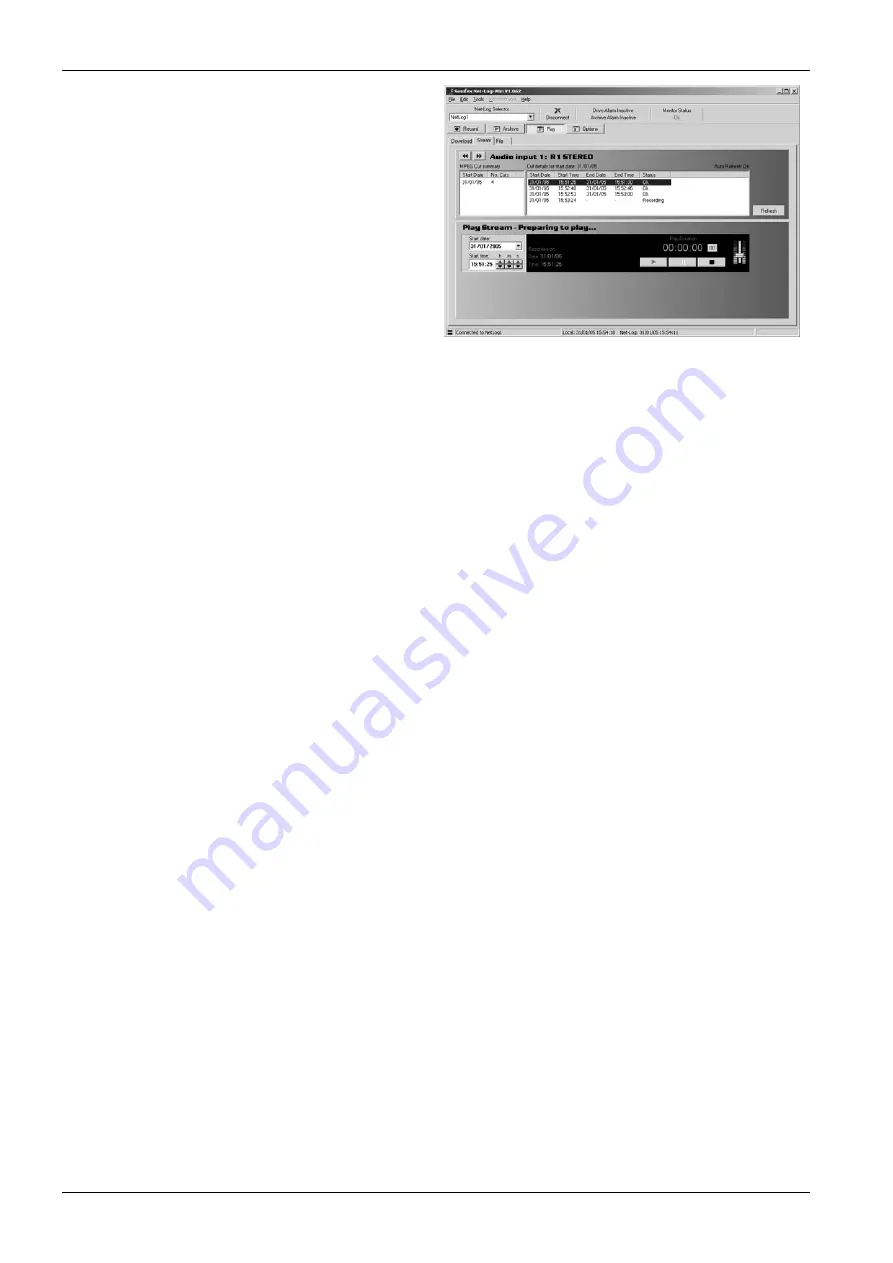
Play Stream
Select the “Stream” tab to select the Play Stream screen
(
Figure 6.2
). Select the left/right arrow to change the
channel. Only one mono or stereo channel can be played
at any one time. Select the track that contains the piece of
audio that you want to stream.
The start time will be entered in the Stream section of the
display. Alter the time and date of the track to the time
and date of the recording that you wish to hear.
Press the “Play” button to hear the audio. It will take a
few seconds to access the audio from the Net-Log and to
steam it across your network. The Recorded Time and
Recorded Date are displayed during playback.
You can use the “Pause” and “Stop” buttons to pause and
stop the audio respectively. The slider on the right can be
used to alter the volume of playback and the “00” button
is used to reset the “Play Duration” counter.
Pressing the “Stop” button will recue the audio back to the
“Play from …” time and date.
Figure 6.2 Play Stream Screen
Sonifex Net-Log-Win User Handbook
16
Содержание Net-Log
Страница 1: ...Sonifex Net Log User Handbook...
Страница 6: ...Contents Sonifex Net Log User Handbook...
Страница 10: ...License Form Sonifex Net Log User Handbook 4...
Страница 16: ...1 Introduction Sonifex Net Log User Handbook 10...
Страница 24: ...3 Net Log Set up Installation Sonifex Net Log User Handbook 18...
Страница 32: ...5 Recording Sonifex Net Log User Handbook 26...
Страница 36: ...6 Playing Downloading Sonifex Net Log Win User Handbook 18...
Страница 48: ...9 Serial Control Interface Sonifex Net Log Win User Handbook 30...
Страница 56: ...11 The Administrator Sonifex Net Log Win User Handbook 38...
Страница 62: ...13 Technical Specification Sonifex Net Log Win User Handbook 44...
Страница 64: ...14 Glossary Sonifex Net Log Win User Handbook 46...