


52
6
Embedded Web Server
In the
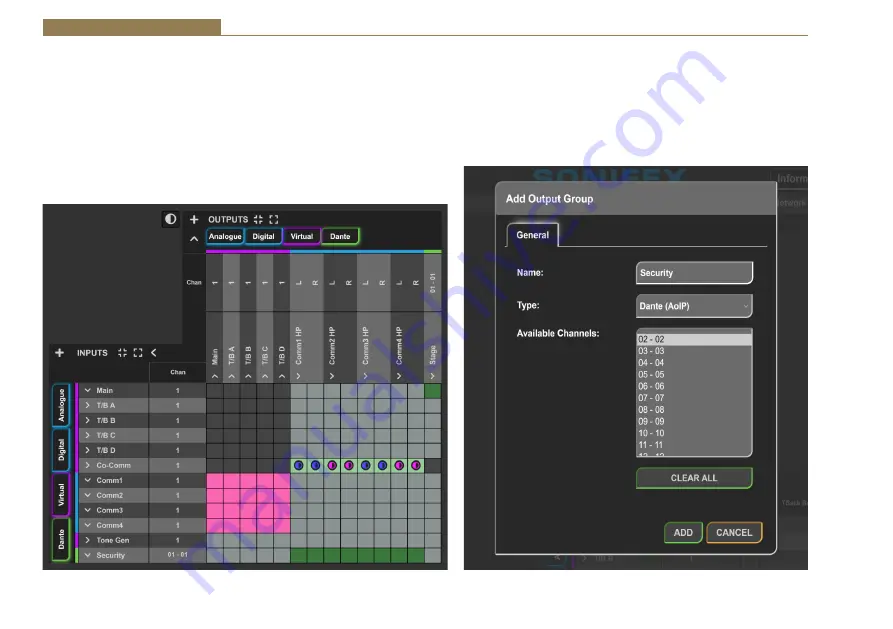
Add Input Group
window the group is given a name, in the example
it is set to ‘Security’. The
Type
is set to
Dante (AoIP)
. In
Available Channels
the first channel is selected as this is the channel that audio was routed to
in Dante Controller. The
Add
button is clicked.
The input group can now be seen in the audio routing grid. Pressing the
arrow to the left-hand side of the input expands the input group to show
the channels belonging to it.
The input group can then be routed to the outputs as required. In the
example a channel is routed to all the commentators headphones.
Fig 6-25: Routing Dante input group
Audio can also be routed to the
Transmit
channels of the device, this is
done by creating an output group and selecting the required transmit
channels.
Click the
+
button next to
OUTPUTS
. Type in a name for the new output
and select
Dante (AoIP)
from the type dropdown menu. Select from
Available Channels
the channels that should be added to the group and
then click the
Add
button.
Fig 6-26: Adding a Dante output group


