background image


SonicWALL TZ 170 Getting Started Guide       Page 23

Windows NT

1.

From the 

Start

 menu, highlight 

Settings

 and then select 

Control Panel

.

2.

Open 

Network

.

3.

Double-click 

TCP/IP

 in the 

TCP/IP Properties

 window.

4.

Select 

Specify an IP Address

.

5.

Type an IP address from your LAN IP range in the 

IP Address 

field.

6.

Type

 255.255.255.0

 in the

 Subnet Mask

 field.

7.

Type the SonicWALL TZ 170 LAN IP Address in the 

Default Gateway 

field. 

8.

Click 

DNS

 at the top of the window. 

9.

Type the DNS IP address in the 

Preferred DNS Server 

field. If you have more than 

one address, enter the second one in the

 Alternate DNS server

 field. 

10. Click 

OK

, and then click 

OK

 again.

11. Restart the computer for changes to take effect. 

Windows 98

1.

In the 

Start

 menu, select 

Settings

 and then select 

Control Panel

2.

Open 

Network

.

3.

Double-click 

TCP/IP

 in the 

TCP/IP Properties

 window.

4.

Select 

Specify an IP Address

.

5.

Type an IP address from your LAN IP range in the 

IP Address 

field.

6.

Type 

255.255.255.0

 in the

 Subnet Mask

 field.

7.

Type the SonicWALL TZ 170 LAN IP Address in the 

Default Gateway

 field. 

8.

Click

 DNS Configuration

.

9.

Type the DNS IP address in the 

Preferred DNS Server 

field. If you have more than 

one address, type the second one in the

 Alternate DNS server

 field. 

10. Click 

OK

, and then click 

OK

 again. 

11. Restart the computer for changes to take effect. 
Содержание TZ 170

Страница 1: ...SonicWALL Security Appliances APPLIANCES SonicWALL TZ 170 Series SonicWALL TZ 170 Getting Started Guide...

Страница 2: ...de up to 10 25 or an unlimited number of computers depending on your license on your network will have secure Internet access Note For complete documentation refer to the SonicOS Standard Administrato...

Страница 3: ...Release Note 4 One straight through Ethernet cable 5 One RJ45 CLI cable 6 One 5 Volt DC power supply 7 One power cord 8 One SonicWALL TZ 170 Resource CD The RJ45 CLI cable is only included with the pu...

Страница 4: ...pecified port Optional Zone Link Act 100 Indicates a link activity and speed of the opt port connection WAN Link Act 100 Indicates a link activity and speed of the WAN port connection Test Light Indic...

Страница 5: ...sk Default Gateway Router IP Address Primary DNS Secondary DNS optional Dial in to a server PPTP Server Address User Name Password Note If you are not using one of the network configurations above ref...

Страница 6: ...lit after the SonicWALL TZ 170 has booted restart the SonicWALL security appliance For more trouble shooting information refer to the SonicOS Standard Administrator s Guide 3 Connecting the SonicWALL...

Страница 7: ...or have an unused IP address in the 192 168 168 x 24 subnet such as 192 168 168 20 For instructions on configuring your IP address see Configuring Computers for Your Network with DHCP on page 20 To ac...

Страница 8: ...et to obtain an IP address dynamically DHCP or set to a static IP of 192 168 168 20 See Configuring Computers for Your Network with DHCP on page 20 for instructions on changing your Local Area Connect...

Страница 9: ...trative password This is the password for the admin account Old Password Should be populated with the default password password New Password Enter your new password Confirm Re enter your new password...

Страница 10: ...ction and assign a dynamic address PPPoE is commonly used with DSL modems PPTP Select PPTP if you dial into a specific server and log into a VPN to establish a connection With PPTP you can have either...

Страница 11: ...e Enter the user name for your Internet account Your ISP may require you to enter your username in e mail address format including and the domain name for example joe user sonicwall com PPPoE Password...

Страница 12: ...LL TZ 170 is configured with a LAN network IP address 192 168 168 168 and subnet mask 255 255 255 0 which will work well for most installations In most cases leave the default LAN IP address and subne...

Страница 13: ...efault range unchanged The default DHCP range will work for most installations Click Next 7 SonicWALL Configuration Summary Displays your network configuration information Confirm that the settings di...

Страница 14: ...gs If you selected DHCP for your WAN settings you may need to specify a host name for your connection a Check with your ISP to see if a host name is required b Go to Procedure 4 Accessing the Manageme...

Страница 15: ...ange Time Zone on page 8 and Step 5 WAN Network Mode on page 9 You need a mySonicWALL com account to register your SonicWALL security appliance You can create a new mySonicWALL com account directly fr...

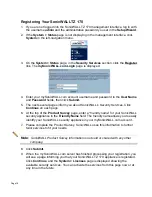
Страница 16: ...here to create one The mySonicWALL com account form is displayed 5 In the MySonicWall Account page enter in your information in the Account Information Personal Information and Preferences fields All...

Страница 17: ...vices Click Continue on each page 6 At the top of the Product Survey page enter a friendly name for your SonicWALL security appliance in the Friendly Name field The friendly name allows you to easily...

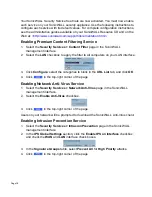
Страница 18: ...e Web content At the end of your free trial period the services will automatically expire unless you purchase a subscription from your reseller or at https www mySonicWALL com Activate the SonicWALL S...

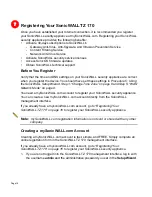
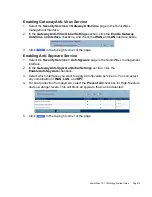
Страница 19: ...rface 3 Click Configure select the categories to block in the URL List tab and click OK 4 Click in the top right corner of the page Enabling Network Anti Virus Service 1 Select the Security Services N...

Страница 20: ...ght corner of the page Enabling Anti Spyware Service 1 Select the Security Services Anti Spyware page in the SonicWALL management interface 2 In the Gateway Anti Spyware Global Settings section click...

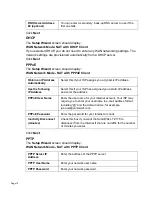
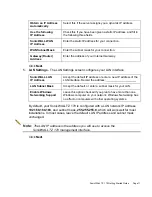
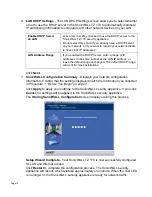
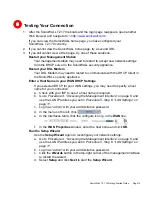
Страница 21: ...n on changing the Local Area Connection settings for four versions of Microsoft Windows Windows XP Windows 2000 Windows NT Windows 98 Note If you are not using DHCP refer to the SonicOS Standard Admin...

Страница 22: ...ight Settings and then select Control Panel 2 Open Network 3 Double click TCP IP in the TCP IP Properties window 4 Select Obtain an IP address automatically 5 Click DNS at the top of the window 6 Sele...

Страница 23: ...the IP address field 4 Type 255 255 255 0 in the Subnet Mask field 5 Type the SonicWALL TZ 170 LAN IP Address into the Default Gateway field 6 Type the DNS IP address in the Preferred DNS Server fiel...

Страница 24: ...second one in the Alternate DNS server field 10 Click OK and then click OK again 11 Restart the computer for changes to take effect Windows 98 1 In the Start menu select Settings and then select Contr...

Страница 25: ...Internet standard that allows your local network to use private IP addresses which are not recognized on the Internet The IP address used for the router is the only routable IP address The computers b...

Страница 26: ...nsmission Control Protocol Internet Protocol is the basic communication protocol of the Internet It supports sending information in packets and identifies each device with a unique numeric IP address...

Страница 27: ...tection and supply wiring Appropriate consideration of equipment nameplate ratings must be used when addressing this concern A power cord is included only with units shipped to North America Mount in...

Страница 28: ...en zur Stromversorgung Sollte das Netzteil nicht im Lieferumfang der SonicWALL enthalten sein wenden Sie sich diesbez glich an den technischen Support von SonicWALL Tel 1 408 752 7819 Dieses Produkt d...

Страница 29: ...rademarks SonicWALL is a registered trademark of SonicWALL Inc Microsoft Windows 98 Windows NT Windows 2000 Windows XP Windows Server 2003 Internet Explorer and Active Directory are trademarks or regi...

Страница 30: ...oned herein may be trademarks and or registered trademarks of their respective companies Specifications and descriptions subject to change without notice T 1 408 745 9600 SonicWALL Inc 1143 Borregas A...

Отзывы: