


7
SONARC SOFTWARE
NETWORK CONNECTION
INSTRUCTIONS
Equipment List
Connecting to Your SONARC Homepage
1. Computer or tablet
2. Network router with DHCP service enabled
3. Two RJ-45 cables (one when using wireless)
1. The amplifier’s factory settings has DHCP set to ON.
2. Connect the amplifier to a network with a router.
Make sure the computer and amplifier are on the
same network.
3. Turn on the amplifier.
4. The amplifier will be issued an IP address by the router.
5. Use an IP Scanner to determine the IP Addresses of the
Sonance DSP amps on the network. We recommend
Fing app for IOS, Advanced IP Scanner for Windows
devices and LanScan for macOS.
6. Network devices will show up and the amplifier will be
named Sonance.
7. Open Safari or Chrome.
8. In the URL address window at the top, enter the
IP address of the Sonance DSP amplifier to configure.
SONARC Legend
Toggle/
Pull-down Menu
Free Type Field
Single Action Menu
SONARC Homepage
Setup Options
Your SONARC Homepage will have two options for setup;
Basic Setup and Advanced Setup. Amplifier name can be
entered by the installer.
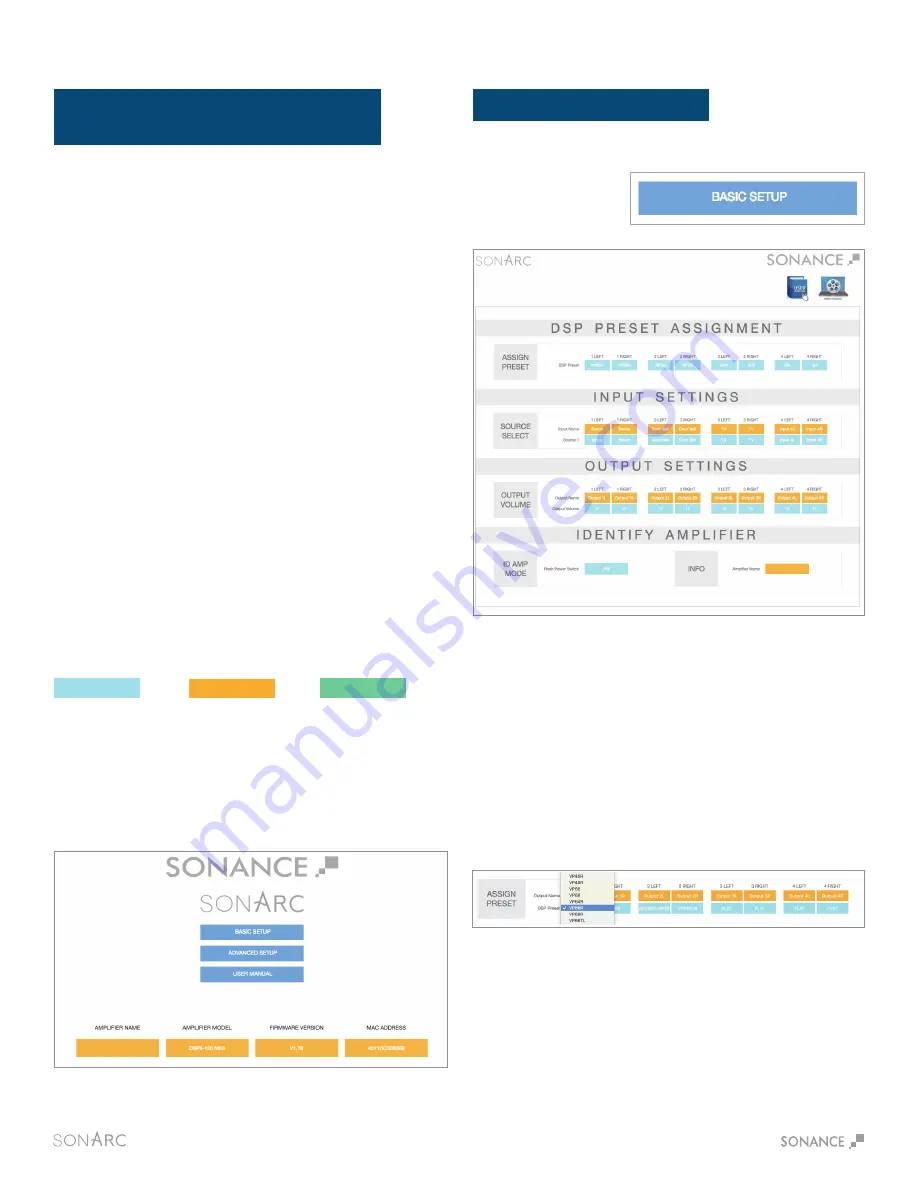
BASIC SETUP PAGE
DSP Preset Assignment
Assign Preset
Basic Setup
This page is for basic set up of EQ, Source and Volume.
Click on the individual channels to show the drop down menu
of preset options. Once you locate the preset for your Sonance
speakers click on the name to set the preset. Each Sonance
DSP amplifier has 50 slots with pre-configured DSP curves for
Sonance speaker models pre-loaded. If the speaker model in
your application is not on the pre-loaded list, hundreds of DSP
files are available for download from the Sonance website.
Download the preset file for additional Sonance speaker
models at www.sonance.com/electronics/amplifiers/dsp.
To start, click on the
Basic Setup button.


