


28
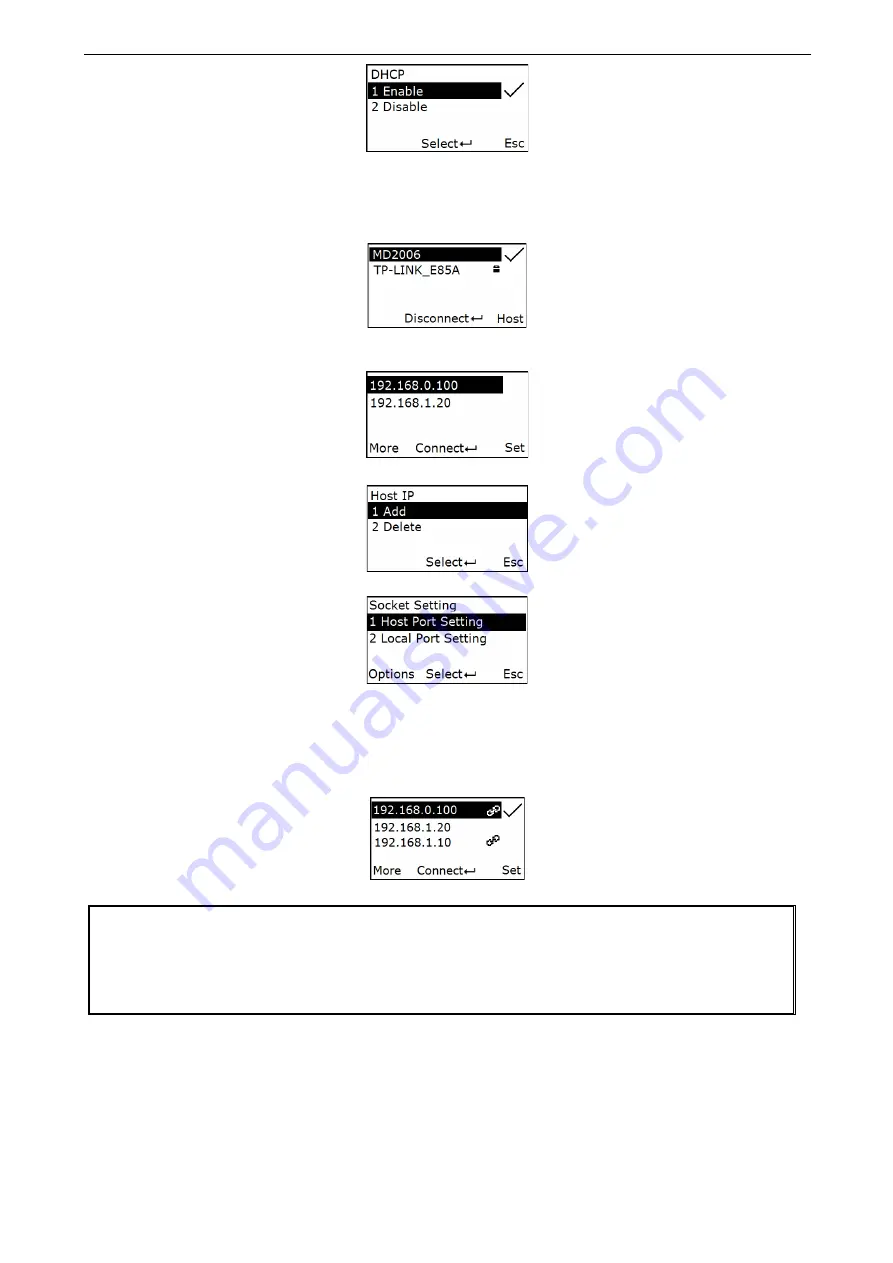
Step 5: Press the navigational key to select the target WLAN, and press the Scan/Select Key to connect
the WLAN. If connect a password-protected WLAN, you should input passphrase.
Step 6: The terminal use the icon “
A
” to indicate which WLAN has been connected. Press Scan/Select
Key to disconnect the WLAN. The screen shows as follow:
Step 7: Press Right-Soft Key to display the Host Lists Menu. In Host Lists Menu, press the navigational
key to select the target host IP. The screen shows as follow:
Press More to add/delete the hostIP
Press Set to set the socket.
Step 8: Press Scan/Select Key to bond with the target host. “ ” indicate the connecting process.
If the terminal connects the host success, it will use “ ” icon to indicate the link state, and use the icon
“√” to indicate the target communicating host. If it has been set up multiple communication channels for
bonding with the host(Up to 8 channels), press the navigational key to move the cursor, then press the
Scan/Select key to select the target communicating host. The screen will show information as follow:
Notice:
1. Make sure the target host has been set up as a server and open the TCP/IP service, or it cannot
set up the communication channel with host successfully.
2. If the target host address is a domain name, ensure the DNS setting of the terminal is open; If the
target host address is an IP address, ensure that the DNS setting of the terminal is closed.
5-3-2-2 Access Point Mode
1)
The terminal is used as a server and the other devices are used as clients in the same WLAN. The
other devices initiate a connection to the server.
2)
The terminal can set up a WLAN and communicate with other devices that connect with the
terminal.
3)
The client initiates a connection to the server and it only supports one connection at a time.
Содержание SX-DT-900
Страница 1: ...SX DT 900 Lightweight Data Terminal User Manual...
Страница 2: ......
Страница 15: ...9 1 6 Parts of the cradle Figure 1 4 Parts of the cradle Charging Green USB interface Firmware upgrade key...
Страница 17: ...11 Figure 2 2 Diagram of replacing the Lithium ion battery...
Страница 101: ...95 Home End Enter Insert Delete F1 F2 F3 F4 F5 F6 F7 F8 F9 F10 Esc F11 F12...
Страница 108: ...102 14 Configuration alphanumeric entry barcode To finish parameter setting please scan the bar code below...


