


19
5 Operations of the terminal
Note:
1. Please establish a Bluetooth/Wi-Fi network and hold the terminal in the range of the network before
the first time of scanning barcodes (See
5-3-1 Bluetooth
and
5-3-2 Wi-Fi
).
2. The terminal can perform a barcode scan operation even though no Bluetooth/Wi-Fi network is
available. However, the terminal may react in a way that differs from what is described here if no
Bluetooth/Wi-Fi network is working.
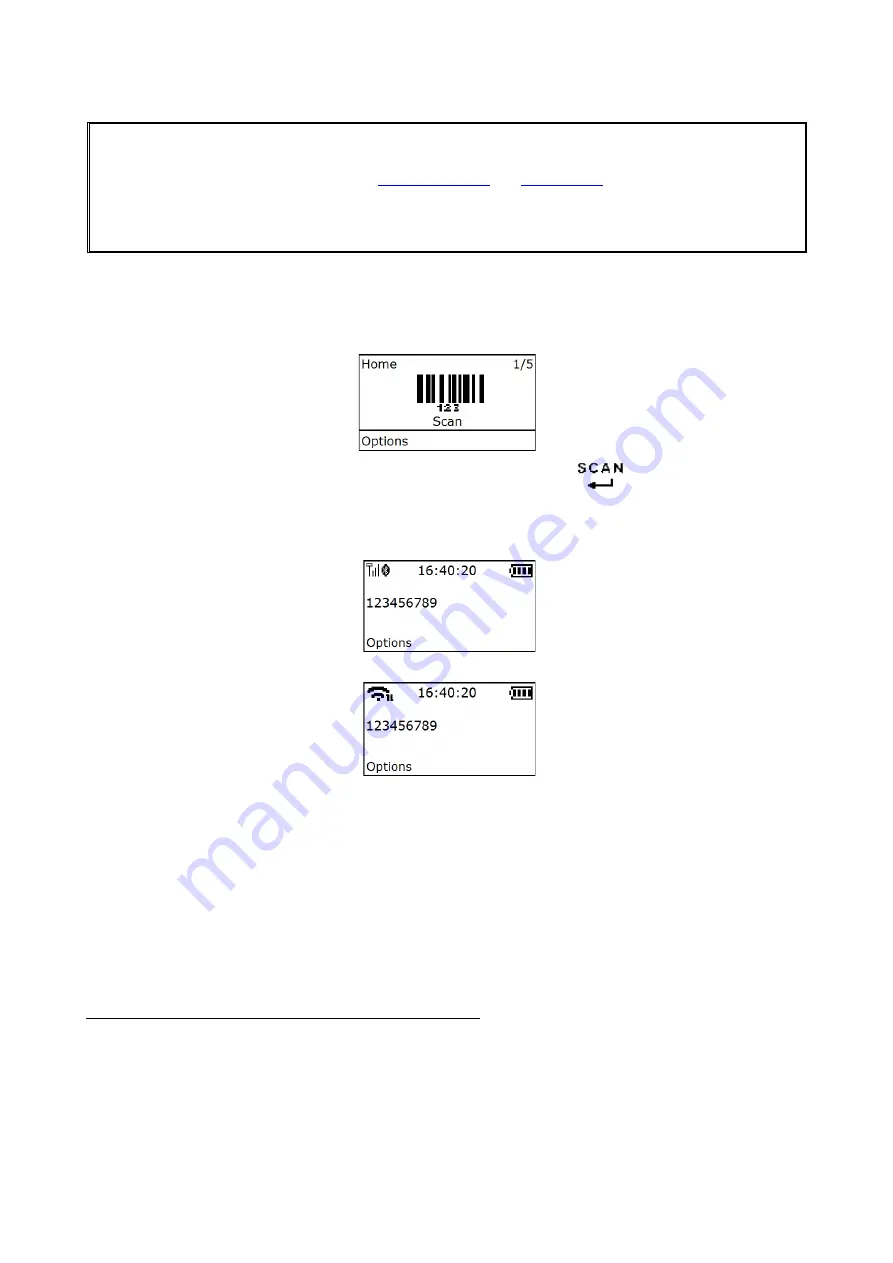
5-1 Scan
Steps:
Step 1: When the terminal is powered on, the OLED screen is displayed as below.
Step 2: Hold the terminal close to the barcode and press the Scan Key
.
Step 3: The terminal port emits a laser to scan the barcode. The decode success indicator lights green
when the scan is successful. The window will show as below.
5-1-1 Scan Mode
Good-read off
- The Scan key must be pressed once to activate scanning. The light source of terminal
stops scanning when there is a successful reading or no code is decoded after the Stand-by duration
elapsed.
Momentary
- The Scan key acts as a switch. Press the key to activate scanning and release the key to
stop scanning. The light source of terminal stops scanning when there is a successful reading or no code
is decoded after the Stand-by duration elapsed.
Continuous
- The terminal always keeps scanning, and it does not matter when the Scan key is released
or duration is elapsed.
Note: SX-DT-900-2D do not support “Continuous” mode.
5-1-2 Input Data Manually
Using the virtual keypad, user can input a barcode manually, and then send the barcode to the host or
store in the terminal.(The maximum length of barcode is 20.)
Make sure a communication link (Bluetooth/Wi-Fi network or USB cable) is working.
Содержание SX-DT-900
Страница 1: ...SX DT 900 Lightweight Data Terminal User Manual...
Страница 2: ......
Страница 15: ...9 1 6 Parts of the cradle Figure 1 4 Parts of the cradle Charging Green USB interface Firmware upgrade key...
Страница 17: ...11 Figure 2 2 Diagram of replacing the Lithium ion battery...
Страница 101: ...95 Home End Enter Insert Delete F1 F2 F3 F4 F5 F6 F7 F8 F9 F10 Esc F11 F12...
Страница 108: ...102 14 Configuration alphanumeric entry barcode To finish parameter setting please scan the bar code below...


