Chapter 3: Installing the Inverter
SolarEdge Installation Guide – MAN-01-00002-1.7
20
Position the mounting bracket against the wall/pole and mark the drilling hole locations:
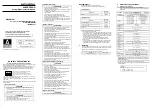
Ensure that the U-shaped indentations are facing up, as shown below:
Figure 7: Bracket with U-shaped Indentations Facing Up
Use at least two bracket holes. Additional holes can be used to fix the bracket. Determine
which and how many holes to use according to mounting surface type and material.
2
Drill the holes and connect the bracket.
Verify that the bracket is firmly attached to the mounting
surface.
3
Hang the inverter on the bracket using the screws at the top of the inverter, as shown below. Let the
inverter lay flat against the wall or pole.
Figure 8: Hanging the Inverter on the Bracket
4
Insert the two supplied screws through the outer heat sink fin on either side of the inverter and into
the bracket. Tighten the screws with a torque of 3.9 N*m / 2.8 lb*ft.
Figure 9: Inserting the Screws into the Outer Heat Sink Fins
5
Open the inverter cover’s six Allen screws and carefully lift the cover towards you before lowering it.
CAUTION:
When removing the cover, make sure not to damage internal components. SolarEdge will not be held
responsible for any components damaged as a result of incautious cover removal.
Après ouverture du couvercle, assurez vous de ne pas endommager des composants internes.
SolarEdge ne pourra être tenue respons
able pour un dommage d’un composant resultant de
l’ouverture du couvercle.
Bracket
screw