PAGE - 12
www.solarmobilityinc.com
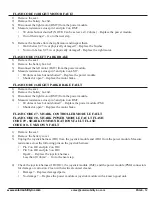
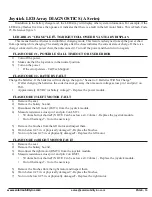
FLASH CODE #4 RIGHT MOTOR FAULT
1)
Remove the seat.
2)
Remove the battery box lid.
3)
Disconnect the right motor (RMT) from the power module.
4)
Measure resistance across pin 1 and pin 2 on RMT.
•
50 ohms but not shorted? (NOTE: Can be as low as 0.2 ohms.) – Replace the power module.
•
Out of that range? – Go to the next step.
5)
Remove the brushes from the right motor and inspect them.
•
Worn below 0.25 in. or physically damaged? – Replace the brushes.
•
Not worn below 0.25 in. or physically damaged? - Replace the right motor.
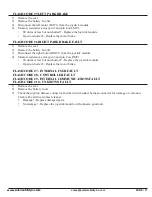
FLASH CODE #5 LEFT PARK BRAKE
1)
Remove the seat.
2)
Remove the battery box lid.
3)
Disconnect the left motor (LMT) from the power module.
4)
Measure resistance across pin 3 and pin 4 on LMT.
•
80 ohms or less but not shorted? – Replace the power module.
•
Shorted or open? – Replace the motor brake.
FLASH CODE #6 RIGHT PARK BRAKE FAULT
1)
Remove the seat.
2)
Remove the battery box lid.
3)
Disconnect the right motor (RMT) from the power module.
4)
Measure resistance across pin 3 and pin 4 on RMT.
•
80 ohms or less but not shorted? – Replace the power module (PM.)
•
Shorted or open? – Replace the motor brake.
FLASH CODE #7 - SHARK CONTROLLER MODULE FAULT
FLASH CODE #8 - SHARK POWER MODULE FAULT FLASH
CODE #9 - SHARK COMMUNICATIONS FAULT FLASH
CODE #10 - UNKNOWN FAULT
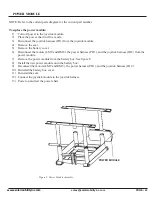
1)
Remove the seat.
2)
Remove the battery cover.
3)
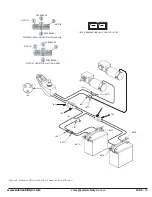
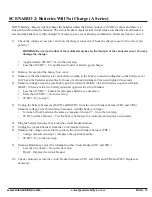
Unplug the joystick harness (JH1) from the joystick module and (JH2) from the power module. Measure
resistance across the following pins on the joystick harness:
•
Pin 2 on JH1 and pin 2 on JH2.
•
Pin 3 on JH1 and pin 3 on JH2.
Open? — Replace the joystick harness.
Less than 10 ohms? — Go to the next step.
4)
Check the joystick harness (JH1/JH2), the joystick module (JM2), and the power module (PM4) connectors
for damage or corrosion. Clean with electrical contact cleaner.
•
Damage? – Replace damaged parts.
•
No damage? — Replace the power module or joystick module with a known good unit.
Содержание liberator
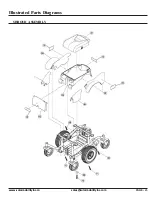
Страница 23: ...www solarmobilityinc co sales solarmobilityinc com PAGE 23 Illustrated Parts Diagrams SHROUD ASSEMBLY ...
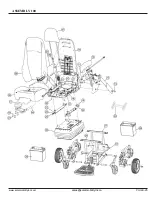
Страница 25: ...www solarmobilityinc com sales solarmobilityinc co PAGE 25 ASSEMBLY 100 ...
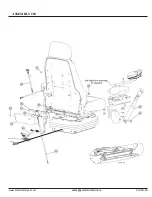
Страница 26: ...www solarmobilityinc com sales solarmobilityinc co PAGE 26 ASSEMBLY 200 ...
Страница 30: ...www solarmobilityinc com sales solarmobilityinc co PAGE 30 FRONT RIGHT CASTER ARM ASSEMBLY ...
Страница 32: ...www solarmobilityinc com sales solarmobilityinc co PAGE 32 FRONT LEFT CASTER ARM ASSEMBLY ...
Страница 34: ...www solarmobilityinc com sales solarmobilityinc co PAGE 34 REAR RIGHT CASTER ARM ASSEMBLY ...
Страница 36: ...www solarmobilityinc com sales solarmobilityinc co PAGE 36 REAR LEFT CASTER ARM ASSEMBLY ...
Страница 38: ...www solarmobilityinc com sales solarmobilityinc co PAGE 38 RIGHT ARMREST ASSEMBLY ...
Страница 40: ...www solarmobilityinc com sales solarmobilityinc co PAGE 40 LEFTARMREST ASSEMBLY ...
Страница 45: ...www solarmobilityinc com sales solarmobilityinc co PAGE 45 ...


