3.2
Using of
”
PuTTy” freeware program for configuration
The module configuration can be done with using of any suitable program for the serial line communication. The
description bellow is relevant for the open-source software
”
PuTTY“ that is available for free on
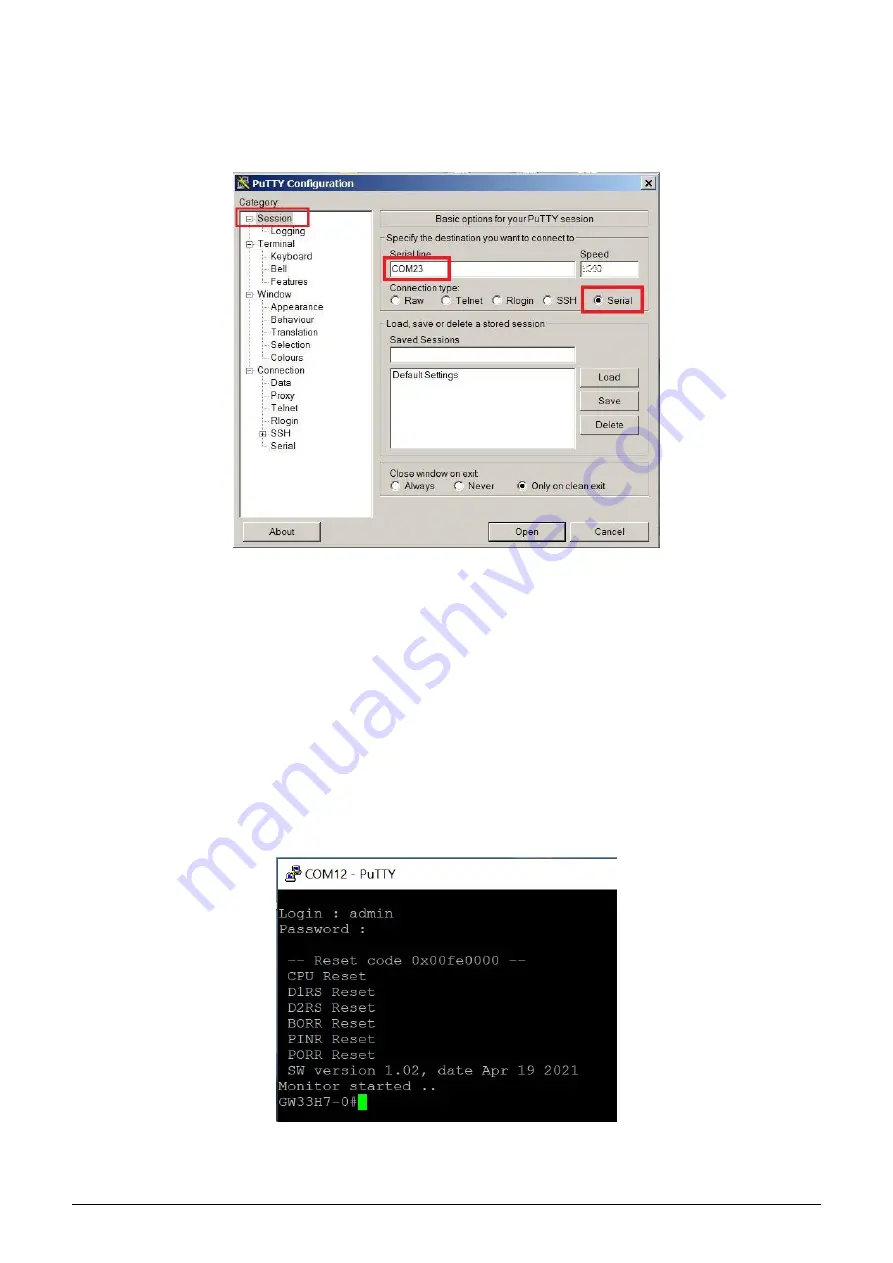
Figure 3: Terminal setting for serial line communication
”
PuTTY” software runs after clicking on the downloaded file
”
putty.exe“. There will open a window of the terminal
communication (see Figure
). For switching the program into the serial line communication, choose
”
Serial” option
of the connection type in the
”
Session” tab.
Check (or set up) the communication speed (
”
Speed”) to 115200 bits/s and then enter into the
”
Serial line“ tab the
number of the serial port that the system automatically assigned to the virtual port at the moment of interconnection
module to the computer. The number of the serial port can be found in OS Windows by using of
”
Device Manager”
(Control Panel/System and Maintenance/Device manager) by clicking on
”
Ports (COM a LPT)” where the numbers
of ports appear (e.g.
”
COM23” - see figure
Click on
”
Open” button in
”
PuTTY” program and open the terminal window. After pressing of ”ENTER” key
there will appear a request for login and (after entering login) password. Factory preset login/pasword couple
is
”
admin/admin
”, it is recommended to change it after installation. After login procedure there will appear a
sequence with an information about last reset ended by system command line marked by ”GW33H7-0#” prompt,
which announces that the module is ready to be configured (see figure
Figure 4: Open terminal window for module configuration via serial line
WB169-RFG
5


