13
Snap-On EEWH329A
3.0 CONTROLS
889
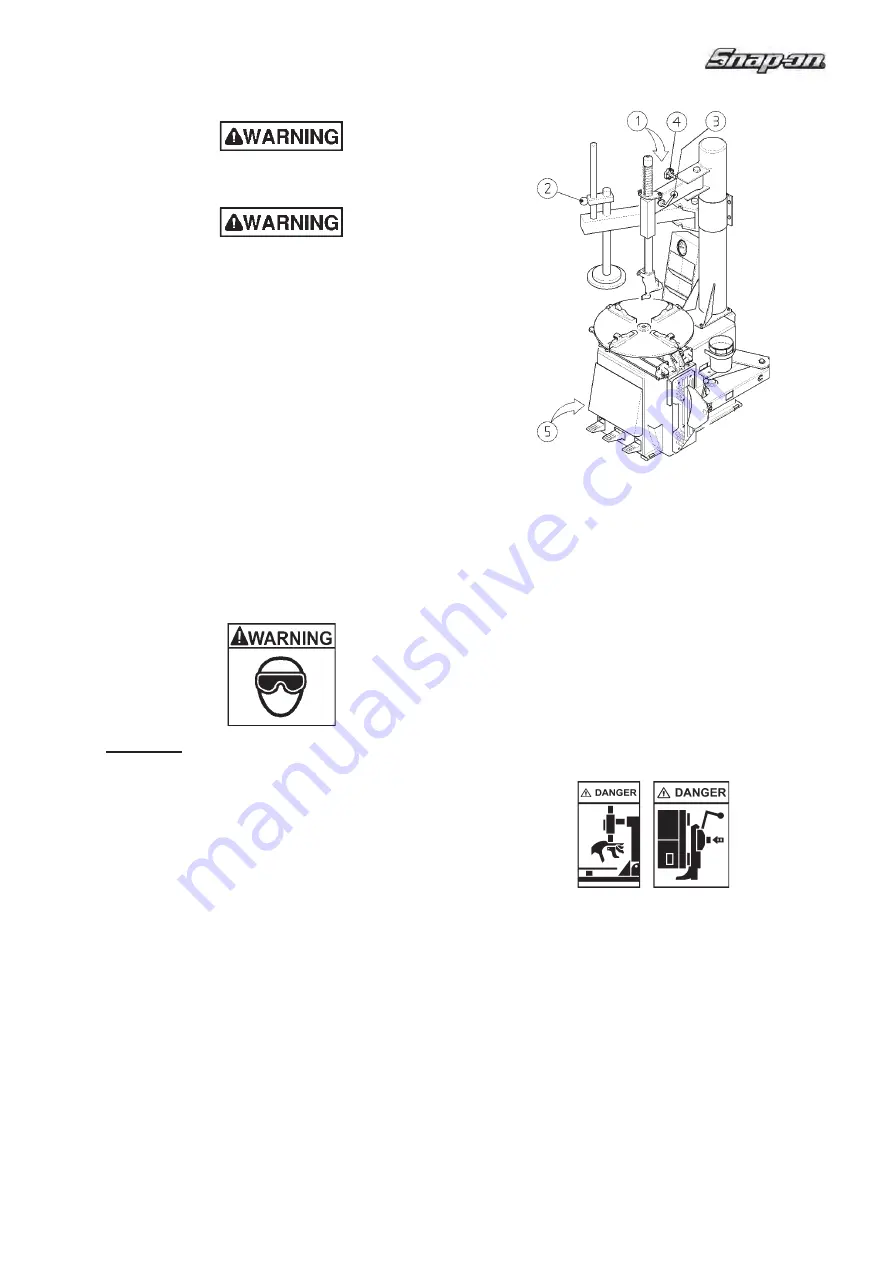
Figure 3.0-1
Before operating the machine, take the time to
familiarize yourself with the operation and function of
all the controls.
A
Press down and release the fi rst pedal from the left:
the jaws of the turntable will retract. Do it again:
the jaws will expand. If you press the pedal prior
to the end of the stroke and release, the jaws may
be stopped in any position.
B
Open the bead breaker arm. Press down and hold
the middle pedal: by doing this you operate the
bead breaker blade and the arm will move towards
the machine. Release the pedal: the bead breaker
blade will retract.
WARNING!
ALWAYS KEEP ARMS AND LEGS AWAY FROM THE
BEAD BREAKER STROKE!!
C
Press down the right pedal: the turntable turns
clockwise. Placing your foot under the pedal and
lift, the turntable turns counterclockwise.
D
Lower the Lock Lever
(3)
to unlock the vertical
slide; lift the Lock Lever to lock.
2.3 AIR INSTALLATION
THE AIR INSTALLATION MUST BE MADE ONLY BY
QUALIFIED PERSONNEL.
EXCESSIVE AIR PRESSURE CAN SERIOUSLY
INJURE PERSONNEL AND DAMAGE THE MACHINE.
Ensure that the line pressure is within the limits
required by the machine. If the pressure exceeds
170 psi (12 bar) it is mandatory to install a pressure
regulator before the air inlet of the machine.
If the air pressure is lower than the minimum required of
110 psi (8 bar) the clamping power of the turntable and
the bead breaker power may be insuffi cient for certain
tires and substantially reduces tire changer performance.
It is suggested that the shop air supply be equipped
with a water separator/dryer type modifi cation for
maximum performance.
After ensuring all the above proceed as follows:
A.
Connect the machine to the air supply with a rubber
hose (rated for the pressure) with an internal diameter
of no less than 1/2” (12.5mm).
WARNING! BEFORE CONNECTING THE MACHINE
TO THE AIR SUPPLY BE SURE ALL PERSONNEL
ARE CLEAR OF THE MACHINE AND NO ITEMS
ARE LEFT ON THE TURNTABLE.
B.
It is strongly recommended that an air valve shut-off be
installed between the shop air supply and the tire changer
for routine maintenance and in case of an emergency.
C.
Should you install any optional accessories, please
refer to the relevant instructions.
D.
Ensure the functional ability of the air lubricator by
ensuring that the glass sight bowl is fi lled with air lubricant.
Содержание EEWH329A
Страница 25: ...25 Snap On EEWH329A Blank Page ...
Страница 28: ...28 Snap On EEWH329A ...
Страница 51: ...51 Snap On EEWH329A Page blanche ...
Страница 54: ...54 Snap On EEWH329A ...
Страница 77: ...77 Snap On EEWH329A Página en blanco ...


