background image

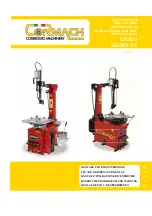
SWING TYPE AIR/ELECTRIC TIRE CHANGER

EEWH329A


OPERATION INSTRUCTIONS

Air-Electric tilt back tower tire changers for car, light commercial vehicle and motor-

cycle tires designed for one-piece rims. Dimensions based on OEM tires and wheels 

only. This tire changer is designed for ease of operation, safe handling of rims, relia-

bility and speed.

Содержание EEWH329A

Страница 1: ... Air Electric tilt back tower tire changers for car light commercial vehicle and motor cycle tires designed for one piece rims Dimensions based on OEM tires and wheels only This tire changer is designed for ease of operation safe handling of rims relia bility and speed ...

Страница 2: ...E Release A January 2017 First publication Release B March 2018 Accessories Chart updating Release B1 February 2019 Max wheel diameter capacity 42 Page 8 Release C October 2019 Tool adjustment section replaced picture 4 1 4 PCN 19G0142 ...

Страница 3: ...e automotive technician s responsibility to be knowledgeable of the wheels and tires being changed It is essential to use proper service methods and change tires in an appropriate and acceptable manner that does not endanger your safety the safety of others in the work area or the equipment or vehicle being serviced It is assumed that prior to using the EEWH329ATire Changers the operator has a tho...

Страница 4: ...n use Never use the cord to pull the plug from the outlet Grasp plug and pull to disconnect Do not expose the equipment to rain Do not use on wet surfaces Plug unit into correct power supply Do not remove or bypass grounding pin Contact with high voltages can cause death or serious injury Risk of electrical shock High voltages are present within the base unit There are no user serviceable items wi...

Страница 5: ...surfaces Remove excess tire lubricant before inflating Wear approved safety glasses during mount and demount procedures Debris dirt and fluids can cause serious eye injury Risk of injury Tools may break or slip if improperly used or maintained Read and understand the operation instructions before using this tire changer Use only the mount demount tire tool supplied with the tire changer Frequently i...

Страница 6: ...approved safety inflation cage designed for this purpose Lock turntable clamp on inside of rim before attempting to inflate tire Use approved tire bead lubricant before removing or installing tire on rim ALWAYS position the Safety Restraint Arm over the wheel to hold it to the turntable while inflating if so equipped If a tire explodes on this tire changer STOP using it until the Safety Restraint Arm...

Страница 7: ... Page 13 3 1 PRESETTING OF CLAMPING JAWS Page 14 4 0 MOUNTING AND DEMOUNTING PRECAUTIONS Page 15 4 1 DEMOUNTING TUBELESS TIRES Page 15 4 2 MOUNTING TUBELESS TIRES Page 17 4 3 IF THE TOP TIRE BEAD IS DIFFICULT TO MOUNT Page 18 4 4 INFLATION OF TUBELESS TIRES Page 19 5 0 DEMOUNTING TUBE TYPE TIRES Page 20 5 1 MOUNTING TUBE TYPE TIRES Page 20 5 2 INFLATING TUBE TYPE TIRES Page 21 5 3 OPERATING THE PN...

Страница 8: ... of trouble free operation Please read this manual thoroughly before operating the unit Instructions on use maintenance and operational requirements of the machine are covered in this manual STORE THIS MANUAL IN A SAFE PLACE FOR FUTURE REFERENCE 1 1 SPECIFICATIONS Operation temperature range 41 122 F 5 50 C Air Electric tire changers for car light commercial vehicle and motorcycle tires designed f...

Страница 9: ...y cumulative wear in the slideway causing mount demount head movement NON SCRATCH NYLON INSERT Integrated into the mount demount head is a replaceable scratch resistent nylon insert protecting against accidental rim contact SAFETY RESTRAINT ARM Optional TIRE RIMASSEMBLY RESTRAINT Safety RestraintArm restrains tire and rim assembly to the tire machine during the inflation process reducing potential ...

Страница 10: ...lso allows a technician to raise and hold wider tires up to assist in safely and easily getting the second bead up onto the mount demount head Wheel Centering Depressor Provides downward pressure on a rim when working to clamp a low profile tire rim combination Will assist the technician in correctly seating the rim clamps between the tire and the rim when clamping from outside in where it is diffic...

Страница 11: ...1 Snap On EEWH329A 1 4 ACCESSORIES AND CONSUMABLES 011 2 3 4 5 3 3 3 1 6 7 5 4 4 4 4 4 4 4 4 4 3 8 4 4 011 5 4 4 4 4 4 1 4 4 4 4 3 4 4 4 4 3 1 9 3 1 9 9 3 8 5 5 8 4 8 4 8 5 8 5 8 5 4 8 3 1 5 ϰϴϭ ϯϬ 1 4 4 ...

Страница 12: ...be bolted to the floor using only the rear two mounting holes Mounting anchors are provided with machines TIRE CHANGER MUST BE ANCHORED TO CONCRETE FLOOR 2 1 ELECTRICAL INSTALLATION BUILDING ELECTRICAL INSTALLATION MUST BE MADE BY A LICENSED ELECTRICIAN Check that the electrical specifications of the power source are the same as the machine The machine uses 110v 60 hz grounded single phase 20 amp so...

Страница 13: ...INE Ensure that the line pressure is within the limits required by the machine If the pressure exceeds 170 psi 12 bar it is mandatory to install a pressure regulator before the air inlet of the machine If the air pressure is lower than the minimum required of 110 psi 8 bar the clamping power of the turntable and the bead breaker power may be insufficient for certain tires and substantially reduces ...

Страница 14: ...esented by the scales to obtain the effective setting diameter D Position wheel and press it down by hand on the turntable E Depress pedal through the first position and release The wheel is clamped E Turn Swing Arm Adjustment Knob 4 for positioning mount demount head slightly away from rim diameter F Lift upward on the restraint positioning knob 2 to position over tire wheel assembly for inflation ...

Страница 15: ... long This could potentially result in bead or rim damage Fig 4 1 2 536 Fig 4 1 2 NOTICE ON RUN FLAT TIRES WITH THE OPTIONAL LOW PRESSURE SENSOR INSTALLED BREAK THE BEAD AT 90 DEGREES OFFSET FROM THE VALVE STEM DAMAGE TO THE WHEELAND OR SENSOR MAY RESULT IF THE BEAD IS BROKEN AT ANY OTHER POINT ON THE RIM 4 0 M O U N T I N G A N D DEMOUNTING PRECAUTIONS IMPORTANT BEFORE MOUNTING A TIRE ON A RIM PA...

Страница 16: ... IDENTICAL WHEELS MAY BE CHANGED WITHOUT HAVING TO RESET THE HEAD F Insert the mount demount tool between the bead and the mount demount head Pry the bead onto the mount demount head using the mount demount head C Set the rim clamps to the proper position retract clamps to clamp the wheel from the outside and expand clamps to clamp from the inside When clamping small wheels 14 or smaller from the ...

Страница 17: ...ss from the mount demount head is in the drop center of the wheel Push the tire into the drop center with your hand or bead depressor tool if necessary It is suggested that the mount demount tool be removed after lifting the bead onto the mount demount head Fig 4 1 5 however you may remove the tool after the bead has been removed 333 Fig 4 1 5 G Rotate the turntable clockwise pedal down and at the...

Страница 18: ...pedal is released NOTICE SOME TIRES HAVE A COLOR DOT THAT IS TO BE KEPT ON THE OUTSIDE OF THE WHEEL AND IS TO BE ALIGNED WITH THE VALVE STEM IF THIS IS THE CASE BE SURE TO ATTAIN PROPER ALIGNMENT PRIOR TO TIRE INFLATION B Lock the rim to the turntable and rotate it so that the valve is at the 2 o clock position Place the tire to be mounted on the rim Swing the mount demount arm in so that the moun...

Страница 19: ...SEAL IT IS IMPOSSIBLE TO GET THEM TO SEAT IN THEIR PROPER POSITION EXPLOSION OF A TIRE MAY CAUSE SEVERE INJURY SAFETY RESTRAINT ARM OPTIONAL MUST BE IN PLACE PRIOR TO ATTEMPTING BEAD SEATING OR INFLATION NEVER EXCEED THE MAXIMUM PRESSURE ALLOWED BY THE TIRE MANUFACTURER IF YOU CLAMPED THE RIM FROM THE OUTSIDE IT MUST BE UNCLAMPED WHEN INFLATING BUT ONLY AFTER THE SRA IS IN PLACE THE OPERATOR MUST ...

Страница 20: ...ve is part of the tube NOTICE BE CAREFUL NOT TO DAMAGE THE TUBE DURING THE BEAD BREAKING OPERATION THE VALVE SHOULD BE OPPOSITE TO THE BLADE OF THE BEAD BREAKER B To demount the first bead place the valve at 2 o clock position NOTICE BE CAREFUL NOT TO CATCH THE TUBE WITH THE MOUNT DEMOUNT TOOL WHEN LIFTING THE BEAD ON THE MOUNTING FINGER After demounting the first bead carefully remove the tube befo...

Страница 21: ...arm designed to comfortably depress the tires sidewall The size and mobility of the arm will allow the formed head to depress the tire at any position around the 360 degrees of rotation The Bead Depressor will be useful numerous times throughout the remount cycle When remounting a tire the bead depressor will ensure that the bead stays down in the drop center of the rim until the entire bead has b...

Страница 22: ... will assist in getting the second bead up onto the mount demount head Fig 5 3 3 903 Fig 5 3 3 When working to loosen a stubborn lower bead simply swing the bottom bead roller under the lower sidewall and apply slow upward pressure Be careful not to mistakenly swing far enough in to contact the rim When working to safely secure the second bead for removal insert the tire tool all the way past first...

Страница 23: ...s installed E Lubricate piston rods of turntable air cylinders with oil as needed F Periodically wash all plastic parts with cold water and soap or window cleaner without alcohol neither ammonia G Check the bead breaker pads Replace if worn H Discharge water from air filter every day Do this by turning the knob B clockwise and push upward Water will automatically be discharged See B at Fig 6 0 3 I ...

Страница 24: ...e close to where it comes out of the machine 2 DO NOT dispose of the equipment as urban waste and re cycle it by taking the materials to suitable recycling centres 3 Contact the reseller for the closest authorised recycling centres for the disposal or for the collection of old equipment when purchasing new equipment 4 Stick to the standards for correct waste management to prevent potential effects...

Страница 25: ...25 Snap On EEWH329A Blank Page ...

Страница 26: ...han Seller s authorized representatives D improper or negligent use application operation care cleaning storage or handling E fire water wind lightning or other natural causes F adverse environmen tal conditions including without limitation excessive heat moisture corrosive elements dust or other air contaminants radio frequency interference electric power failure power line voltages beyond those s...

Страница 27: ...ctro pneumatique pour roues de voiture de fourgon et de moto avec pneus montés sur jantes à base creuse Dimensions basées sur les pneus et les roues OEM uniquement Construit pour des utilisateurs professionnels qui travaillent intensément ce démonte pneu est d emploi facile sûr et fiable ...

Страница 28: ...28 Snap On EEWH329A ...

Страница 29: ...u technicien de l appareil d être bien informé des caractéristiques de la roue et la jante qui doit être remplacé Il est essentiel d utiliser des procédures correctes et d exécuter les changeants des pneus de façon appropriée et acceptable ne mettant pas en danger la sécurité de l opérateur et celle d autres dans la zone de travail ou l appareil et le véhicule utilisés pour la réparation On présum...

Страница 30: ...tirer pour débrancher Ne pas exposer l appareil à la pluie Ne pas utiliser sur des surfaces humides Connecter l unité à la bonne prise d alimentation Ne pas enlever ou désactiver le câble de terre Le contact avec d autres tensions peut causer la mort ou des dommages graves Risque électrique De hautes tensions sont présentes à l intérieur de l unité Il n y a pas de partie réparable par l utilisateu...

Страница 31: ...lement et de la roue Enlever l excédent de lubrifiant pour pneus avant de gonfler Porter des lunettes de sécurité approuvées pendant les interventions de service Les fragments les déchets et les fluides peuvent causer des dommages graves aux yeux Risque de dommage Les outils peuvent se briser ou glisser s ils sont utilisés ou conservés de façon non appropriée Lire et comprendre le manuel d utilisatio...

Страница 32: ...age de sécurité agréée et conçue à cet effet Bloquer la fixation de la plaque tournante à l intérieur de la jante avant de commencer à gonfler le pneu Utiliser un lubrifiant pour talon avant de démonter ou de monter le pneu sur la jante Placer toujours le bras de maintien de sécurité sur la roue pour la maintenir fixée à la plaque tournant pendant le gonflage en cas d équipement de ce genre Si un pneu ...

Страница 33: ...MANDES Page 39 3 1 PRESELECTION DES MORS DE BLOCAGE Page 40 4 0 MONTAGE ET DÉMONTAGE PNEUS PRÉCAUTIONS GÉNÉRALES Page 41 4 1 DÉMONTAGE PNEUS SANS CHAMBRE TUBELESS Page 41 4 2 MONTAGE PNEUS SANS CHAMBRE TUBELESS Page 43 4 3 EN CAS DE DIFFICULTÉS POUR LE MONTAGE DU TALON SUPÉRIEUR Page 44 4 4 GONFLAGE PNEUS SANS CHAMBRE TUBELESS Page 45 5 0 DEMONTAGE PNEUS AVEC CHAMBRE Page 46 5 1 MONTAGE PNEUS AVEC...

Страница 34: ...eu vous garantit de nombreuses années de travail rentable et sans problèmes Lire attentivement ce manuel avant d utiliser la machine Les instructions sur l emploi l entretien et les modalités d emploi sont décrites dans ce manuel CONSERVER LES PRÉSENTES INSTRUCTIONS 1 1 CARACTÉRISTIQUES TECHNIQUES Gamme de la température operatif 41 122 F 5 50 C Démonte pneus électro pneumatique pour roues de voit...

Страница 35: ...sière assurant le mouvement de la tête de monte démonte INSERT NYLON ANTI RAYURES Intégré dans la tête de monte démonte c est un insert en Nylon anti rayures remplaçable destiné à assurer une protection contre le contact accidentel de la jante BRAS DE SECURITE Optionnel MAINTIEN ENSEMBLE PNEU JANTE Le bras de sécurité maintient l ensemble pneu jante à la machine pendant le processus de gonflage ce ...

Страница 36: ...remettre en place par accident après la procédure de décollage initiale Permet également au technicien de soulever et de maintenir en position soulevée les pneus plus larges pour mettre en place facilement le deuxième talon sur la tête de montage démontage Abaisseur de centrage roue Fournit une pression vers le bas sur une jante quand il s agit de fixer une combinaison pneu à bas profil jante Assist...

Страница 37: ...37 Snap On EEWH329A 1 4 ACCESSOIRES ET CONSOMMABLES 0 0 1 2 3 4 5 0 6 3 7 8 8 8 9 8 8 8 9 9 8 8 3 0 3 0 3 3 6 0 3 6 0 3 0 3 7 Ϭϰϴϭ ϯϬ 2 7 7 ...

Страница 38: ...e au sol à travers les orifices présents sur le coffret en utilisant des boulons de fixation 3 8x2 recommandés LE CHANGEUR DE PNEUS DOIT ETRE ANCRE AU SOL EN BETON 2 1 BRANCHEMENT ÉLECTRIQUE T O U T E S L E S I N T E R V E N T I O N S S U R L INSTALLATION ÉLECTRIQUE DOIVENT ÊTRE RÉALISÉES PAR UN PERSONNEL PROFESSIONNELLEMENT QUALIFIÉ Vérifiez que les caractéristiques électriques de la source sont les...

Страница 39: ...OFESSIONNELLEMENT QUALIFIÉ UNE PRESSION PNEUMATIQUE EXCESSIVE PEUT COMPROMETTRE LA SECURITE DU PERSONNEL ET ENDOMMAGER LA MACHINE Contrôler si la pression du réseau est dans les limites demandées Si la pression est supérieure à 170 psi 12 bar il faut installer un régulateur de pression avant la prise d air de la machine On conseille de monter sur le réseau de l air comprimé un filtre supplémentaire...

Страница 40: ...tant en position 2 2 Fig 3 1 1 ajouter 4 à la valeur indiquée par les index pour connaître le diamètre paramétré D Placer la roue sur l autocentreur et faire pression vers le bas E Abaisser la pédale complètement et relâcher La roue est bloquée l outil selon le diamètre de la roue F Soulever le bouton de positionnement 2 pour placer l ensemble pneu roue en vue du gonflage en même temps appuyer sur ...

Страница 41: ...neur pressée Il pourrait provoquer accidentellement la rupture du talon Fig 4 1 2 536 Fig 4 1 2 SUR LES ROUES SUR LES QUELLES SONT INSTALLESDESCAPTEURSDEBASSEPRESSION IL FAUT DETALONNER A 90 DEGRES PAR RAPPORT A LA POSITION DE LA VALVE UN DETALONNAGE EFFECTUE EN TOUT AUTRE POINT DE LA JANTE ABIMERAIT LA JANTE 4 0 MONTAGE ET DÉMONTAGE PNEUS PRÉCAUTIONS GÉNÉRALES IMPORTANT AVANT DE MONTER UN PNEU SU...

Страница 42: ...ST DU AU FAIT QUE L OPERATEUR DE REGLE PAS CORRECTEMENT LE BOUTON DE REGLAGE DU DIAMETRE JANTE CE QUI ENTRAINE UN CONTACT INCORRECT DE L INSERT AVEC LA JANTE NOTE QUAND L OUTIL DE MONTAGE DÉMONTAGE A ÉTÉ CORRECTEMENT POSITIONNÉ LES ROUES IDENTIQUES PEUVENT ÊTRE MONTÉES SANS DEVOIR RÉGLER L OUTIL DE NOUVEAU C Positionner les griffes d une façon convenable Actionnement de les griffes vers l intérieu...

Страница 43: ... Soulever le talon sur la languette de montage Pour rendre l opération plus facile appuyer de la main gauche ou du presseur pneumatique sur le flanc du pneu dans une position opposée à celle de l outil On conseille de enlever le levier pour soulever l enveloppe après avoir soulevé le talon sur la languette de montage Fig 4 1 5 333 Fig 4 1 5 G Faire tourner l autocentreur dans le sens des aiguilles ...

Страница 44: ...de l autocentrant pour terminer le montage du talon supérieur Ne pas retirer le levier ou l outil de montage avant de relâcher la pédale de rotation NOTE CERTAINS PNEUS ONT UNE COULEUR QUI N EST PAS CONSERVEE A L EXTERIEUR DE LA ROUE ET DOIT ETRE ALIGNEE SUR LA VALVE SI CE N EST PAS LE CAS VEILLER A ASSURER L ALIGNEMENT AVANT LE GONFLAGE DU PNEU B Bloquer la jante sur l autocentreur et la tourner ...

Страница 45: ...DIAMÈTRE DE LA JANTE SUR LAQUELLE ILS SONT MONTÉS MÊME SI LES TALONS S ACCROCHENT IL EST IMPOSSIBLE DE RÉUSSIR À LES METTRE EN PLACE DANS LEUR POSITION CORRECTE LA CREVAISON D UN PNEU POUR N IMPORTE QUELLE RAISON PEUT CAUSER DES LÉSIONS GRAVES OU MORTELLES Gonfler le pneu en suivant les instructions du fabricant ENAUCUNCASONNEDEVRADÉPASSERLAPRESSION MAXIMUM ADMISE PAR LE CONSTRUCTEUR DU PNEU POUR P...

Страница 46: ... PROCEDER A LA MISE EN PLACE DU 5 0 DEMONTAGE PNEUS AVEC CHAMBRE A Pour le démontage des talons opérer comme décrit pour les pneus sans chambre au chapitre 4 1 A F Dans ce cas la vanne ne peut pas être remplacée car elle est unie à la chambre à air NOTE NE PAS ENDOMMAGER LA CHAMBRE À AIR PENDANT L OPÉRATION DE DÉTALONNAGE LA VANNE DOIT ÊTRE EN POSITION OPPOSÉE À LA PALETTE DU DÉTALONNEUR B Pour dé...

Страница 47: ...905 Fig 5 3 2 Le troisième outil intégré dans le PBA est le rouleau talon inférieur Ce dispositif est utile plusieurs fois pendant le cycle de démontage D abord le rouleau inférieur peut être utilisé pour enlever un talon TALON OU AU GONFLAGE EN AUCUN CAS ON NE DEVRA DÉPASSER LA PRESSION MAXIMUM ADMISE PAR LE CONSTRUCTEUR DU PNEU POUR POUVOIR GONFLER LE PNEU JUSTE APRES LA MISE EN PLACE DU TALON L...

Страница 48: ... la jante Quand on prépare le deuxième talon pour l enlèvement insérer l outil à fond au delà du premier et du deuxième talon A présent mettre le rouleau talon inférieur en position sous le flanc inférieur et soulever Quand le flanc se soulève la barre du pneu se met en place facilement sur la tête de montage démontage 5 4 MONTAGE ET DÉMONTAGE PNEUS MOTO Pour opérer sur les pneus pour moto il faut m...

Страница 49: ...s tiges des cylindres de l autocentreur F Laver périodiquement toutes les parties en plastique avec de l eau froide et du savon ou avec des détergents chimiques non agressifs sans alcool ni ammoniaque G Contrôler les supports du détalonneur s ils sont détériorés les remplacer H Vider tous les jours le filtre de l eau Fig 6 0 3 Faites ceci en tournant la décharge rapide B et pressant vers le haut L ...

Страница 50: ...mme s il s agissait d un déchet urbain mais effectuer le tri sélectif en apportant les matériaux aux centres de collecte et de tri agréés 3 S informer auprès du revendeur pour connaître les endroits de collecte de recyclage et de tri au torisés ou pour une éventuelle reprise de l équi pement en cas d achat d un neuf obligation du un pour un 4 Respecter les normes sur la gestion des déchets pour év...

Страница 51: ...51 Snap On EEWH329A Page blanche ...

Страница 52: ... des représentants différents par rapport au Vendeur D utilisation incorrecte ou négligente fonctionnement nettoyage entreposage ou manutention E feu eau vent éclairage ou autres causes naturelles F conditions environnementales adverses y compris sans se limiter chaleur excessive humidité élément de corrosion poussière ou autres contaminants interférences de fréquences radio défaillance électrique...

Страница 53: ...icos neumática para automóviles furgones y motos con neu máticos montados en llantas de una sola pieza Dimensiones basadas solo en neu máticos OEM y ruedas Construida para el empleo de profesionales que trabajan inten samente esta desmontadora de neumáticos presenta un uso sencillo seguro y fiable ...

Страница 54: ...54 Snap On EEWH329A ...

Страница 55: ...an todas las situaciones posibles Es responsabilidad del técnico conocer las ruedas y los neumáticos que se dispone a cambiar Es fundamental utilizar los métodos de servicio adecuados y cambiar las ruedas de forma aceptable para no poner en peligro la propia seguridad ni la de otras personas que se encuentren en la zona de trabajo del equipo o del vehículo sobre el que se está trabajando Se supone...

Страница 56: ...l enchufe de la toma Tome el enchufe y estire para desconectarlo No exponga el equipo a la lluvia No lo utilice sobre superficies húmedas Enchufe la unidad en la toma de alimentación adecuada No retire ni derive la toma de tierra El contacto con tensiones altas puede ser mortal o provocar daños graves Riesgo de electrocución Dentro de la unidad base se hallan presentes tensiones altas No hay elemen...

Страница 57: ...ndas de los neumáticos y de las superficies de la rueda Elimine el lubricante sobrante antes de hinchar Use gafas de seguridad certificadas durante el montaje y desmontaje deseado Los escombros la suciedad y los líquidos pueden herir los ojos de forma grave Riesgo de heridas Las herramientas pueden romperse o resbalar si no se usan o mantienen correctamente Lea y comprenda las instrucciones antes de...

Страница 58: ...a para este propósito Bloquee la mesa giratoria dentro de la llanta antes de hinchar el neumático Use lubricante para talones de neumáticos adecuado antes de quitar o instalar el neumático en la llanta Coloque SIEMPRE el Brazo de sujeción de seguridad en la rueda para sujetarla a la mesa giratoria mientras se hincha si este equipo está incluido Si un neumático explota en esta desmontadora de neumá...

Страница 59: ...TE EL MONTAJE Y DESMONTAJE página 67 4 1 DESMONTAJE NEUMÁTICOS SIN CÁMARA DE AIRE TUBELESS página 67 4 2 MONTAJE NEUMÁTICOS SIN CÁMARA DE AIRE TUBELESS página 69 4 3 SI ES DIFÍCIL MONTAR EL TALÓN DEL NEUMÁTICO SUPERIOR página 70 4 4 HINCHADO DE NEUMÁTICOS SIN CÁMARA DE AIRE TUBELESS página 71 5 0 DESMONTAJE NEUMÁTICOS CON CÁMARA DE AIRE página 72 5 1 MONTAJE NEUMÁTICOS CON CÁMARA DE AIRE página 72...

Страница 60: ...abajo proficuo y sin inconvenientes Lea este manual por completo antes de manipular o trabajar con la unidad Las instrucciones sobre el uso mantenimiento y modo de empleo se describen en el presente manual CONSERVAR CON CUIDADO ESTE MANUAL PARA CUALQUIER OTRA CONSULTA EN EL FUTURO 1 1 ESPECIFICACIONES Intervalo de temperaturas de funcionamiento 5 50 C 41 122 F Desmontadora de neumáticos neumática p...

Страница 61: ...sgaste por acumulación en la guía de deslizamiento que provoca el movimiento del cabezal de montaje y desmontaje INSERCIÓN DE NYLON ANTI ARAÑAZOS Integrada en el cabezal de montaje y desmontaje es una inserción de nylon resistencia anti arañazos que se puede sustituir y proteger contra el contacto accidental con la llanta BRAZO DE SUJECIÓN DE SEGURIDAD Opcional SUJECIÓN DEL CONJUNTO DE NEUMÁTICO Y...

Страница 62: ...alonar fácilmente el segundo talón en el cabezal de montaje y desmontaje Depresor de centrado de rueda Ofrece presión hacia abajo en una llanta cuando se está trabajando para sujetar una combinación de neumático con perfil bajo y llanta Ayuda al técnico a colocar correctamente las mordazas de la llanta entre el neumático y la llanta cuando se sujeta desde fuera casos en los que es difícil bajar el ...

Страница 63: ...EEWH329A 1 4 ACCESORIOS Y CONSUMIBLE WƌŽƚĞĐƚŽƌ ĚĞ ŵĂŶĚşďƵůĂ ĚĞ ůŽŶŐŝƚƵĚ ŵĞĚŝĂ 0 0 0 0 1 0 1 0 0 2 1 0 1 0 3 1 0 1 0 4 0 5 6 0 1 0 0 7 8 0 0 0 0 1 1 1 9 1 1 9 9 1 7 4 6 1 4 7 4 2 7 4 7 4 1 7 4 1 4 7 4 7 4 Ϭϰϴϭ ϯϬ 0 ...

Страница 64: ...ación deseada la desmontadora de neumáticos debe empernarse al suelo usando solo los dos agujeros de montaje posteriores Los pernos de montaje se incluyen con las máquinas LA DESMONTADORA DEBE SUJETARSE A UN SUELO DE CEMENTO 2 1 CONEXIÓN ELÉCTRICA LA INSTALACIÓN ELÉCTRICA DEBE SER EFECTUADA POR UN ELECTRICISTA PROFESIONAL Controlar que las especificaciones de alimentación sean compatibles con las d...

Страница 65: ...ínea se encuentre dentro de los límites requeridos por la máquina Si la presión supera los 12 bares 170 psi es obligatorio instalar un regulador de presión antes de la entrada de aire de la máquina Si la presión del aire es inferior al mínimo necesario de 8 bares 110 psi la fuerza de bloqueo del autocentrante y la fuerza del destalonador pueden resultar insuficientes para algunas ruedas y reduce de...

Страница 66: ... diámetro de ajuste efectivo D Coloque la rueda y bájelo a meno en la mesa giratoria E Baje el pedal a la primera posición y libérelo La rueda está sujeta E Gire el pomo de ajuste del brazo giratorio 4 para colocar el cabezal desmontaje y desmontaje ligeramente lejos del diámetro de la llanta F Suba hacia arriba el pomo de sujeción y posicionamiento 2 para colocar encima del conjunto neumático rue...

Страница 67: ...Fig 4 1 2 AVISO EN NEUMÁTICO PLANO CON EL SENSOR DE PRESIÓN BAJA OPCIONAL INSTALADO DESTALONE CON UNA SEPARACIÓN DE 90 GRADOS DEL VÁSTAGO DE LA VÁLVULA PUEDEN PROVOCARSE DAÑOS EN LA RUEDA Y EN EL SENSOR SI SE ROMPE EL TALÓN EN CUALQUIER PUNTO DE LA LLANTA C Fije las mordazas de la llanta en la posición adecuada retrase las abrazaderas para sujetar la rueda desde fuera 4 0 PRECAUCIONES DURANTE EL M...

Страница 68: ...a de montaje y desmontaje entre el talón y el cabezal de montaje y desmontaje Haga palanca en el talón en el cabezal de montaje y desmontaje usando el cabezal de montaje y desmontaje como punto de nivelación Para que esta operación sea más fácil asegúrese de que el talón del neumático a 180º desde el cabezal de montaje y desmontaje está en el centro de la rueda Empuje el y expanda las abrazaderas ...

Страница 69: ...UEDAS TIENEN UN PUNTO DE COLOR neumático en el centro con la mano o con la herramienta de baja de talón si es necesario Se sugiere quitar la herramienta de montaje o desmontaje después de subir el talón en el cabezal de montaje y desmontaje Fig 4 1 5 en cualquier caso puede quitar la herramienta después de quitar el talón 333 Fig 4 1 5 Hacer girar el autocentrador pedal abajo en dirección horaria ...

Страница 70: ...del talón hasta haber liberado el pedal QUE DEBE MANTENERSE EN LA PARTE EXTERIOR DE LA RUEDA Y DEBE ALINEARSE CON EL VÁSTAGO DE LA VÁLVULA SI ES ASÍ ASEGÚRESE DE QUE LA ALINEACIÓN ES ADECUADA ANTES DE REALIZAR EL HINCHADO DE LA RUEDA B Bloquear la llanta en el autocentrador y hacerlo girar hasta que la válvula se encuentre a las 2 Apoyar el neumático en la llanta Haga oscilar el brazo de montaje y...

Страница 71: ...EDE CAUSAR LESIONES GRAVES EL BRAZO DE SUJECIÓN DE SEGURIDAD OPCIONAL DEBE ESTAR EN SU LUGAR ANTES DE INTENTAR EL ENTALONADO O EL HINCHADO EN NINGÚN CASO SE DEBE SUPERAR LA PRESIÓN MÁXIMA ADMITIDA POR EL FABRICANTE DEL NEUMÁTICO SI HA SUJETADO LA LLANTA DESDE FUERA DEBE LIBERARSE CUANDO SE REALICE EL HINCHADO PERO SOLO DESPUÉS DE QUE EL SRA ESTÉ EN SU LUGAR EL TRABAJADOR TIENE QUE MANTENERSE A UNA...

Страница 72: ...OPERACIÓN DE DESTALONADO LA VÁLVULA TIENE QUE ESTAR EN LA POSICIÓN DIAMETRALMENTE OPUESTA A LA PALETA DEL DESTALONADOR B Para desmontar el primer talón la válvula tiene que estar en las 2 horas AVISO TENGACUIDADO DE NO PINCHAR LACAMERADEAIRE CON LA HERRAMIENTA DE MONTAJE Y DESMONTAJE CUANDO SE LEVANTAEL TALÓN SOBRE LALENGÜETA DE LA HERRAMIENTA Después de haber desmontado el primer talón con cuidad...

Страница 73: ...aje Cuando se vuelve a montar un neumático el depresor de talón asegurará que el talón permanece abajo en el centro de la llanta hasta que todo el talón se vuelve a montar en la llanta Cuando se haya vuelto a montar el primer talón mueva el depresor de talón en la posición justo detrás del cabezal de montaje y desmontaje Ahora baje el segundo talón 1 3 Active la mesa giratoria cuando el segundo ta...

Страница 74: ...ferior y aplique lentamente presión hacia arriba Tenga cuidado de no hacer oscilar demasiado en contacto con la llanta Cuando trabaje para sujetar de manera segura el segundo talón para su extracción introduzca la herramienta del neumático completamente en el primer y segundo talón Ahora haga oscilar el rodillo de talón inferior en su posición debajo del flanco inferior y suba Cuando suba el flanco ...

Страница 75: ... los cilindros neumáticos de la mesa giratoria con aceite según sea necesario F Limpie periódicamente todas las piezas de plástico con agua fría y jabón o limpiacristales sin alcohol ni amoniaco G Compruebe los soportes destalonadores si estuvieran desgastados substituirlos H Descargue el agua del filtro neumático cada día Hágalo girando el pomo B a la derecha y empujándolo hacia arriba El agua deb...

Страница 76: ...la máquina 2 NO elimine el aparato como residuo urbano pro ceda a su eliminación separada y entregue los distintos materiales en los centros de recogida separada 3 Solicite información al distribuidor sobre los puntos de recogida autorizados para la la eliminación y para la entrega en caso de compra de un nuevo aparato intercambio uno por uno 4 Atenerse a las normas sobre la correcta gestión de lo...

Страница 77: ...77 Snap On EEWH329A Página en blanco ...

Страница 78: ...entes E fuego agua viento rayos u otras causas naturales F condiciones medioambientales adversas incluyendo pero sin limitarse a ello calor excesivo humedad elementos corrosivos polvo u otros contaminantes en el aire interferencias por radiofrecuencia fallo de alimentación eléctrica tensiones de línea superiores a las especificadas para el equipo esfuerzos físicos eléctricos o electromagnéticos no ...

Отзывы:

Похожие инструкции для EEWH329A