Chapter 12
Tooling Installation and Work Holding
Installing and Changing Tools
WARNING
: Be sure the power is turned off and the machine unplugged
before installing or changing tool bits
Aligning Tooling -
Use the procedure below to align your tooling in the R-8
spindle:
Step 1: Select the appropriate tool or fixture.
Step 2: Wipe the surfaces of the tooling and spindle interior to ensure a
proper fit. Grease or debris on either surface will cause misalignment.
Step 3: Align the keyway in your tooling with the key inside the mill spindle
and insert the fixture in the lower mill spindle opening.
You can feel the key in the mill spindle with your finger. It is located just
beyond the tapered portion of the spindle.
Securing R-8 Tooling with the Drawbar -
Use the procedure below for
attaching and securing the drawbar:
Step 1: Remove the arbor bolt cover located on the top of the mill belt cover
and insert a drawbar (SAE standard 7/16-20) from the top of the spindle.
Step 2: Tighten the drawbar clockwise into the fixture or tooling that is
inserted into the mill spindle opening. Use the spanner wrench to stabilize
the spindle while tightening the drawbar.
Step 3: Use a wrench to apply torque to the drawbar. This will draw the
fixture firmly into the spindle.
Step 4: Reinstall the arbor bolt cover when the fixture/tooling is in place.
Removing R-8 Tooling from the Drawbar
Use the procedure below to remove tooling using the drawbar method:
Step 1: Stabilize the drawbar with the spanner wrench and use a wrench to
apply force counter clockwise to the drawbar nut.
Step 2: Loosen the drawbar two to three turns counter clockwise.
Step 3: Use a dead blow or brass hammer to strike a downward blow on the
top of the drawbar to loosen the fixture from the spindle.
Unscrew the drawbar only two to three turns before striking. Unscrewing it
further before striking the drawbar can damage the threads on the drawbar
or the fixture.
Step 4: Continue turning the drawbar until it unscrews from the tooling.
Step 5: After the tool is free from the spindle, hold the fixture with your free
hand or use a catch box to prevent the tooling from dropping onto your
machine or work piece.
28
Содержание MI-409MZ
Страница 1: ...Smithy MI 409MZ Operator s Manual 1 ...
Страница 31: ...Chapter 13 Parts Diagrams in work ...
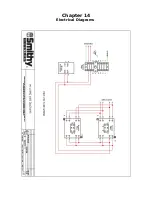
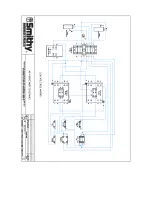
Страница 32: ...Chapter 14 Electrical Diagrams ...
Страница 33: ......


