Page 7
TROUBLE
LOOK FOR
REMEDY
Sprayer leaks at pump or
sprayer does not build
pressure.
1. Dirt or debris on tank cover
o-ring. (#3H).
2. Chipped, torn, swollen, or
defective tank cover o-ring (3H).
3. Check valve (#3S) at bottom of
pump assembly.
4. Worn or damaged o-ring (#3L)
on piston.
1. Clean dirt or debris from o-ring (#3H) or
closure.
2. Remove old o-ring (#3H) and replace with
new as described in
Pump Disassembly &
Reassembly
section.
3. Replace if missing or damaged as described
in
Pump Disassembly & Reassembly
section.
4. Replace if worn or damaged as described in
Pump Disassembly & Reassembly
section.
Sprayer material
overflows through pump
barrel or pump handle
rises when handle is
unlocked.
1. Dirt or debris under check
valve (#3S) on pump.
2. Chipped, torn, or swollen
pump check valve (#3S).
1. Clean check valve (#3S) and valve sealing
surface on pump.
2. Replace check valve (#3S) as described
in
Pump Disassembly & Reassembly
section.
Hose leaks at tank or
shut-off.
1. Loose hose at tank.
2. Cracked, swollen, or faulty hose.
3. Loose hose at shut-off.
1. Tighten hose nut at tank.
2. Replace hose.
3. Tighten hose at shut-off.
Sprayer is difficult to
pump.
1. Damaged piston o-ring (#3L)
2. Piston o-ring (#3L) is dry.
1. Replace piston o-ring as described in
Pump Disassembly & Reassembly
section.
2. Lubricate piston o-ring as described
in
Pump Disassembly & Reassembly
section.
Sprayer tank leaks.
Evidence of spray material
escaping from the tank.
Replace entire sprayer.
Nozzle drips when
shut-off lever is released.
1. Dirt or debris in shut-off valve.
2. Damaged o-rings or seals in
shut-off (Kit #10).
1. Clean shut-off as described in
Shut-off
Maintenance
section.
2. Service shut-off seals as described in
Maintenance service (Kit #10).
Nozzle tip leaks, poor
spray pattern, partial
spray or complete
stoppage.
1. Spray extension or nozzle
clogged.
2. Dirty or clogged nozzle tip.
1. Remove nozzle and clean as described in
Nozzle Maintenance
section.
2. Clean the nozzle tip with a soft brush.
TROUBLESHOOTING
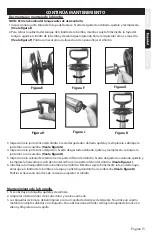
Shut-Off Maintenance (Repair Kit)
Always depressurize sprayer before maintenance by activating
shut-off and spraying contents out.
1. Unscrew the handle from the shut-off assembly.
2. Unscrew valve cap and remove valve stem components and seals as
shown. Clean components with cool clean water.
3. Clean any debris from inside the handle and shut-off body. Check
for any wear of o-rings or seals and replace as necessary.
4. Reassemble the components as shown and tighten the handle and
valve cap securely.
MAINTENANCE CONTINUED
SEALS


