background image

10

11

smithandnoble.com

800.248.8888

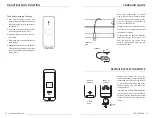
Remove  the  batt ery  tray  from  the 
remote by inserti ng a fi ngernail into the 
indentati on  on  the  back  of  the  remote. 
To  avoid  the  batt ery  falling  out  of  the 
remote,  remove  the  tray  while  the 
remote is face up.

Insert the new batt ery (CR2430 lithium) 
into the batt ery tray so that the writi ng is 
facing up (positi ve up) when the remote 
is  face  up.  Slide  the  tray  back  into  the 
remote.

ACCESS 

DOOR

BATTERY 

TRAY

FRONT OF 

REMOTE

BACK OF 

REMOTE

CHARGER

CHARGING SHADE 

REPLACE BATTERY IN REMOTE

When  the  shade  begins  to  operate 
slower than normal it is ti me to charge 
the motor. Plug the 8.4v charger into the 
wire.  The  charging  wire  is  att ached  to 
the back of the head rail.

Plug the charger into an electrical outlet. 

A red light on the charger indicates that 
the batt ery is charging.

To  fully  charge  the  batt eries,  allow  the 
batt eries  to  charge  for  at  least  1  hour 
aft er  the  light  on  the  charger  turns 
green.  A  typical  charge  cycle  can  take 
between 4-6 hours.

CHARGING 

WIRE

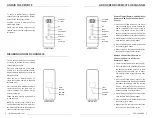
To De-Acti vate the Jog Functi on

1. The  remote  comes  pre-set  with 

jogging functi on acti vated. Follow the 
directi ons  below  if  you  would  like  to 
de-acti vate it.

2. Press down and up on the back cover 

to slide it approximately 1/4 inch.

3. Carefully  remove  the  back  cover  of 

the remote.

4. Slide the switch from the H positi on to 

the R positi on.

5. Replace the back cover of the remote 

making sure that the rubber piece that 
goes over the confi rm and limit butt ons 
stays in place.

DE-ACTIVATE JOG FUNCTION

H

R

REMOTE BACK

REMOTE BACK

Содержание Honeycomb Shades Skylight

Страница 1: ...Operating Programming Guide For Rechargeable Motorized Shades Smith Noble Smart Shades Honeycomb Shades Honeycomb Skylight Shades...

Страница 2: ...es If a battery is not already installed in the remote follow the instructions REPLACE BATTERY IN REMOTE The 14 Channel remote may also be used to operate top down bottom up honeycomb shades You can n...

Страница 3: ...if a number 1 2 or 3 shows in the left of the display If a number is shown deactivate the Top Down Bottom Up function for that channel by pressing the RAIL SELECTOR and DOWN buttons at the same time...

Страница 4: ...hold the LIMIT button on the back of the remote then press and hold the UP button Release both buttons when the shade jogs beeps When complete repair previously unpaired shades by following the steps...

Страница 5: ...nel that you want to program using the CHANNEL selector button 5 Press and hold the CONFIRM button until the shade s jogs beeps 6 Repeat steps 3 5 to program the rest of the channels on a multi channe...

Страница 6: ...attached to the back of the head rail Plug the charger into an electrical outlet A red light on the charger indicates that the battery is charging To fully charge the batteries allow the batteries to...

Страница 7: ...TAPE SOLAR PANEL RECHARGE UNIT BRACKET BOTTOM BRACKET HOOK SOLAR PANEL BOTTOM BRACKET HOOK BRACKET SOLAR PANEL Determine Solar Panel Placement The solar panel should be placed where it gets the maximu...

Страница 8: ...s shorter Replace the battery in the remote CR2430 Shade goes up when down button is pushed and down when up button is pushed Press the LIMIT button on the underside of the remote or the SETTING butto...

Страница 9: ...coverings should be everlasting which is why our products come with a limited lifetime warranty The warranty applies to the original owner requires a proof of purchase hang on to your receipt and cov...

Отзывы: