11
5 How to Use the Utility Software
5.1 Main Tab
The
Main
screen provides a list of all HomePlug AV devices logically connected to the computer when the utility is
running on.
The
top panel
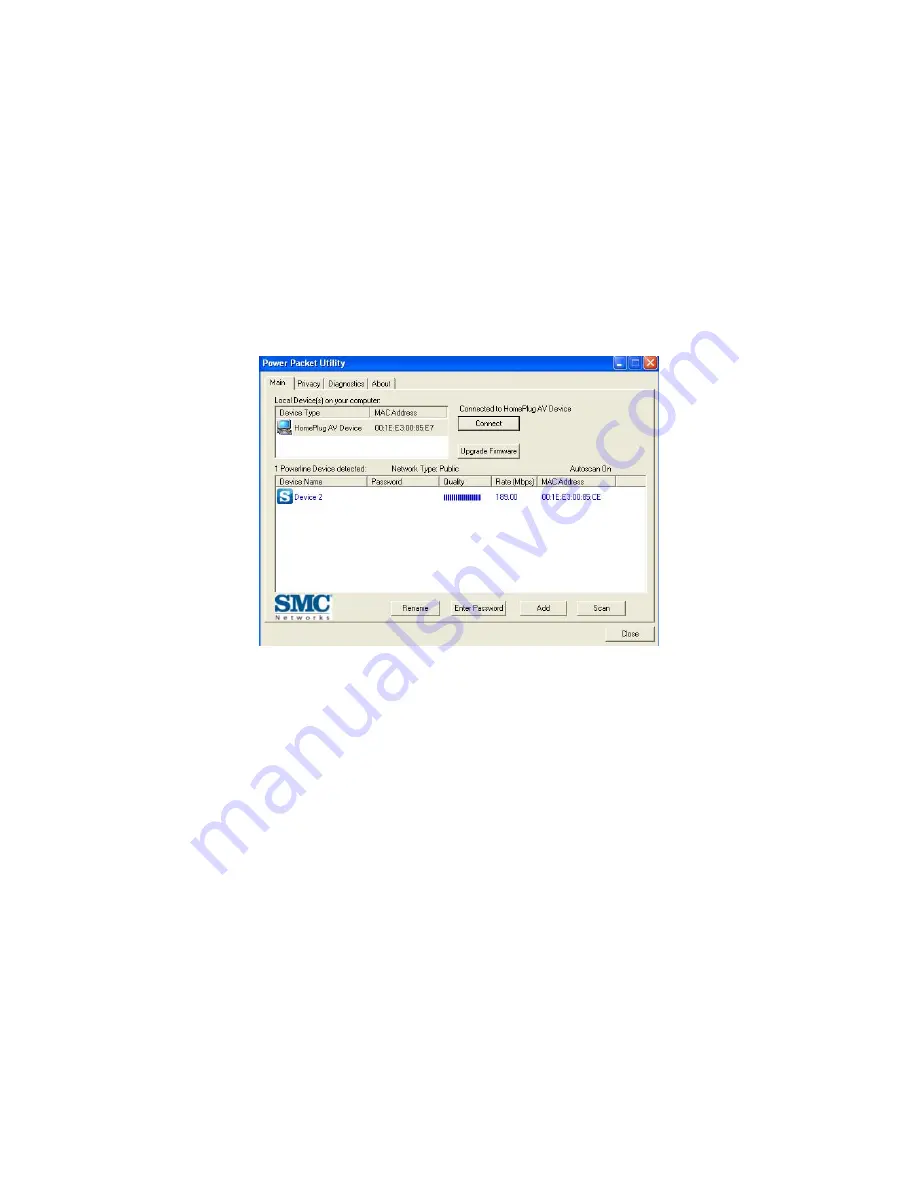
shows local HomePlug AV devices connected to the computer’s NIC (Network Interface Card). The
user can click the Connect button to its right. Once connected to the local device, the utility will automatically scan the
power line periodically for any other HomePlug AV devices. If no local HomePlug AV devices are discovered, the
status bar displays
NO HOMEPLUG ADAPTERS DETECTED
.
Figure 5-1: Main Tab information
The
lower panel
displays all the HomePlug AV remote devices, discovered on the current logical network. The total
number of remote devices connected on the same network can be found on top of the Remote device panel. The
Network type (Public or Private) is also displayed based on the network status of the local device. The scan status
option is displayed on the top right corner above the Remote devices panel showing whether the Autoscan
functionality is turned ON and active. The following information is displayed for all devices that appear in the list.
Device Name
This column shows the default device name, which may be modified. To change the name of a device, select the
device and click
Rename
or click the name and edit it in the list.
MAC Address
This column shows the Remote device’s MAC address.
Password
By default, this column is blank. You can select a device and click
Enter Password
to change it (see below).
The password is necessary to activate security in the Powerline network and to control all HomePlug AV devices from
one computer. To activate security you need to create a so-called “private network” by changing the private network
Содержание EZ Connect Powerline SMCHPAV-ESW
Страница 1: ......
Страница 11: ...10 Figure 4 3 Installation Complete Figure 4 4 Installation complete Click Close to complete installation...
Страница 24: ......


