C
HAPTER
4
| Configuring the Router
Parental Control
– 86 –
◆
Web Management Port
- Web browser access normally uses the
standard HTTP service port 80. This Router's default remote
management web port number is 80. For greater security, you can
change the remote management web port to a custom port by entering
that number in the box provided. Choose a number between 1 and
65534, but do not use the number of any common service port.
◆
Remote Management IP Address
- This is the current address you
will use when accessing your Router from the Internet. This function is
disabled when the IP address is set to the default value of 0.0.0.0. To
enable this function change 0.0.0.0 to a valid IP address. If set to
255.255.255.255, then all the hosts can access the Router from
internet.
N
OTE
:
To access the Router, you should type your Router's WAN IP address
into your browser's address (in IE) or Location (in Navigator) box, followed
by a colon and the custom port number. For example, if your Router's WAN
address is 202.96.12.8, and the port number used is 8080, please enter
http://202.96.12.8:8080 in your browser. Later, you may be asked for the
Router's password. After successfully entering the username and
password, you will be able to access the Router's web-based utility.
N
OTE
:
Be sure to change the Router's default password to a very secure
password.
P
ARENTAL
C
ONTROL
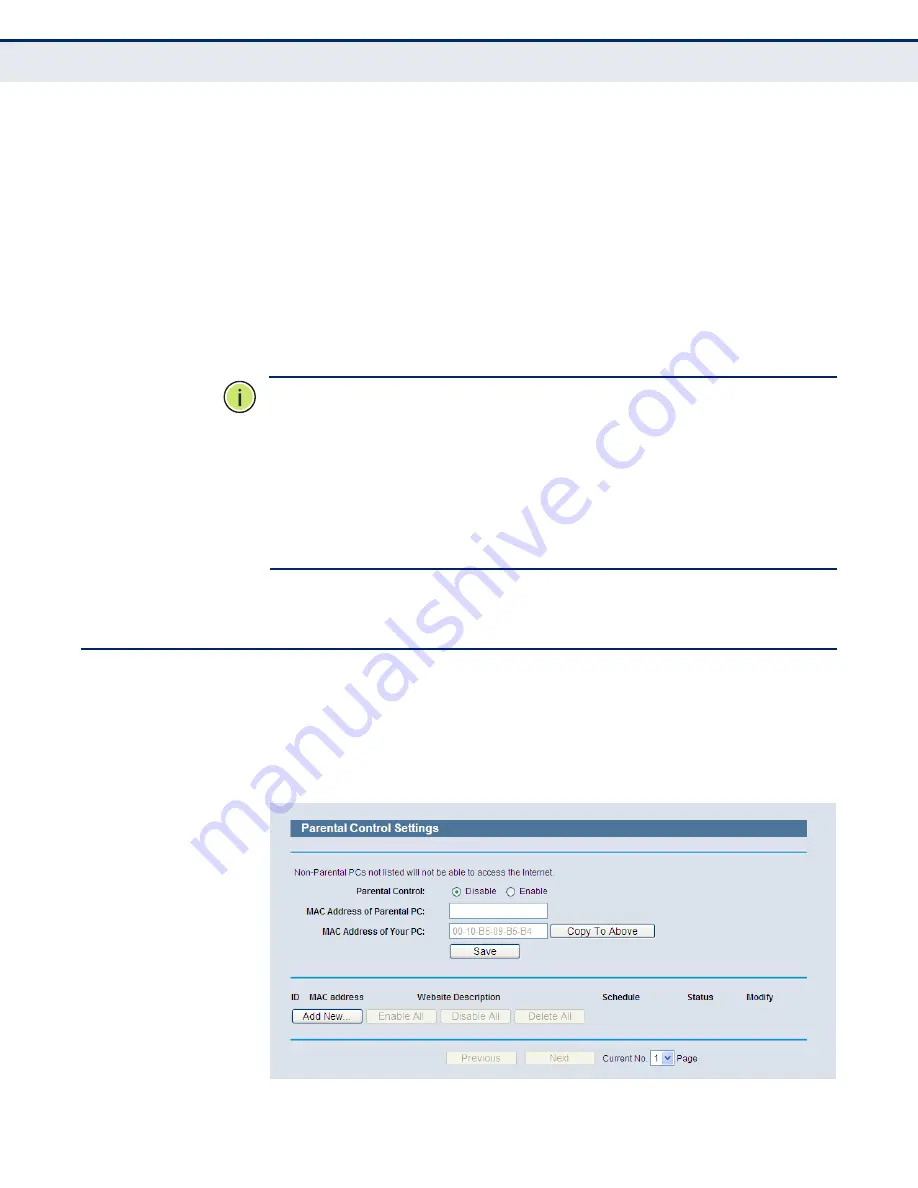
Select
Parental Control
from the menu; you can then configure the
parental control in the displayed page, as shown in
. The Parental
Control function can be used to limit children’s access to certain websites
and restrict the time of surfing.
Figure 73: Parental Control Settings
Содержание BARRICADE N SMCWBR14SN5V2
Страница 1: ...USER GUIDE BARRICADE N 150Mbps 4 Port Wireless Broadband Router SMCWBR14S N5 ...
Страница 23: ... 23 TABLES Table 1 Key Hardware Features 25 Table 2 LED Behavior 26 ...
Страница 31: ...CHAPTER 2 Connecting the Router Connecting the Router 31 Figure 4 Client Router Mode WISP Signal Noteboook PC ...
Страница 39: ...CHAPTER 3 Quick Installation Guide Quick Installation Guide 39 Figure 16 Quick Setup Finish ...


