4-8
SMA America
SB700U-11:SE3207
Connecting the AC Wires
Use the following procedure to connect the AC wires to the Sunny Boy:
WARNING:You must connect the wires that carry
the AC voltage from the Sunny Boy to the utility grid
in the order described in this procedure. Deviating
from this procedure could expose you to hazardous
voltages that can cause serious injury and/or
death.
1. Turn OFF the main breaker in the main utility breaker box.
2. If you are replacing an existing inverter, disconnect the wires for the AC line
you are working with in the breaker box.
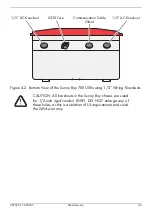
3. Install a ½-inch conduit fitting in the Sunny Boy’s AC wiring knockout (the
knockout farthest to the right on the bottom of the Sunny Boy, as shown in
Figure 4-2 on page 4-5). Fasten the fitting on the inside of the Sunny Boy with
the nut supplied with the fitting.
4. Install ½-inch conduit between the main breaker box and the Sunny Boy’s AC
wiring knockout.
5. Pull the AC wires through the conduit from the interior of the breaker box to the
interior of the Sunny Boy.
Note:
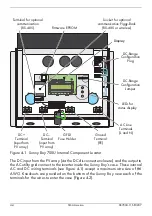
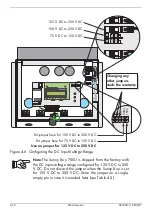
Refer to Figure 4-4 on page 4-9 for steps 7 through 8.
CAUTION: Avoid using wire nuts to join any wires together
or to make any connections anywhere in the PV system. Wire
nuts are a frequent cause of unreliable connections, resistive
connections, and ground faults.
6. Connect the equipment-grounding wire to the terminal labeled PE in the Sunny
Boy and tighten to a torque of 15 in-lbs.
7. Connect the L1 (AC line) wire to the terminal labeled L in the Sunny Boy.
8. Connect the N (AC neutral) wire to the terminal labeled N in the Sunny Boy.
9. Fasten the wires while applying a torque of 15 in-lbs.
10. Verify that all connections are correctly wired and properly torqued.
Содержание Sunny Boy SB 700U
Страница 1: ...Sunny Boy SB 700U Installation Guide Version 1 1 SB700U 11 SE3207 TBE SB07U...
Страница 2: ...ii SMA America SB700U 11 SE3207...
Страница 14: ...1 6 SMA America SB700U 11 SE3207...
Страница 16: ...2 2 SMA AmericaSB700U 11 SE3207...
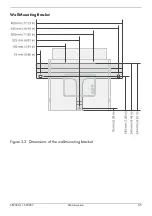
Страница 21: ...SB700U 11 SE3207 SMA America 3 5 Wall Mounting Bracket Figure 3 3 Dimensions of the wall mounting bracket...
Страница 24: ...3 8 SMA America SB700U 11 SE3207 11 Verify that the Sunny Boy 700U is firmly mounted in place...
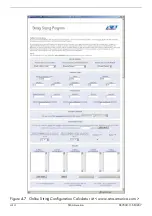
Страница 38: ...4 14 SMA America SB700U 11 SE3207 Figure 4 7 Online String Configuration Calculator at www sma america com...
Страница 46: ...4 22 SMA America SB700U 11 SE3207...
Страница 50: ...6 2 SMA America SB700U 11 SE3207 Figure 6 1 The Sunny Boy LED Status Indicator...
Страница 84: ...8 6 SMA America SB700U 11 SE3207...
Страница 85: ......

