

9
•
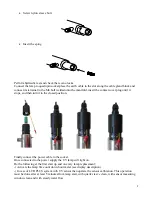
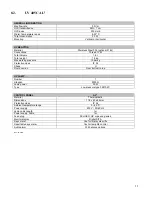
Screw nylon sleeve bolt
•
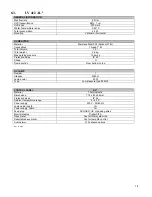
Insert the sping
Perform hydraulic test and check there is no leaks.
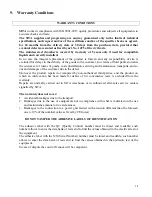
Connect the lamp to quadripin socket place the earth cable in the slot along the cable gland block and
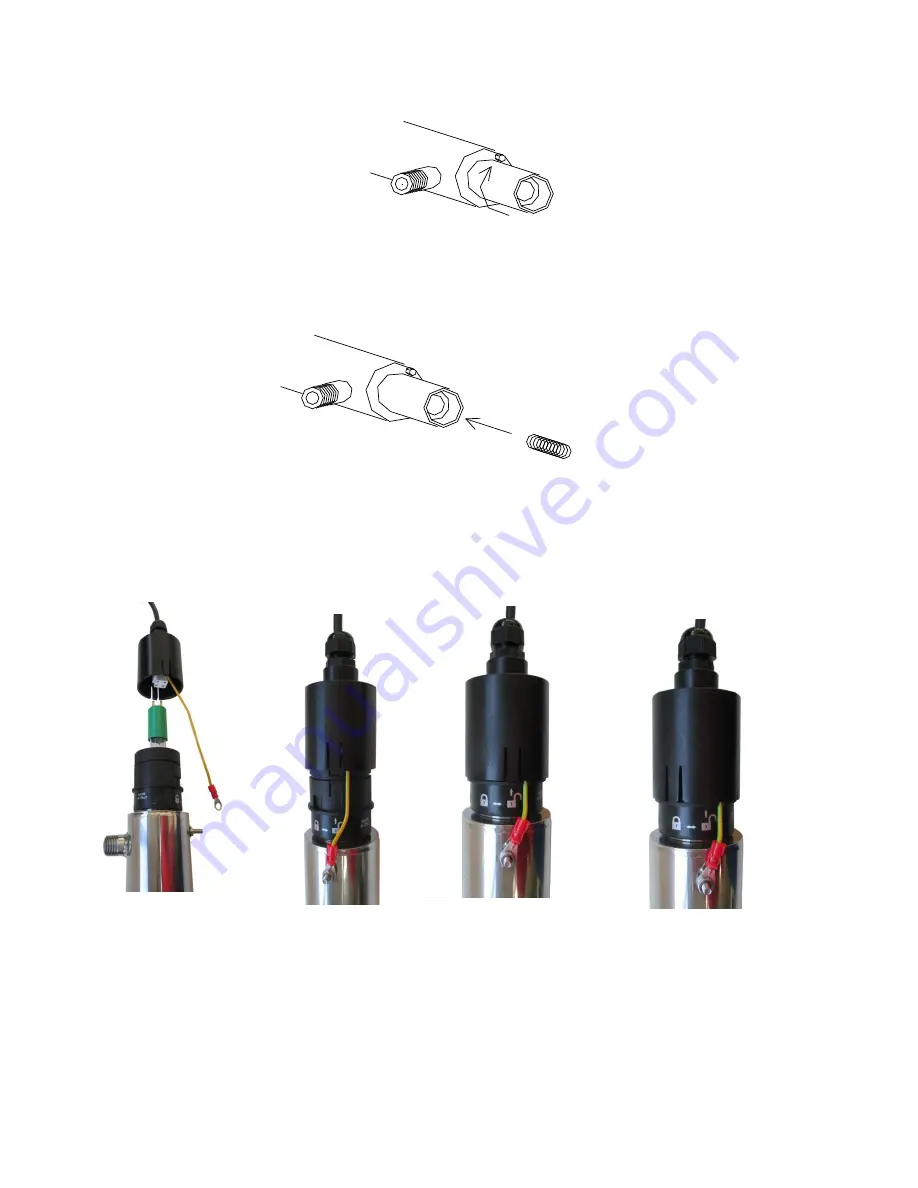
connect its terminal to the M4 bolt welded onto the manifold, insert the contact cover plug until it
stops, and then turn it to the closed position.
Finally connect the power cable to the socket.
Once connected to the power supply the UV lamp will light on.
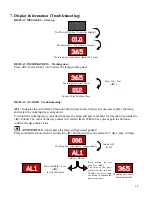
Do the following at the first start up and on every lamp replacement:
-) Activate the lamp life count down hour meter (see display description)
-) In case of LCD PLUS system with UV sensor then operate the sensor calibration. This operation
must be done after at least 5 minutes from lamp start, with quartz sleeve clean, with sensor measuring
window clean and with steady water flow.
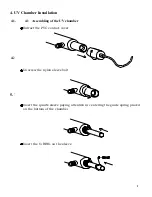
Inserire la lampada UV-C nella guaina
Collegare il quadripin elettrico
Inserire la calotta PVC copricontatti.
Avvitare il bloccaguaina in nylon
Inserire la molla di appoggio della lampada nella guaina al quarzo
Inserire la lampada UV-C nella guaina
Collegare il quadripin elettrico
Inserire la calotta PVC copricontatti.
Avvitare il bloccaguaina in nylon
Inserire la molla di appoggio della lampada nella guaina al quarzo
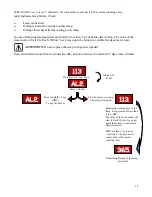
Содержание 405 AL2
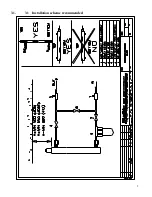
Страница 8: ...7 3 1 3 1 Installation scheme recommended ...
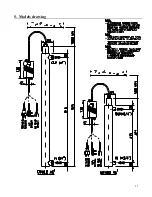
Страница 12: ...11 5 Models drawing ...
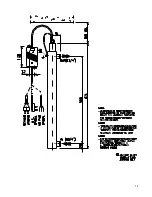
Страница 13: ...12 ...
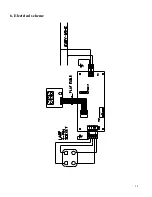
Страница 14: ...13 6 Electrical scheme ...