background image

 CLEANING & MAINTENANCE

1. Always unplug the sauna and allow it to cool down before performing any cleaning or 

maintenance.
2. Use furniture polish or furniture oil when cleaning the sauna exterior.  
3. The sauna interior surfaces should only be wiped down with a damp cloth.  Do NOT use 

4. As with all natural wood products, variations in the color and the grain as well as irregu-

natural beauty of the wood and should not be considered defective.

13


WARNING!

1. Check that the Main Power Cable is plugged into the wall outlet.
2. Check that the circuit breaker for the outlet has not tripped.  If the breaker has tripped, check that the 

amperage of the breaker is appropriate for your sauna.
3. Check all connections to the Power Supply Box.
4. Check for damage to the Main Power Cable; replace, if necessary.
5. Replace the Power Supply Box, if necessary. 

1. Check that all the connections are tight.
2. Replace the Heater Element.

1. Check that all connections are tight.
2. Replace the Heater Circuit Board, if necessary. 

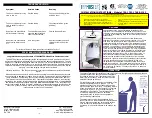
Problem

Solution

Solution

Solution

Problem

Problem

THERE IS NO POWER TO THE SAUNA

ONE HEATER DOES NOT WORK

NONE OF THE HEATERS WORK

 TROUBLESHOOTING GUIDE

• Always unplug the sauna and allow it to cool down before performing any maintenance.

• Unauthorized repairs or alterations will void the manufacturer’s warranty. 

Содержание SA7008

Страница 1: ...SA7008 SA7009 Ver 9 19 Please Do Not Hesitate to Contact Our Consumer Hotline at 800 759 0977 with Any Questions That May Arise During Assembly or Use of This Product SA7009 4 Person with 9 Carbon He...

Страница 2: ...n this manual is subject to change without notice Les informations contenues dans ce manuel peuvent tre modifi es sans pr avis If you would like a French version of this manual please contact our Cust...

Страница 3: ...and checking local ordinances before installing ANY sauna These saunas require a 20 amp receptacle and a 20 amp circuit breaker Note Electrical modi These saunas requires a dedicated circuit No other...

Страница 4: ...rrect part number when ordering replacements 4 9 19 Illustrations Not to Scale For replacement parts please call 800 759 0977 MOOD LIGHTING BACKREST 1 2 3 4 5 ADDITIONAL EQUIPMENT REQUIRED 16 17 18 19...

Страница 5: ...FRONT RIGHT WALL PANEL on the FLOOR in the same manner and insert the INNER WALL CONNECTORS on the side into the three corresponding holes on the RIGHT SIDE PANEL then push down to lock panels togeth...

Страница 6: ...the FLOOR as shown and make sure it fits snugly against the RIGHT SIDE WALL PANEL with wall fititng into groove and trim overlapping wall then engage buckles Place ring over knob and snap buckle close...

Страница 7: ...back wood strip over board on BACK WALL PANEL Use two 2 50 mm SCREWS to attach bench through pre drilled holes ASSEMBLY INSTRUCTIONS CONT 8 Connect the black floor heater plug and bench heater plug sn...

Страница 8: ...lot on LEFT SIDE WALL and FLOOR Attach to FLOOR using two 3 4 20mm SCREWS andBLACKPLASTICWASHERSthroughglass 10A Lift the ROOF above the sauna and place on top of walls feeding the control panel and h...

Страница 9: ...n the designated position with two 5 8 16mm SCREWS Plug the power cable into the OXYGEN IONIZER as shown The assembly of your sauna is now complete Please review the Operation Instructions and Health...

Страница 10: ...remote control to make adjustments to interior light color and intensity INTERIOR MOODLIGHTING thisisNOTColorTherapyLight seeabove Reset TUNER Use buttons to select AM and FM radio signal FM1 FM2 FM3...

Страница 11: ...ntering 6 Perspiration will begin within 15 to 25 minutes after entering the sauna 7 Limit the use of lotions or oils on your body while using your sauna These products can 8 For spot treatment of a p...

Страница 12: ...ines 5 Do not touch or interfere with the temperature sensor on the control panel 6 Do not touch or spray water on the heater elements 8 Do not sleep inside the sauna 9 Do not use the sauna immediatel...

Страница 13: ...the outlet has not tripped If the breaker has tripped check that the amperage of the breaker is appropriate for your sauna 3 Check all connections to the Power Supply Box 4 Check for damage to the Mai...

Страница 14: ...e provider who is knowledgeable in sauna use before using a sauna Saunas are powerful devices and monitoring your progress by a professional trained in sauna use is always advisable Variables of sauna...

Страница 15: ...CREW SAP7038 2 C 19 BLACK PLASTIC WASHER METAL CAP SAP7038 4 SETS C 20 SIDE WALL GLASS SAP7039 1 A 21 330W HEATER ELEMENT LFT RGT FRNT BACK WALLS SAP2418 6 A 22 225W HEATER ELEMENT BENCH FLOOR SAP2421...

Страница 16: ...1 330W HEATER ELEMENT LFT RGT FRNT BACK WALLS SAP2418 6 A 22 225W HEATER ELEMENT BENCH FLOOR SAP2421 2 C 23 80W HEATER ELEMENT FLOOR SAP2420 1 C 24 GLASS CLIP METAL SAP2537 2 A 25 DOOR MAGNET SAP25371...

Страница 17: ...ve Products NO REFUNDS will be given 10 Improper installation misuse or damages resulting from acts of nature will render this warranty null and void 11 This warranty is in lieu of all other warrantie...

Отзывы: