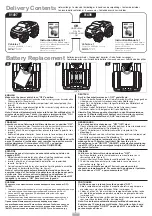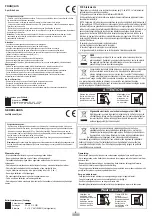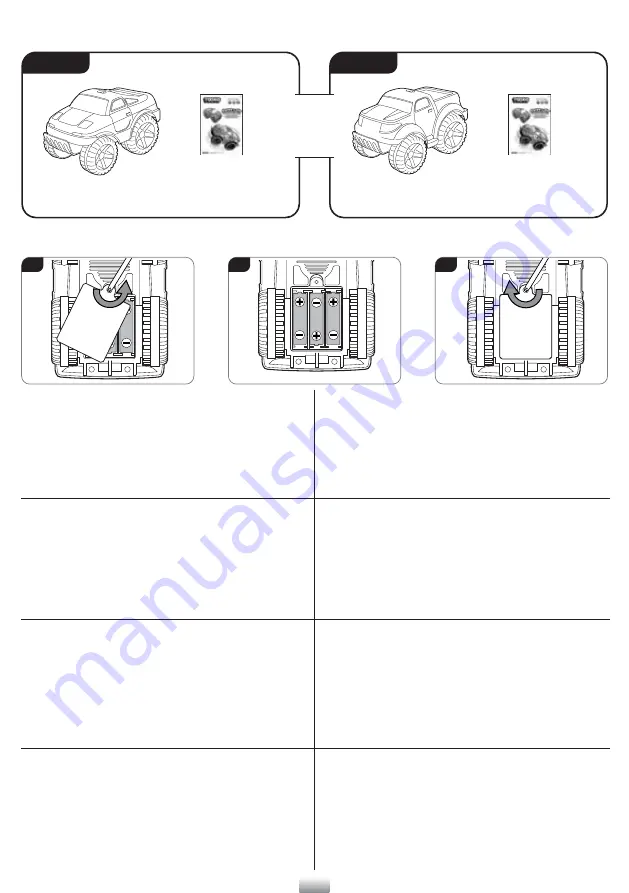
Vehicle x 1
Delivery Contents
81497
81498
1
Bedienungsanleitung
• Mode d'emploi
Handleiding
• Manual de instrucciones
Manuale di istruzioni
Руководство по эксплуатации
Manual de instruções
Fahrzeug
• Véhicule
• Voertuig
Vehículo
• Veicolo
Машина
• Veículo
Instruction Manual x 1
Vehicle x 1
Bedienungsanleitung
• Mode d'emploi
Handleiding
• Manual de instrucciones
Manuale di istruzioni
Руководство по эксплуатации
Manual de instruções
Fahrzeug
• Véhicule
•
Voertuig
Vehículo
•
Veicolo
Машина
•
Veículo
Instruction Manual x 1
Lieferumfang • Contenu de l’emballage • Inhoud van de verpakking • Contenido incluido •
Contenuto della confezione •
В комплекте
• Conteúdo acessórios incluídos
Battery Replacement
Batterien auswechseln • Changement des piles • De batterijen vervangen •
Cambiar las pilas • Sostituzione delle batterie •
Замена батареек
• Substituição das pilhas
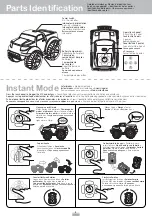
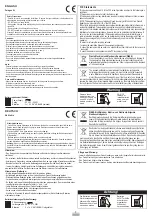
Make sure the power switch is on “OFF” position.
1.
Open the battery compartment: loosen the screw by turning counter clockwise with a
Philips screwdriver.
(See picture A)
2. Insert 3 AA batteries in the battery compartment with correct polarity.
(See
picture B)
3. Close the battery compartment: tighten the screw by turning clockwise with a
Philips screwdriver.
(See picture C)
Note: Vehicle will automatically enter into Power Saver Mode after 10
minutes when not in use. To turn it on again, simply switch the "ON /
OFF" switch to OFF position and ON again to start the play.
Убедитесь, что выключатель питания находится в положении «OFF»
(ВЫКЛ).
1. Откройте крышку батарейного отсека: открутите винт, вращая его против
часовой стрелки с помощью крестообразной отвертки. (см. Рис. A)
2. Установите 3 батарейки типа АА в батарейный отсек, соблюдая
полярность (см. Рис. B)
3. Закройте крышку батарейного отсека: затяните винт, вращая его по
часовой стрелке с помощью крестообразной отвертки. (см. Рис. C)
Примечание. Машина автоматически перейдет в режим
энергосбережения после 10 минут бездействия. Чтобы включить ее
снова, просто установите выключатель питания в положение «OFF»
(ВЫКЛ), а затем снова в положение «ON» (ВКЛ), чтобы начать игру.
Certifique-se que o interruptor está na posição "OFF".
1. Abra o compartimento das pilhas: desaperte o parafuso ao girar para a
esquerda com uma chave de fendas Philips. (ver imagem A)
2. Coloque 3 pilhas "AA" (não incluídas) no compartimento das pilhas, tendo
em atenção a polaridade e aparafuse o parafuso ao girar para a direita.
(ver imagem B)
3. Feche o compartimento das pilhas: aperte o parafuso ao girar para a direita
com uma chave de fendas Philips. (ver imagem B)
Nota: O veículo entra automaticamente em Modo Economia de
Energia após 10 minutos sem utilização. Para voltar a ligar, basta
colocar o interruptor "ON/OFF" na posição OFF e de volto em ON
para começar a brincar.
Verificare che l'interruttore sia posizionato su "OFF".
1. Apri il vano batterie: svita la vite ruotandola in senso antiorario con un
cacciavite a croce. (Figura A)
2. Inserisci 3 batterie AA rispettando la corretta polarità. (Figura B)
3. Chiudi il vano batterie: avvita la vite ruotandola in senso orario con un
cacciavite a croce. (Figura C)
Nota: se non utilizzato per più di 10 minuti, questo veicolo si
spegnerà automaticamente. Per accenderlo, posizionare il pulsante
di accensione su “OFF” e poi nuovamente su “ON”
Compruebe que el interruptor de encendido está en posición de
apagado (OFF).
1. Abre el compartimento de las pilas: afloja el tornillo girándolo en sentido
antihorario con un destornillador Phillips. (ver figura A)
2. Inserta 3 pilas AA en el compartimento de las pilas con la polaridad
correcta. (ver figura B)
3. Cierra el compartimento de las pilas: aprieta el tornillo girándolo en sentido
horario con un destornillador Phillips. (ver figura C)
Nota: el vehículo pasará automáticamente al modo de ahorro de
energía al cabo de 10 minutos si no detecta acción alguna por parte
del usuario. Para volver a activarlo, bastará con desplazar el
interruptor de encendido/apagado (ON / OFF) hasta la posición OFF
(apagado) y de nuevo a “ON” para continuar jugando.
Zorg dat de aan/uit-schakelaar op "OFF” (UIT) staat.
1. Open het batterijvak, maak de schroef los door hem linksom te draaien met
een Philips-schroevendraaier. (Zie afbeelding A)
2. Plaats 3 AA-batterijen in het batterijvak met de juiste polariteit. (Zie
afbeelding B)
3. Sluit het batterijvak: span de schroef aan door hem rechtsom te draaien met
een Philips-schroevendraaier. (Zie afbeelding C)
Opmerking: Voertuig zal automatisch in de Energiebesparende
modus gaan na 10 minuten inactiviteit. Om hem terug in te
schakelen, zet u de "ON / OFF" (AAN/UIT) schakelaar eenvoudigweg
in de OFF (UIT) stand en vervolgens terug in de ON (AAN) stand om
het spelen te starten.
Assurez-vous que l'interrupteur d'alimentation est en position “OFF”.
1.
Ouvrez le logement des piles : Desserrez la vis en la tournant dans le sens contraire
des aiguilles d'une montre avec un tournevis cruciforme. (voir image A)
2. Insérez 3 piles AA dans le logement des piles en respectant la polarité. (voir
image B)
3. Refermez le logement des piles : Serrez la vis en la tournant dans le sens des
aiguilles d'une montre avec un tournevis cruciforme. (voir image C)
Remarque: Le véhicule se mettra automatiquement en Mode de veille
après 10 minutes d’inutilisation. pour remettre le produit en marche,
mettez simplement l’interrupteur « ON / OFF » en position
OFF(ARRET) puis de nouveau en position ON (MARCHE).
Der Ein-/Ausschalter muss auf „OFF“ gestellt sein.
1. Öffnen Sie das Batteriefach: Lösen Sie die Schraube durch Drehen gegen den
Uhrzeigersinn mit einem Schraubenzieher. (siehe Abbildung A)
2. Legen Sie 3 AA Batterien mit der richtigen Polarität in das Batteriefach ein.
(siehe Abbildung B)
3. Schließen Sie das Batteriefach: Ziehen Sie die Schraube mit einem
Schraubenzieher im Uhrzeigersinn fest (siehe Abbildung C)
Hinweis: Das Fahrzeug geht automatisch in den Stromsparmodus,
wenn es 10 Minuten lang nicht bedient wird. Um weiter zu spielen,
stelle den Ein-/Ausschalter auf „AUS“ und dann auf „EIN“.
OR
ODER
• OU
OF
• O
OPPURE
•
ИЛИ
OU
3 x AA
A
B
C
RUSSIAN
PORTUGUÊS
ESPAÑOL
ITALIANO
FRANÇAIS
NEDERLANDS
ENGLISH
DEUTSCH


