


7. Firmware
This section describes the smart outlet reference design application firmware.
7.1 Obtaining the Firmware Application
The firmware application is loaded into the flash of the ERF32MG1P232F256 during the manufacturing process. The firmware applica-
tion source code is delivered as part of EmberZNet PRO, which is available to registered users of a development kit.
For more information, visit the ZigBee
Getting Started
page.
7.2 Programming the Reference Design
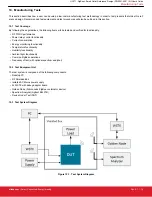
The reference design provides two methods to reprogram the demo board:
• Using the mini-Simplicity header with an .s37 or .hex image file.
• Using the over-the-air (OTA) upgrade feature with an .ota image file.
7.2.1 Board Header Reprogramming
The reference design can be reprogrammed with an available .s37 or .hex file and a wireless starter kit with Mini Simplicity header. The
Mini Simplicity Connector on the reference design is the U1 header. Notice the orientation of the connector, where the keyed side of the
connector corresponds to the Mini Simplicity key marking found with the silkscreen drawing surrounding the U1 header.
SHOCK HAZARD:
Do not connect the U1 header while the smart outlet reference design is plugged into AC-mains power as this will
cause damage to the Mini Simplicity programmer, the reference design, or both. An isolation transformer may be used on the AC-mains
supply to allow operation while the Mini Simplicity programmer is connected.
7.2.2 Over-the-Air Reprogramming
The demo board can be reprogrammed with an available .ota file and a device that can perform OTA upgrades such as the RD-0001 or
RD-0002 ZigBee USB Gateway Kit supported by Silicon Labs. Refer to the gateway documentation for more information on how to
reprogram via OTA upgrade.
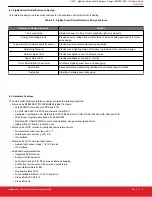
7.3 Build Instructions
The instructions below describe how to build the device firmware.
1. Install EmberZNet PRO 5.7.4.1 or later.
2. Create a new Application Framework Configuration in AppBuilder and select the 5.7.4.1 SoC stack release.
3. Create a project using HaSmartOutlet sample application.
4. During Project Setup, verify that the proper chip (EFR32MG1P232F256GM48) is selected.
5. In AppBuilder, under the “hal configuration tab”, verify the architecture (EFR32MG1P232F256GM48) and Board header (ist_a0051:
Smart Outlet Reference Design) are properly selected.
6. Generate and note the directory in which the project files were created.
7. Save the project file into the directory you just created.
8. Compile in IAR version 7.80.2 or later.
At this point you can load the image onto the Smart Outlet reference design using the Board Header Reprogramming method described
above.
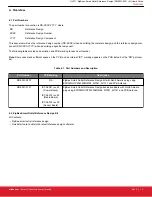
7.4 General Configuration
The device ID used is
0x0051
, which represents an occupancy sensor device, and the ZigBee Device Type is set to
Sleepy End
Device
. The board header is set to
ist_a0051: Smart Outlet Reference Design
.
UG171: ZigBee
®
Smart Outlet Reference Design (RD-0051-0201) Kit User's Guide
Firmware
silabs.com
| Smart. Connected. Energy-friendly.
Rev. 0.1 | 11


