


54
007-5688-003
6: Advanced Chassis Setup
SATA Drive Installation
The SATA drives are mounted in drive carriers to simplify their installation and removal from the
chassis. These carriers also help promote proper airflow for the drives. For this reason, even empty
carriers without hard drives installed must remain in the chassis.
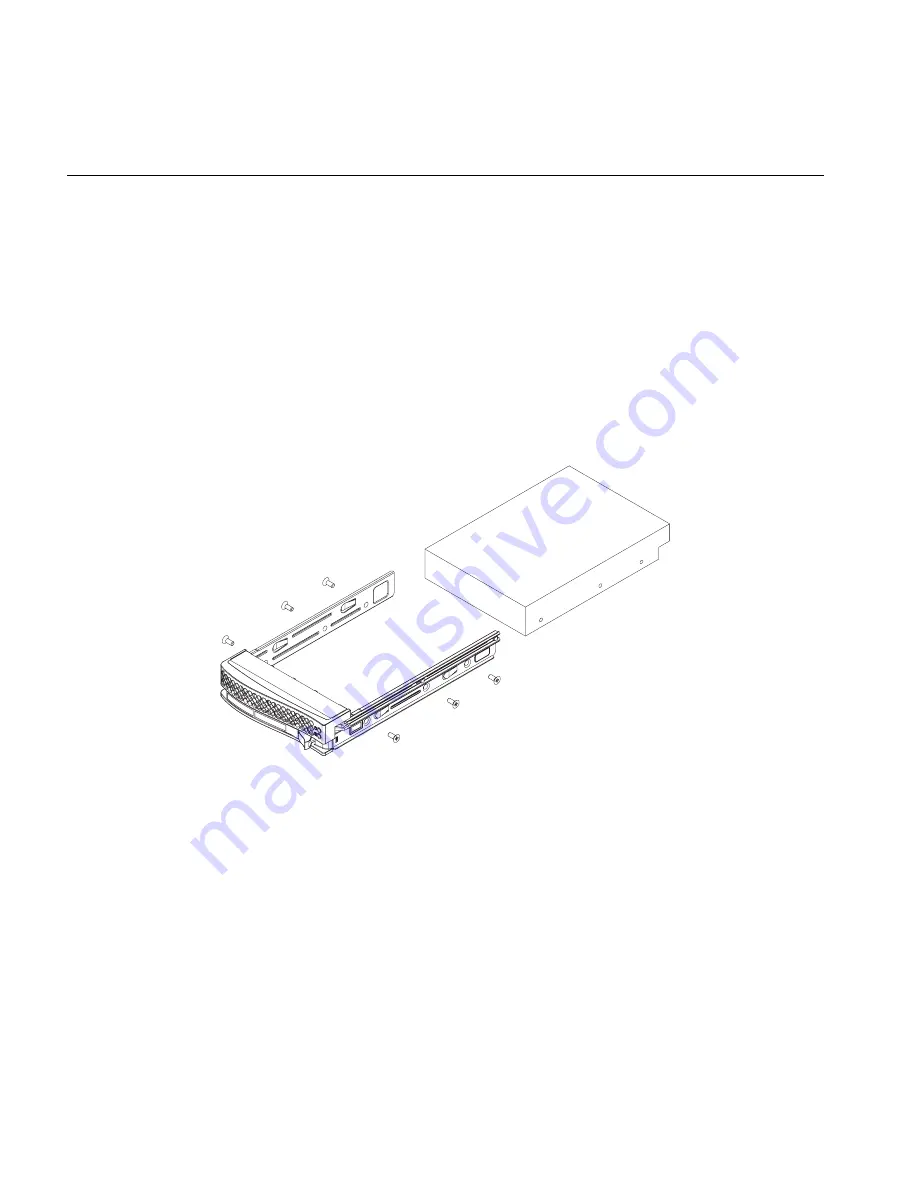
Mounting a SATA Drive in a Drive Carrier
1.
To add a new SATA drive, install the drive into the carrier with the printed circuit board side
facing down so that the mounting holes align with those in the carrier.
2.
Secure the drive to the carrier with four screws, as shown in
Figure 6-3
.
Figure 6-3
Mounting a SATA Drive in a Carrier
Installing/Removing Hot-swap SATA Drives
1.
Push the release button located beside the drive's LEDs.
2.
Swing the handle fully out and use it to pull the drive carrier straight out (see
Figure 6-4
).
Содержание Rackable C2108-TY10
Страница 1: ...SGI Rackable C2108 TY10 System User s Guide 007 5688 003 ...
Страница 4: ......
Страница 16: ......
Страница 22: ......
Страница 37: ...Check the Node Board Setup 007 5688 003 15 Figure 2 3 Accessing the Inside of the System ...
Страница 40: ......
Страница 48: ......
Страница 56: ...34 007 5688 003 5 Advanced Severboard Setup Figure 5 5 Installing DIMM Modules ...
Страница 80: ......
Страница 116: ......
Страница 118: ......


