


13
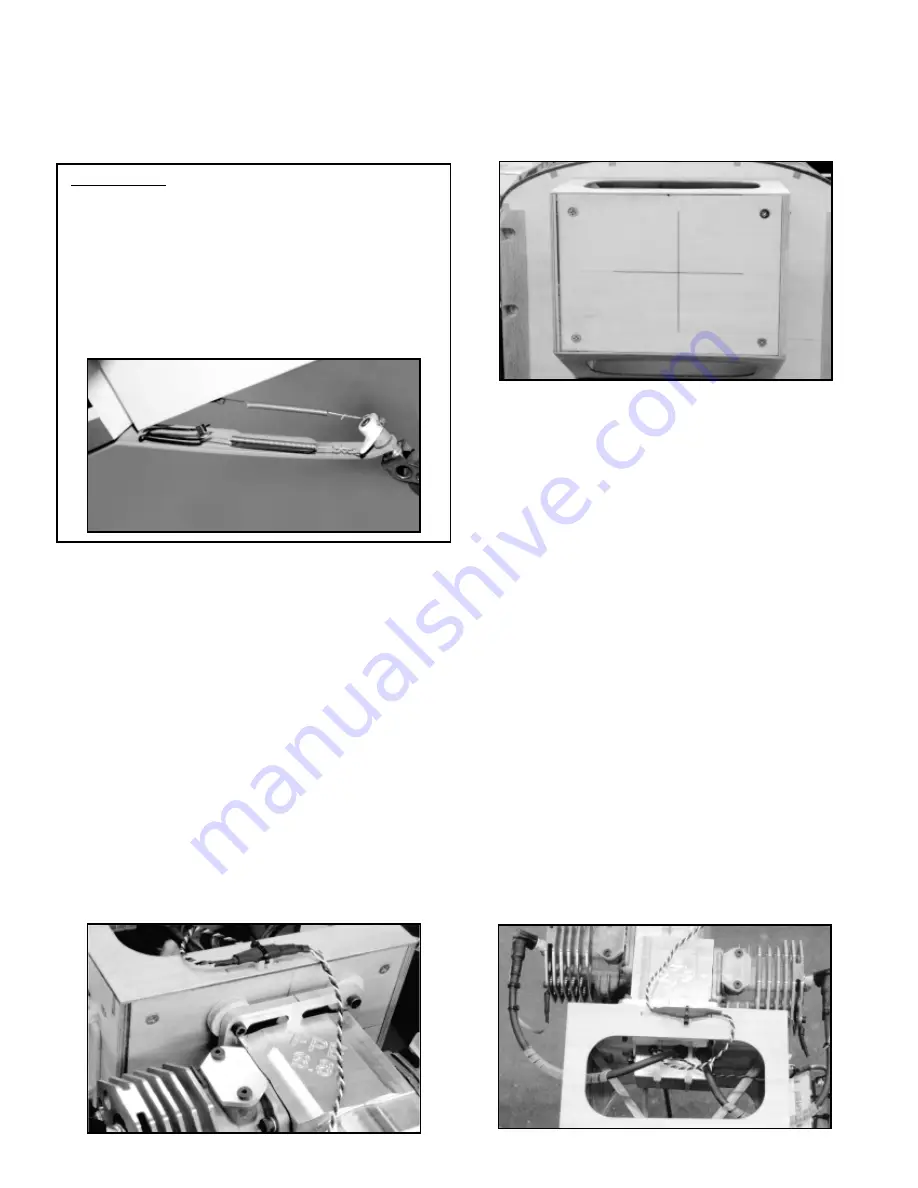
The firewall on the Edge 540T ARF has been factory-built with 2
O
of right thrust. The firewall has also been accurately marked with
vertical and horizontal centerlines.
These two lines, at their
intersection, represent the centered position of the engine when it
is mounted to the firewall, taking into account the built-in 2
O
of right
thrust and the 7-7/32" distance to the cowl's spinner ring opening.
Using the vertical and horizontal centerlines, you can now
accurately measure the motor mount plate location against the
firewall and its bolt hole mounting locations. If required, you must
also now make the firewall mounting spacers for your particular
engine, to move it forward enough to clear the cowl by 1/8" to 3/16"
when the spinner backplate is in place on the engine.
When the mounting bolt hole locations have been accurately
marked on the face of the firewall, use an electric drill and the
appropriate bit to make the required clearance holes for the bolts.
As also mentioned earlier, you will need to provide your own
mounting hardware. We used four #10-32 x 1-1/2" hardened steel
hex head bolts with #10-32 lock nuts and flat washers to mount our
F.P.E. 6.8 engine. The engine and spacers can now be mounted in
place to the firewall. Check the cowl fit by sliding it in place over
the engine (with the mufflers removed) and onto the front of the
fuselage. Make any adjustments necessary.
Mounting The Ignition Module:
We mounted the electronic ignition module for our F.P.E. 6.8
engine to a simple lite-ply tray that was made from scrap 1/8" lite-
ply, sized for our specific module. We glued a couple of pieces of
1/4" sq. balsa on each end of the tray to keep the module from
shifting and then glued two more pieces of 1/4" sq. balsa to the
opposite side of the tray to stand it off from the back face of the
firewall. We cut a piece of 1/4" foam rubber to fit between the tray
and the module. The module was then secured to the tray with a
pair of cable ties.
We used epoxy glue to then glue the module tray to the back face
of the firewall, directly behind the engine.
In our F.P.E. 6.8
installation, this module mount location was perfect for routing the
shown, center the bracket onto the bottom of the rudder, with the
left and right arms spaced equally on each side.
Mark the
locations of the two mounting holes onto the rudder with a
marking pen. Use a .042" dia. bit (#58 index drill) to drill two screw
guide holes at the marks just made. Mount the bracket in place
with the two T2 x 12mm PWA screws.
Mounting The Engine:
As mentioned earlier in this manual, the distance between the
firewall and the outside surface of the cowl, at the spinner location
is 7-7/32". As also mentioned, this distance is adjustable aft about
1/8" or can be moved forward as much as a 1/2" or so. Therefore,
you need to now measure the length of the engine that you plan to
install in your Edge. The measurement you need is the overall
length of the engine, from the back surface of the mounting plate
forward to the back surface of the spinner backplate when it's in
place.
This measurement will tell you how far forward your
particular engine needs to be spaced from the firewall to fit within
the cowl, leaving about 1/8" - 3/16" clearance between the back
surface of the spinner backplate and the cowl itself.
For example, to mount our F.P.E. 6.8 twin cylinder engine in place
with the correct relationship to the firewall and the spinner
backplate, we needed to space it's mount 1/4" forward from the
firewall.
We did this by using 1/4" plywood to make four 1"
diameter disks. These four disks were then center-drilled with a
.193" dia. bit (#10 index drill) to provide clearance holes for the four
#10-32 mounting bolts. The photo shows the firewall, spacers, and
the bolts already in place.
MODELER’S TIP: The connection between the two centering springs
and the "T" bracket on the bottom of the rudder can be made using
two small cable ties. Doing this allows easy and accurate centering
of the tail wheel to the rudder and also avoids metal-to-metal contact
between the spring ends and the "T" bracket. The only requirement
needed to do this is to drill oversize holes in the "T" bracket arms to
allow clearance for the cable ties. We used a 7/64" drill bit to drill out
these two holes in the bracket.
The centering springs are each
attached to the tail wheel tiller arms as usual. The opposite ends of
each spring were bent with round-nose pliers to create a couple of
small loops in the wire. The connection between the springs and "T"
bracket arms were then made with 4" cable ties at each spring.