


.
When dry, reinforce the seams by applying a little Thick CA glue on the inside of the cylinders. Let dry.
84d.
Carefully drag the bottom of the cylinder bank against a fine sanding block (150
grit or finer) to even out the edges. Don’t try to sand too fast or too hard. You’ll
crush the thin plastic. Just drag the part lightly back and forth across the block
and let the sandpaper do the work.
e.
The excess flange around the outside of each cylinder bank can now be carefully
trimmed and sanded to final shape. Use 220 grit sandpaper and/or small
jeweler’s files. Do not attempt to eliminate the seam completely, but rather work
to make it as uniform as possible for a good appearance. When the engine is
painted, the seam lines become very muted and won’t detract from the scale
appearance.
85.
If you intend to paint your cylinders a different color than the crankcase, like we
did ("steel" for the crankcase, "copper" for the cylinders), then you should paint
them now. Allow the paint to dry before continuing.
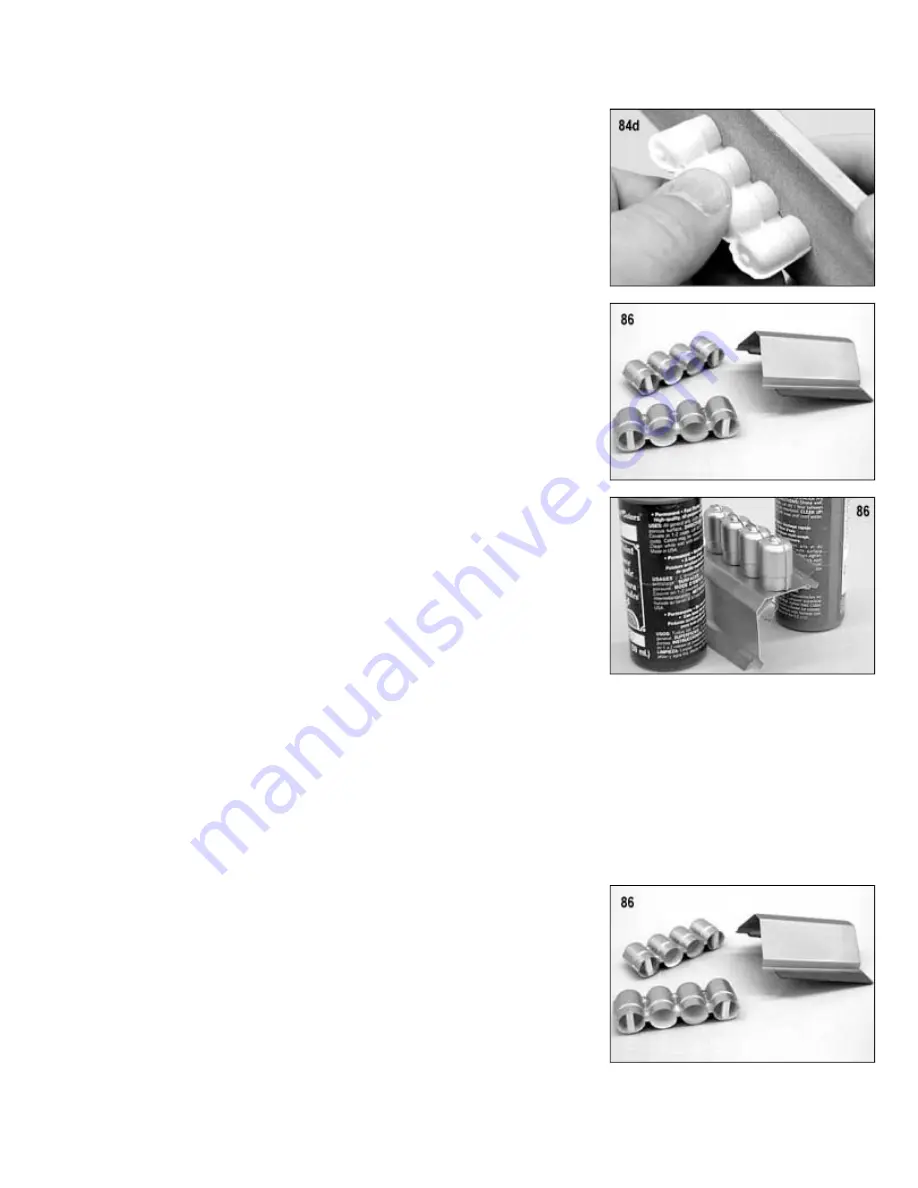
86a.
Cut four 1/2" long pieces of 1/8" sq. scrap balsa stick. Adjust the length of the
sticks as needed to fit inside the bottom of both end cylinders of each cylinder
bank. Glue the sticks in flush with the bottom edge of the plastic cylinder. These
sticks provide more gluing surface for attaching the cylinder banks to the
crankcase in the next step.
b.
Put a drop of Medium CA on the balsa gluing sticks and then, carefully set the
cylinder bank in place on the side of the crankcase. Prop the assembly up so the
cylinder bank won’t fall off and leave it alone to dry.
Note: We don’t use CA Accelerator during this installation because it can mar the
metallic paints we used on the cylinders and crankcase. Most brands of Medium
CA will dry on its own, without accelerator, in 15-20 minutes.
c.
When dry, glue the second cylinder bank in place on the other side of the
crankcase. Let dry.
87.
The dummy engine assembly, as provided in the kit, is now basically complete. For some modelers, this may be enough
and they will want to move on. However, there are always those who want a little more "eye candy" and will want to fully
detail the engines. For these folks, we'll share some additional detailing tips that we used on our dummy engines
(materials for these additional details is not provided).
As mentioned earlier in the PAINT section of this manual, we used a selection of flat Testor's Model Master™ plastic
model paints - both spray can and brushable types - for painting and detailing the dummy engine. The plastic crankcase
was sprayed with Steel. The cylinders were sprayed with Copper. We made the exhaust pipes out of 1/8" od K&S™
Aluminum Tubing, carefully bent to shape, and then, painted with Burnt Metal Buffing Metalizer™. Thin or medium CA glue
was used to attach the finished exhaust pipes to the cylinders.
The "sparkplugs" were made from 1/32" K&S™ Aluminum Tubing. Spray or brush
the tubing with Flat White or Flat White Primer and allow to dry. Cut 1/4" lengths
of the painted tubing for the sparkplug bodies. Cut 3/8" lengths of .031 music wire
for the sparkplug tips. Glue one of the music wire pieces into each sparkplug
body, leaving 1/8" of wire exposed. Use medium CA glue to install the spark
plugs into pre-drilled holes in the top of each cylinder head. Use a 1/2" long piece
of leftover 1/4" balsa dowel to simulate a distributor on the back end of the
crankcase.
The sparkplug wires are made from thin black or gray R/C hook-up or antenna
wire. Cut the 8 sparkplug wires to length, plus an extra inch on each one to work
with.
Use a pliers to pull the metal wire out of the plastic insulation. One end of the plug wire is placed over the wire tip of each
sparkplug (warming the tubing with a little heat relaxes it enough to do this). The other end of the tube is inserted into a
distributor. Done neatly, the overall effect can be very convincing!
Содержание Antoinette 1909
Страница 5: ... ...