Installation and Startup
Rev 4 Jan.15
27
7.
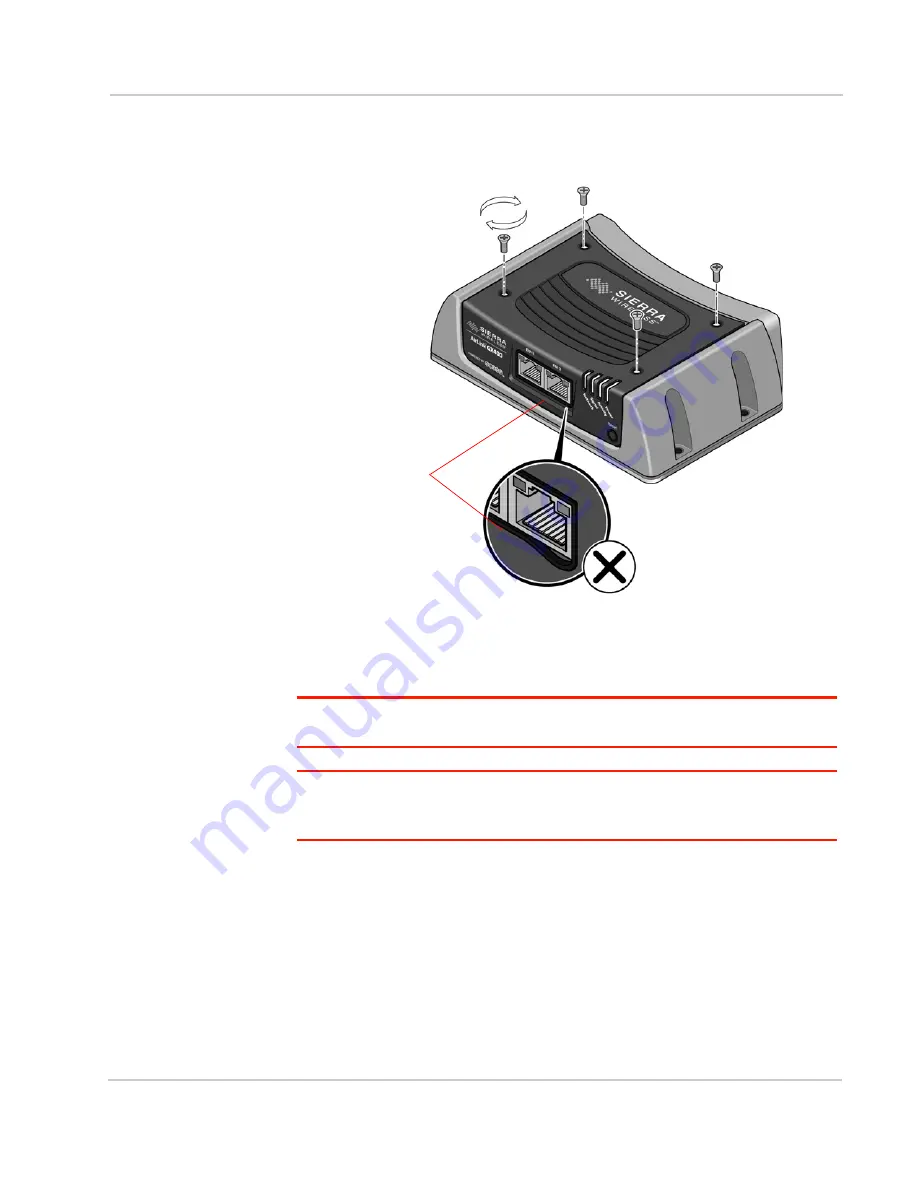
Use the 4 screws saved in step 1 to re-attach the decorative black cover.
Torque the screws to 5 in-lb. (0.6 N-m). Ensure that the screws are tight so
that the seal underneath the decorative black cover is tight against the device.
Figure 2-16: Replacing the screws (Dual Ethernet X-Card installed)
Mounting the GX Series
Warning:
This device is not intended for use close to the human body. Antennas should
be at least 8 inches (20 cm) away from the operator.
Note: The device has a hardened case for use in industrial and extreme environments. If
you are installing it in these types of environments, use cables designed and specified for
use in these types of environments to avoid cable failure.
Mount the device where:
•
There is easy
access to the cables
•
Cables are not bent, constricted, close to high amperages or exposed to
extreme temperatures
•
Cables are secured to ensure reliable connections
•
The front panel LEDs are easily visible
•
There is adequate airflow
•
It is kept free from direct exposure to the
elements, such as sun, rain, dust,
etc.
black gasket around
the Ethernet ports
Содержание Airlink GX450
Страница 1: ...AirLink GX Series Hardware User Guide 4114008 Rev 4...
Страница 2: ......
Страница 6: ...AirLink GX Series Hardware User Guide 6 4114008...
Страница 62: ...AirLink GX Series Hardware User Guide 62 4114008...
Страница 68: ...AirLink GX Series Hardware User Guide 68 4114008...
Страница 71: ......
Страница 72: ......


