


Installation and Startup
Rev 4 Jan.15
21
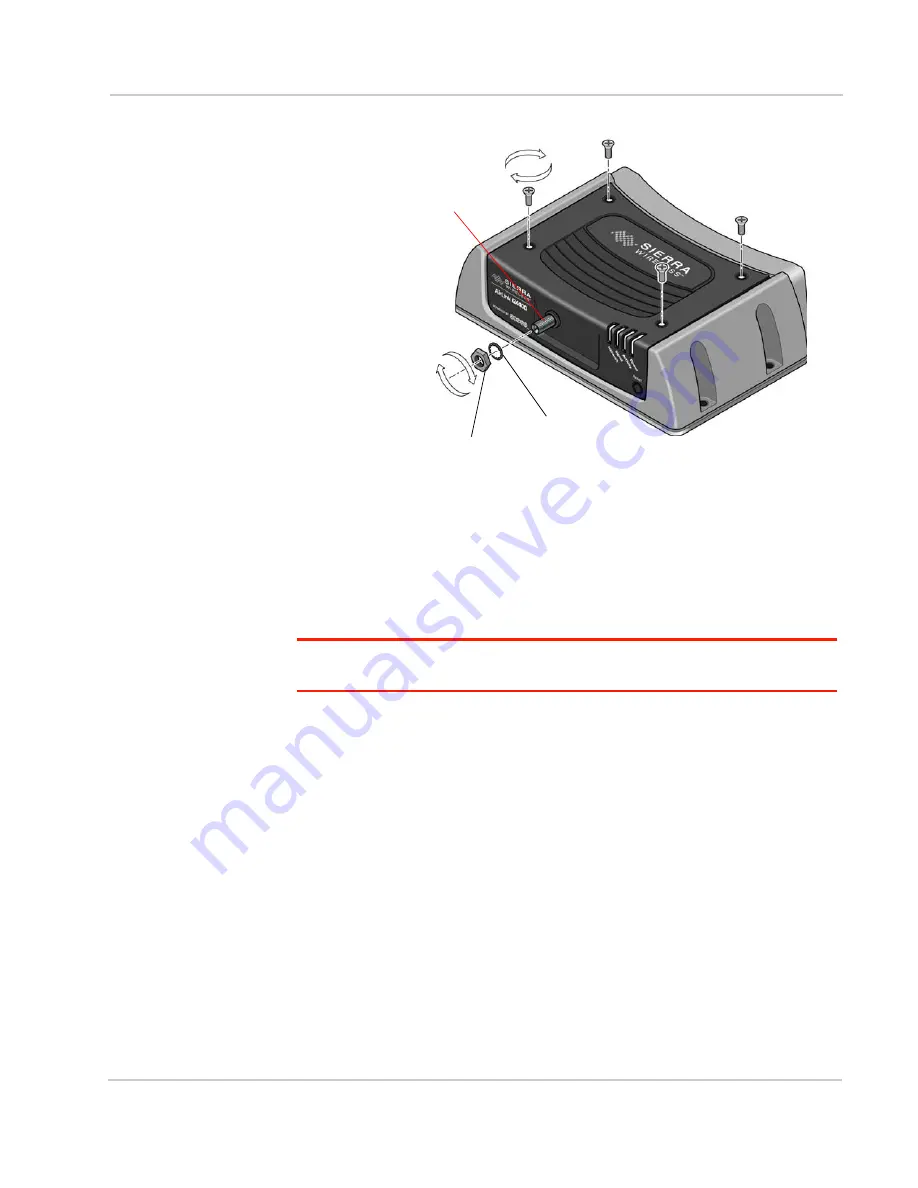
Figure 2-6: Replacing the screws, nut, and washer (Wi-Fi X-Card installed)
10.
Place the lock washer onto the SMA antenna connector and move it to the
back of the connector, so it is touching the decorative black cover.
11.
Install, then tighten the nut with a 5/16" or 8 mm socket torque wrench to a
torque specification of 8in-lbs (0.9 N-m).
Installing the SIM Card—I/O X-Card present
Important:
Failure to follow these instructions carefully may damage the X-Card and
void the warranty agreement.
To install a SIM card in a GX Series device with an I/O X-Card installed:
1.
Unscrew the two 4-40 male to female hexagonal threaded standoffs (jack
screws) on either side of the serial port at the front of the device, using the
socket and wrench. Keep the hexagonal threaded standoffs for reinstallation.
2.
Remove the four screws used to secure the black decorative cover. Use a
2 mm Allen (hex) wrench or a Phillips #1 screwdriver, depending on the screw
type used on the decorative black cover. Save the screws for reinstallation.
lock washer
hexagonal nut
SMA antenna connector
Содержание Airlink GX450
Страница 1: ...AirLink GX Series Hardware User Guide 4114008 Rev 4...
Страница 2: ......
Страница 6: ...AirLink GX Series Hardware User Guide 6 4114008...
Страница 62: ...AirLink GX Series Hardware User Guide 62 4114008...
Страница 68: ...AirLink GX Series Hardware User Guide 68 4114008...
Страница 71: ......
Страница 72: ......


