background image

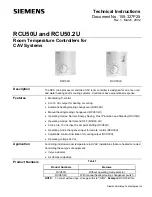
RCU50U and RCU50.2U Room Temperature Controllers Technical 

Instructions 

For VAV Systems 

Document Number 155-327P25 


Rev. 1, March, 2002 

Information in this publication is based on current specifications. The company reserves the right to make changes in specifications and models as 
design improvements are introduced. Other product or company names mentioned herein may be the trademarks of their respective owners.  
© 2002 Siemens Building Technologies, Inc. 

Siemens Building Technologies, Inc. 
1000 Deerfield Parkway 
Buffalo Grove, IL  60089-4513 
U.S.A. 

Your feedback is important to us. If you have 
comments about this document, please send 
them to 

[email protected]


Document No. 155-327P25 

Printed in the U.S.A. 

Page 11 


Wiring Diagrams 

G

G0

7

D1 GND

6

4

5

1

2

3

1mA
max.

24 V

A

C

TH0638R1


G

G0

7

6

24 V

AC

5

4

1mA
max.

TH0637R1


Figure 14.  RCU50U Wiring Diagram. 

Figure 15.  RCU50.2U Wiring Diagram. 


Signal input set point shift 

2 Measuring 

neutral 

Heat/cool "changeover sensor" input 

0 to 10 Vdc control signal 

Ground for control signal 

Operating voltage, 24 Vac negative 

Operating voltage, 24 Vac positive 

D1 

Signal input for potential-free 
operating mode changeover switch 

24 Vac, digital input 

G0 24 

Vac 

GND Ground 
 

Dimensions 


4.49

(114.15)

TH0575R1

3.80

(96.6)

1.69

(42.8)


TH0576R1

0.16 (4)

1.10

(28)

1.10

(28)

1.02

(26)

1.18

(30)

1.38

(35)

0.46

(11.8)

0.16

(4)

4.09

(104)

3.34

(90)

1.18

(30)

1.10

(28)

1.10

(28)

 0.16 (4)


Figure 16.  Controller and Baseplate Dimensions in Inches (Millimeters). 


Содержание RCU50.2U

Страница 1: ...ver RCU50 2U Operating modes Normal Energy Saving Frost Protection and Standby RCU50U Operating modes Normal and OFF RCU50 2U Active 0 to 10 Vdc input for set point shifting RCU50U Operating mode changeover input for remote control RCU50U Adjustable minimum limitation for cooling output RCU50U Operating voltage 24 Vac Application Controlling individual room temperature in HVAC installations that a...

Страница 2: ...crease in temperature the output signal goes down Reverse Acting R A from 10 to 0 volts When in cooling mode on increase in temperature the output signal goes up Direct Acting D A from 0 to 10 volts RCU50 2U The output signal can be reversed 0 to 10 or 10 to 0 volts via the DIP switch Heating Cooling with Minimum Limitation Cooling TH0577R1 T F XpK XpH W Y10 Y10 100 0 100 c o VR T Room temperature...

Страница 3: ... point can be shifted by 22 5 F at 72 F set point The neutral position is at 5 Vdc and means no set point shift TH0621R1 1 0 0 5 72ºF 10 22 5ºF 22 5ºF 22 5ºF 22 5ºF W2 W1 72ºF W T ºF 100 heating cooling Set Point Shift K Input Voltage V Q W Original set point W1 Highest set point at 10V input W2 Lowest set point at 0V input set point shift V Input voltage Figure 4 Set Point Shifting RCU50U Automat...

Страница 4: ...ature falls below 46 F 8 C the controller will automatically switch to frost protection mode In that case the heating valve opens and the room temperature is maintained at a set point of 46 F 8 C The set point adjusted by the user will be ignored Energy Saving Mode Energy saving mode can be initiated by activating the external operating mode changeover switch if DIP Switch No 1 is set to ON In ene...

Страница 5: ...ct of switch is closed N O 1 Changeover activated when contact of switch is open N C 3 Standby OFF Frost protection mode heating output ON at a set point of 46 F 8 C 1 4 P band 2 F 1 C in heating mode 1 F 0 5 C in cooling mode 7 F 4 C in heating mode 1 3 5 F 2 C in cooling mode 1 5 Cooling signal output in energy saving mode Active Inactive 1 Table 4 RCU50 2U DIP Switches DIP Switch No Meaning Pos...

Страница 6: ...er should be opened by authorized personnel only Figure 8 Acceptable Mounting Height When mounting the unit attach the controller base first Then make the electrical connections and fit and secure the cover The controller must be mounted on a flat wall and in compliance with local regulations Any radiator valves in the room must be set to their fully open positions upon start up User input via set...

Страница 7: ...controller base 8 Level mounting plate 9 Using the two wood screws provided fasten controller base to wall Thermostat is not position sensitive 10 Pull the wiring through the controller base 11 Position controller housing over the two mounting lugs located at the top of the controller base and press down on cover until bottom lugs snap in place 12 Terminate wires per wiring instructions located ab...

Страница 8: ...rom the controller base and push up to remove cover from two tabs located at the top of the controller base 3 Separate the controller base from the controller 4 Using the four screws provided fasten wall box adapter 3 to plaster ring 2 Plaster ring supplied by others 5 Flex adapter mask 4 and snap in place inside wall box adapter 3 6 Fasten the controller base 5 included with controller to wall bo...

Страница 9: ... of the controller from the controller base and push up to remove cover from two tabs located at the top of the controller base 3 Separate the controller base 5 from the controller 6 4 Using the two screws provided fasten wall box adapter 3 to plaster ring 2 Plaster ring supplied by others 5 Flex adapter mask 4 and snap in place inside wall box adapter 3 6 Pull wires through plaster ring 2 7 Faste...

Страница 10: ...t D1 RCU50U Contact sensing 6 to 15 Vdc 3 to 6 mA Insulation against live voltage 4 kV Maximum number of contacts connected 50 in a panel Status inputs 1 and 2 RCU50U Set point shift of 22 5 F 72 F 22 C 0 to 10 Vdc Neutral position no set point shift 5 Vdc Signal input terminals 2 and 3 for changeover QAH11 1 safety class 2 sensor NTC resistor 3K Ω 77 F 25 C Maximum copper cable length 16 AWG For ...

Страница 11: ...em to technical editor sbt siemens com Document No 155 327P25 Printed in the U S A Page 11 Wiring Diagrams G G0 7 D1 GND 6 4 5 1 2 3 1mA max 24 VAC TH0638R1 G G0 7 6 24 V AC 5 4 1mA max TH0637R1 Figure 14 RCU50U Wiring Diagram Figure 15 RCU50 2U Wiring Diagram 1 Signal input set point shift 2 Measuring neutral 3 Heat cool changeover sensor input 4 0 to 10 Vdc control signal 5 Ground for control si...

Отзывы: