


Siemens Industry, Inc.
Building Technologies Division
A6V11231630_en--_b
3
INSTALLATION
Remove ELECTRICAL POWER prior to installing the FCM2041-U3 in the enclosure.
Set the Network Address
Remove the FCM2041-U3 from its anti-static bag. Set the two-digit address using
the 10-position rotary switches (S2, S3) located on the back of the FCM2041-U3. For
a standalone HNET panel, set the address of the FCM2041-U3 to 01. Be sure to set
leading zeros. In the Zeus Physical View, make sure that the FCM2041-U3 is config-
ured at address 253.
When the FCM2041-U3 is used for networking with other panels, set the two-digit
network address to the XNET node address that has been assigned in Zeus. Be sure to
set leading zeros. For example, Node 2 is set at 02. In the Zeus Physical View, the
HNET address of the PMI is automatically set to 253 when operating in an XNET panel.
The table below details the differences between the network address settings in a
FCM2041-U3 and a PMI.
S
E
H
C
T
I
W
S
S
S
E
R
D
D
A
K
R
O
W
T
E
N
E
H
T
G
N
I
T
T
E
S
3
U
-
1
4
0
2
M
C
F
y
r
a
t
o
R
f
o
r
e
b
m
u
N
s
e
h
c
t
i
w
S
s
s
e
r
d
d
A
o
w
T
)
3
S
,
2
S
(
)
e
n
o
l
a
d
n
a
t
S
(
T
E
N
H
)
I
M
P
n
o
g
n
i
t
t
e
S
(
.
1
0
o
t
s
s
e
r
d
d
a
t
e
S
.
)
h
c
t
i
w
s
s
n
o
i
t
p
O
(
4
S
n
o
g
n
i
t
t
e
s
o
N
)
s
u
e
Z
n
i
g
n
i
t
t
e
S
(
t
a
d
e
r
u
g
i
f
n
o
c
s
i
3
U
-
1
4
0
2
M
C
F
e
h
t
e
r
u
s
e
k
a
M
.
w
e
i
v
l
a
c
i
s
y
h
p
s
u
e
Z
e
h
t
n
i
3
5
2
s
s
e
r
d
d
a
)
k
r
o
w
t
e
N
(
T
E
N
X
)
I
M
P
n
o
g
n
i
t
t
e
S
(
.
)
h
c
t
i
w
s
s
n
o
i
t
p
O
(
4
S
n
o
g
n
i
t
t
e
s
o
N
t
i
g
i
d
-
o
w
t
e
h
t
o
t
s
s
e
r
d
d
a
e
d
o
n
T
E
N
X
e
h
t
t
e
S
.
s
u
e
Z
n
i
t
i
r
o
f
d
e
n
g
i
s
s
a
s
s
e
r
d
d
a
)
s
u
e
Z
n
i
g
n
i
t
t
e
S
(
m
o
r
f
(
s
s
e
r
d
d
a
e
d
o
n
t
i
g
i
d
-
o
w
t
T
E
N
X
e
h
t
t
e
S
o
t
e
r
u
s
e
B
.
e
e
r
t
l
a
c
i
s
y
h
p
s
u
e
Z
e
h
t
n
i
)
4
6
-
1
0
.
s
o
r
e
z
g
n
i
d
a
e
l
t
e
s
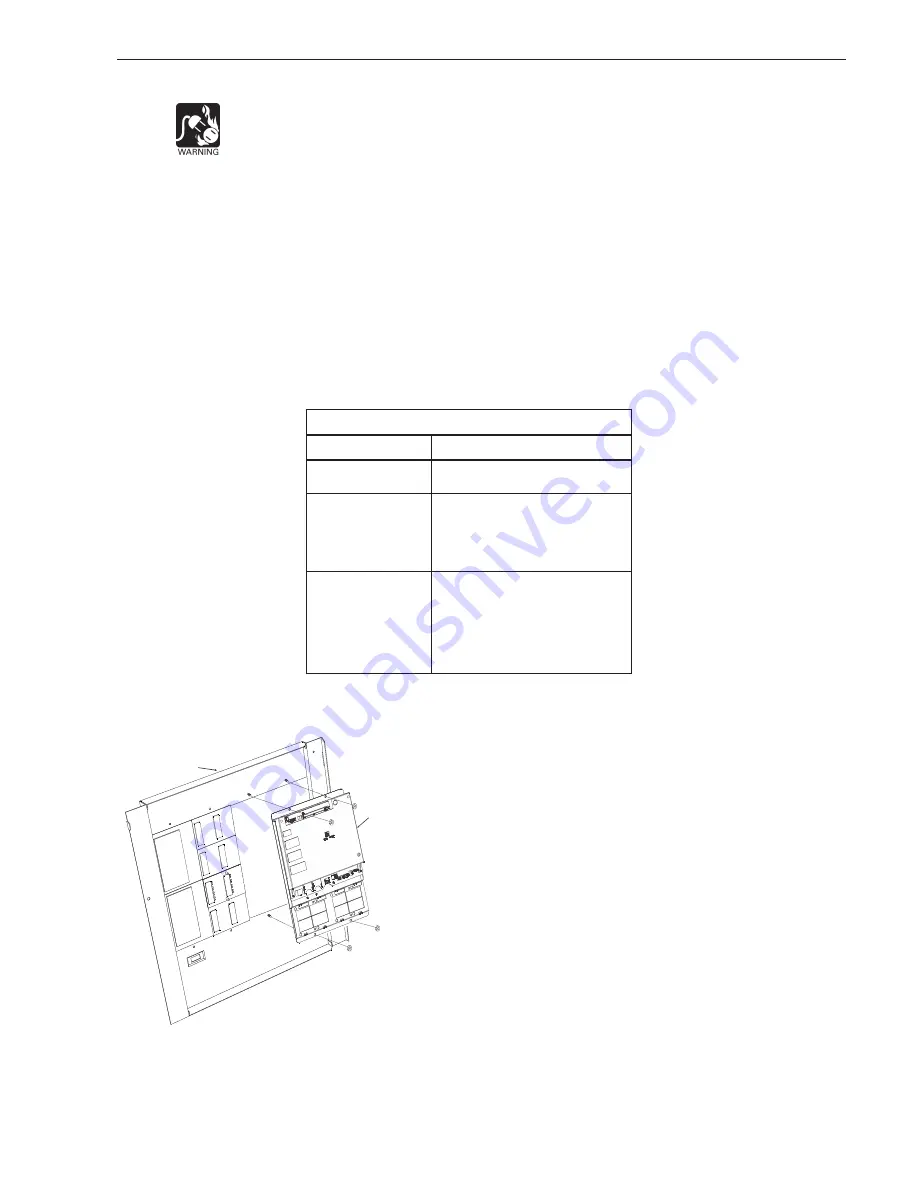
Mount the FCM2041-U3
The FCM2041-U3 mounts to the rear of the inner door in the CAB-1, CAB-2, CAB-3,
REMBOX2 or REMBOX4 enclosures. Select the location of the
FCM2041-U3. It can be mounted either in the center or on the left
side of the inner door, when viewed from the outside of the
enclosure. Place the FCM2041-U3 onto the inner door from the rear,
over the four mounting studs in the desired location. Secure the
FCM2041-U3 to the inner door with the four nuts provided. (Refer to
Figure 4.)
A 40 inch long 60 wire cable, P/N 555-133743, connects the
FCM2041-U3 to the CC-5. The CC-5 is located in the back of the
enclosure on the left hand side. Connect one end of the cable to J2
on the FCM2041-U3. J2 is marked with “CC-5” on the FCM2041-U3
printed circuit board. Connect the other end of the cable to P1 on the
CC-5. (Refer to Figure 5.)
Connect the FCM2041-U3 to the RNI in a REMBOX2/4. The RNI is
located in the back of the enclosure on the top left hand side.
Connect one end of the cable to J2 on the FCM2041-U3. J2 is
marked with “CC-5” on the printed circuit board. Connect the other
end of the cable to JP1 on the RNI. (Refer to Figure 6.)
Figure 4
Mounting the FCM2041-U3 to
the Rear of the Inner Door
INNER DOOR
FCM2041-U3


