background image

in the other direction to catch the strongest signal. 

You can also move the radio to a different location or turm it 

control knob (3). If the reception signal is too weak, try to move the antenna. 

by turning the volume

function keys (1

the frequency range (the 

radio on, press the ON switch on the left side of the radio case (26).


AM  band or FM (VHF) band button to set 

AM frequency band

device (RCD) in the power circuit, with residual current rating not more than 30 mA. Contact 

professional electrician in this matter.

15. Avoid getting the radio wet. 

16. The radio may only be wiped with a dry cloth. Do not use water or cleaning fluids.

17. Special discs for cleaning the CD player should be used regularly.

18. The radio should be kept in a dry room.

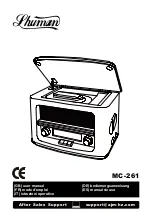
DESCRIPTION OF THE DEVICE

1. 

          2. FM frequency scale (VHF)          3. Volume control knob

4. CD player cover support          5. CD player cover          6. CD plate          7. CD/MP3 player function keys

8. Speakers          9. USB port          10. Headphone jack          11. Function keys: AM (radio – long frequency band), FM (radio, VHF band), 

CD/USB (CD and MP3 player)          12. FM.ST indicator (radio reception in stereo)          13. Remote control sensor

14. Frequency control knob          15. The LED indicator for playing pre-programmed playlist          16. Track number display

17. REPEAT/ALL – repeat mode button for song/all songs          18. PROGRAM – button to program the playlist

19. B.SKIP – the BACK button          20. F.SKIP – the FORWARD button          21. PLAY/PAUSE – the PLAY/PAUSE button

22. STOP – the STOP button          23. Security lock lifting lever           24. Power cable          25. FM antenna

26. ON/OFF switch          27. 10 tracks FORWARD button          28. 10 tracks BACK button          29. REPEAT, see no. 17

30. PROGRAM, see no. 18.          31. PLAY/PAUSE, see no. 21          32.STOP, see no. 22         33. UP/FF – the FORWARD button

34. DN/FB – the BACK button

USING THE REMOTE 

When pressing the control function keys, the remote should be pointed towards the remote control sensor (13). Description of the remote 

control function keys is provided in the device description.

LISTENING TO THE RADIO

Before first use, unpack everything and remove all protective materials. Unwind the FM antenna cable and power cable. Do not cover the 

ventilation holes, make sure that there is a space of a few centimeters around the radio, which is required for proper ventilation. To turn the 

1). While turning the frequency control knob (14), find the desired station. You can set the volume 

PLAYBACK OF AUDIO CDs OR MP3 CDs

Important: The CD player can play audio CDs, CD-R and CD-RW discs. It may not be possible to read some discs due to mechanical 

failure, the quality of the media or the software used to burn the disc. There is no 100% guarantee that all CDs or MP3 disc will be read. 

The device may not be compatible with all the files because of the differences in the coding.

1.Turn on the device by pressing the button (26). Press the CD/USB function key (11). The CD play mode will start. 

2.Lift the cover (5) until it locks on the CD player cover support (4).

3.Using the lever (23), lift the CD safety lock. Put the CD on the spindle with the label up. Push the lock down. To close the cover (5),

gently pull the player cover support towards you (4) and gently lover the cover (5).

4.The track number display (16) will flash for a few seconds and then it will display the number of tracks on the disc or folder (for Mp3

discs). 

5.The player will automatically start with the first track. The disc will play until the end of the last track.

REPEAT DISC/TRACK OPTION

Set the number of the track pressing the DN/F.B (34) and the UP/F.F buttons (33). Press once the REPEAT/ALL button (17).

To play all tracks from MP3 disc or folder – press the REPEAT/ALL button (17) twice.

PROGRAMMING PLAYBACK SEQUENCE

1.Press the PROGRAM button (18). Select the track that you want to add to the playlist pressing the DN/F.B (34) and UP/F.F (33)

buttons. Press the PROGRAM button again. 

The track is added to the memory. Select the next track. 

The memory function can program 20 audio tracks and 99 MP3 tracks in sequence.

2.To play the programmed playlist, press the Play/Pause button.

You can use the play repeat mode (read: disc/track repeat option). 

To exit the programmed playlist play mode, press the LW or FM function keys (11) or lift the disc safety lock lever (23). 
PLAYBACK OF MP3 FILES FROM USB MEMORY

1.Turn on the device by pressing the button (26). Press the CD/USB function button (11). The CD and MP3 play mode will start. Verify

5

Содержание MC-261

Страница 1: ... GB FR mode d emploi ES manual de uso IT istruzioni operative user manual DE bedienungsanweisung After Sales Support support ajm hz com MC 261 ...

Страница 2: ...2 ...

Страница 3: ...3 ...

Страница 4: ...arried out under supervision 6 After you are finished using the product always remember to gently remove the plug from the power outlet holding the outlet with your hand Never pull the power cable 7 Never put the power cable the plug or the whole device into the water Never expose the product to the atmospheric conditions such as direct sun light or rain etc Never use the product in humid conditio...

Страница 5: ...Do not cover the ventilation holes make sure that there is a space of a few centimeters around the radio which is required for proper ventilation To turn the 1 While turning the frequency control knob 14 find the desired station You can set the volume PLAYBACK OF AUDIO CDs OR MP3 CDs Important The CD player can play audio CDs CD R and CD RW discs It may not be possible to read some discs due to me...

Страница 6: ...ndere Zwecke als den bestimmungsgemäßen Gebrauch 3 Das Gerät ausschließlich an die Steckdose 230 V 50 Hz anschließen Es darf nicht zu anderen bestimmungswidrigen Zwecken benutzt werden Wegen Vorsichtsmaßnahmen sollten keine weiteren Geräte an den gleichen Stromkreis angeschlossen werden 4 Falls sich Kinder in der Nähe befinden sollte bei der Nutzung des Gerätes spezielle Vorsicht bewahrt werden Di...

Страница 7: ...luss 10 Kopfhörer Anschluss 11 Funktionstasten AM FM Radio UKW Frequenzbereich CD USB CD und MP3 Player 12 Anzeige des FM ST Stereo Signals Radioempfang im Stereo Modus 13 Fühler der Fernüberwachung 14 Drehknopf für die Frequenzeinstellung 15 Die Diode signalisiert die Wiedergabe der programmierten Liste der Musikstücke 16 Display für die Anzeige der Nummer des Musikstücks 17 REPEAT ALL Taste für ...

Страница 8: ... Beendigung der Wiedergabe der im Wiederholungsmodus programmierten Musikstücke erfolgt durch das Drücken der Funktionstasten 11 AM oder FM oder das Anheben 23 der Klemme welche die Platte schützt WIEDERGABE DER MP3 DATEIEN AUS DEM USB SPEICHER 1 Schalten Sie das Gerät mittels der Taste 26 ein Drücken Sie die Funktionstaste CD USB 11 Es wird der Lesemodus für Platten und MP3 aktiviert Vergewissern...

Страница 9: ... atmosphériques pluie soleil etc Ne pas l utiliser non plus dans des conditions d humidité élevée salle de bain mobile homes humides 8 Vérifier périodiquement l état du cordon d alimentation Si le cordon d alimentation est endommagé il devra être changé par un service de réparation spécialisé afin d éviter le danger 9 Ne pas utiliser l appareil si le cordon d alimentation est endommagé si l appare...

Страница 10: ...strement La possibilité de lire tous les disques CD ou MP3 ne peut être totalement garantie Compte tenu des possibles différences de codage l appareil peut ne pas être compatible à tous les fichiers 1 Mettre l appareil en marche avec la touche 26 Appuyer sur la touche de fonction 11 CD USB La fonction de lecteur CD va être mise en marche 2 Soulevez le capot 5 jusqu à ce qu il se bloque sur la tige...

Страница 11: ...ar varios equipos electrónicos a un mismo circuito 4 Hay que actuar con especial precaución durante el uso del equipo si los niños están a su alcance No dejar que los niños jueguen con el equipo ni que los niños o personas no familiarizadas usen el equipo 5 ADVERTENCIA Este dispositivo puede ser utilizado por niños mayores de 8 años y personas con capacidades físicas sensoriales o mentaleslimitada...

Страница 12: ...ncia está en la descripción del dispositivo ESCUCHAR LA RADIO Antes del primer uso desembale todo y retire todos los materiales de protección Desenrolle el cable de la antena FM y el cable de alimentación No cubra los orificios de ventilación asegúrese de que alrededor de la radio hay unos centímetros de espacio necesario para una correcta ventilación Para encender el receptor mueva la antena T RE...

Страница 13: ...eproductor de CD 4 La radio debe ser guardada en un lugar seco ATENCIÓN No use agua para limpiar ya que podría dañar la radio FICHA TÉCNICA Tensión de alimentación 230 V 50 Hz Alimentación del mando a distancia pila tipo Cr2025 Potencia de RMS de salida 2 x 2 W potencia 19 W Preocupación por el medio ambiente Por favor lleva las cajas de cartón a un sitio de reciclaje Las bolsas de polietileno se ...

Страница 14: ...ione 7 Non mettere mai il cavo di alimentazione la spina o l intero dispositivo nell acqua Non esporre mai il prodotto a condizioni atmosferiche quali luce diretta del sole o pioggia ecc Non utilizzare mai il prodotto in condizioni di umidità 8 Controllare periodicamente le condizioni del cavo di alimentazione Se il cavo di alimentazione è danneggiato il prodotto deve essere girato in un luogo di ...

Страница 15: ...inché non si blocca sul supporto del coperchio del lettore CD 4 3 Utilizzando la leva 23 sollevare il blocco di sicurezza del CD Metti il CD sul mandrino con l etichetta rivolta verso l alto Spingere il blocco verso il basso Per chiudere il coperchio 5 tirare delicatamente il supporto del coperchio del lettore verso di sé 4 e amarlo delicatamente del coperchio 5 4 Il display del numero di traccia ...

Страница 16: ...ibed above is in conformity with the relecant European Union harmonization legislation RED Directive 2014 53 EU EMC Directive 2014 30 EU LVD Directive 2014 35 EU ROHS Directive 2011 65 EU The product meets the requirements of the following standards EN 55013 2013 A1 2016 EN 61000 3 2 2014 EN 61000 3 2 2013 EN 55020 2007 A11 2011 EN 61000 4 2 2009 EN 61000 4 3 2006 A1 2008 A2 2010 EN 61000 4 4 2012...

Отзывы: