


MILL TURN AND TURNADO BENCH ARE THE SAME
picture shows doors removed and toolboxes installed
CHOOSING A LOCATION AND WIRING
Now that your machine is all prepared to move into place, you need to
decide on its placement. Keep in mind access for future maintenance and
cleaning. Ideally, you should be able to walk around the machine, but we
know that many of these machines are going into home garages where space
is limited. With the casters, you can easily move the machine around should
the need arise. Keep in mind that the access panel for your electronics is on
the left as you face the machine and should you be turning long parts in the
lathe which protrude through the spindle, you will need some space on the
left side. You definitely do not want to place the left side in a corner. Once
you have chosen your location, its time to run your wiring. The machine
comes with a 6’ long cord wired to a NEMA 6-15 220 volt plug. The NEMA
6-15 is a common plug found at any home improvement store and you can
find the corresponding outlet as well. You will only need a single 15 amp 220
volt circuit and plug for the machine.
Содержание MILL TURN
Страница 12: ......
Страница 13: ......
Страница 14: ......
Страница 15: ...5C COLLET SET 4 JAW CHUCK ...
Страница 16: ...FOLLOW REST ...
Страница 17: ...STEADY REST ...
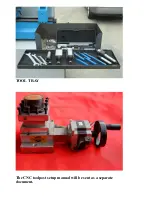
Страница 18: ...TOOL TRAY The CNC toolpost setup manual will be sent as a separate document ...