


When using the threading wizard in Mach 3, these settings will be set
automatically, but if writing your own program, be sure they are set as follows;
Distance- absolute
IJ - incremental
Active plane- X, Z
These settings are found in CONFIG>GENERAL CONFIG
4. SPINDLE SETUP SETTINGS
Your settings should be as follows:
USE SPINDLE MOTOR OUTPUT CHECKED
PWM CONTROL CHECKED
STEP/DIR MOTOR UNCHECKED
USE SPINDLE FEEDBACK IN SYNC MODE CHECKED
CLOSED LOOP SPINDLE CONTROL UNCHECKED
SPINDLE SPEED AVERAGING CHECKED
These settings are found in CONFIG>PORTS & PINS> SPINDLE SETUP
5. FEED RATES AND SPINDLE RPM
The VFD drives and motors are more consistent at higher rpm’s, so we try to cut
threads with the spindle as fast as possible. However, this can change with material
type etc. In your Z axis settings under CONFIG>MOTOR TUNING, you have
established your feed rates from your previous tuning setups. For the TURNADO,
the Z will be about 60 IPM max. Mach 3 synchronizes the spindle rpm and the feed
rate to achieve the proper thread pitch. Course threads require faster feed rates
than fine threads. In the threading wizard you may encounter an error message
stating “Over Max Feed Rate !!!!”. This is saying that the spindle rpm is too fast
for the maximum feed rate of your Z axis. Simply begin reducing the RPM setting
down until the error message disappears.
NOTE: When making changes in the thread wizard settings you must hit ENTER
on your keyboard to save the setting.
6. SETTING THE SPINDLE RPM FOR THREADING
Mach 3 has 2 functions working during threading. It receives signals from the
spindle sensor to calculate the actual rpm – this is shown on the line marked S
TRUE, while the rpm you set in the wizard is shown on the S line. Mach 3 uses the
signals from the spindle sensor to match these lines. However you will see that S
TRUE will fluctuate up and down by a few rpm. The other function that Mach 3
does is to adjust the feed rate according to the rpm it is reading from S TRUE in
order to keep the thread pitch constant. HOWEVER, we have found that trying to
coordinate both of these functions is beyond the speed of the computer and Mach 3,
because it simply cannot react fast enough to the spindle slowdown under load and
try to adjust the spindle back to the proper rpm while changing the feed rate to
match. Therefore we have found that by eliminating one of these functions, Mach 3
can keep the rpm/feed rate ratio at a much more consistent level. Therefore, for
threading we go into a semi-manual mode. On the VFD keypad we change the
settings so the spindle is controlled by the keypad and the speed is set by the speed
knob.
7. SETTING UP YOUR THREADING WIZARD
Once you have entered all your settings in the wizard and have selected the rpm
you will use, click on SAVE SETTINGS and POST CODE then EXIT. That will
download your threading file to the AUTO mode. On the bottom right you will see
CYCLE, click on that and the Gcode file will load, then you will see a box marked
Содержание MILL TURN
Страница 12: ......
Страница 13: ......
Страница 14: ......
Страница 15: ...5C COLLET SET 4 JAW CHUCK ...
Страница 16: ...FOLLOW REST ...
Страница 17: ...STEADY REST ...
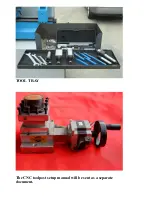
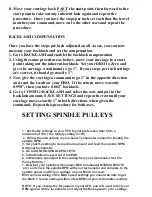
Страница 18: ...TOOL TRAY The CNC toolpost setup manual will be sent as a separate document ...