background image

7

Preparation

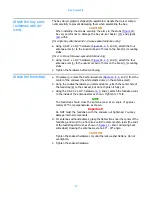
Figure 5. Tower layout, five-bay 

antenna

Содержание 6842

Страница 1: ...Circularly Polarized FM Broadcast Antenna Model 6842 Instruction Manual Installation Operation Maintenance ...

Страница 2: ...chnical staff has a wealth of experience in the broadcast industry and is standing by to serve you in any way This manual is intended to give you a good basic understanding of your antenna its proper and safe installation startup and operation and trouble shooting and maintenance information to keep it working satisfactorily for years to come Please have everyone involved with the antenna read thi...

Страница 3: ...this manual in its entirety before beginning installation of your antenna Failure to follow the installation and operation instructions in this manual could lead to failure of your equipment and might even void your warranty ...

Страница 4: ......

Страница 5: ...s antennas with de icers 12 Attach the feedstrap 12 Figure 10 Attaching the feedstrap 13 Chapter 3 Endseal Radome Installation 15 Install the radome 15 Figure 11 Installing the endseal radome 15 Chapter 4 Mounting the Antenna Bay s 17 Mount the antenna bays 17 Figure 12 Bay mounting on pole 17 Chapter 5 Installing the De icer System if applicable 19 Precautions 19 De icer system description 19 Ele...

Страница 6: ... initial characterization 35 Read transmission line VSWR 35 Read transmission line TDR 35 Read system VSWR 35 Trim impedance 36 Figure 20 Impedance matching transformer 36 Before beginning checkout 37 Check out 37 Operate 37 Figure 21 Apply the signal 38 Chapter 10 Maintenance 39 Log 39 Inspection 39 Paint 39 Return policy 39 Troubleshooting 39 Broad spectrum RF noise 39 High VSWR 39 Change in cov...

Страница 7: ...a 48 Table 15 Accessories and optional items for 2 bay antenna 48 Table 16 Accessories and optional items for 3 bay antenna 48 Table 17 Accessories and optional items for 4 bay antenna 48 Table 18 Accessories and optional items for 5 bay antenna 48 Table 19 Accessories and optional items for 6 bay antenna 48 Table 20 Accessories and optional items for 8 bay antenna 49 Appendix A Selected Assembly ...

Страница 8: ......

Страница 9: ...g on stainless steel threads Check the parts Check to be sure all the parts shown in Table 4 on page 41 Table 6 on page 42 Table 8 on page 44 and Table 9 on page 44 as applicable have arrived in good condition NOTE Item callouts are consistent across all the illustrations in this technical sheet Set up the mounting pole Remember It is YOUR responsibility to ensure that your installation meets all ...

Страница 10: ... degraded a Set up a outrigged round pole or pipe 3 to 5 1 4 in diameter 15 from the tower face or leg See Figure 1 through Figure 8 as applicable for mounting pole length requirements CAUTION Watch for tower components that might interfere with your installation b Mark the mounting pole at the locations where the antenna bays will be mounted in accordance with the installation drawing The bay spa...

Страница 11: ...3 Preparation Figure 1 Tower layout single bay antenna ...

Страница 12: ...Preparation 4 Figure 2 Tower layout two bay antenna ...

Страница 13: ...5 Preparation Figure 3 Tower layout three bay antenna ...

Страница 14: ...Preparation 6 Figure 4 Tower layout four bay antenna ...

Страница 15: ...7 Preparation Figure 5 Tower layout five bay antenna ...

Страница 16: ...Preparation 8 Figure 6 Tower layout six bay antenna ...

Страница 17: ...9 Preparation Figure 7 Tower layout eight bay antenna ...

Страница 18: ...Preparation 10 Figure 8 Top mounted installation ...

Страница 19: ...Figure 9a 2 3 and 4 attach the four antenna arms 5 to the innermost pair of holes on the boom 1 mounting stubs for 2 to 8 bay full wave spaced antennas only b Using 1 4 20 x 1 3 4 hardware Figure 9b 2 3 and 4 attach the four antenna arms 5 to the outermost pair of holes on the boom 1 mounting stubs c Tighten the hardware before continuing Figure 9 Attaching the arms ...

Страница 20: ...sary remove the bolt and washers Figure 10 6 4 and 7 from the center of the endseal the white plastic dome on the antenna mast b Using the endseal hardware you removed above attach the center hole of the feedstrap 8 to the endseal but do not tighten it fully yet c Using the 1 4 20 x 1 3 4 hardware 2 3 and 4 attach the feedstrap ends to the inside of the antenna arms as shown Tighten to 7 ft lb NOT...

Страница 21: ...13 Bay Assembly Figure 10 Attaching the feedstrap NOTE Only antennas without radomes and 1 2 wave spaced antennas require this additional twist step ...

Страница 22: ......

Страница 23: ...re Figure 11 17 18 assemble the radome support disc halves 19 20 around the base and up against the shoulder of the endseal b Using 1 4 20 x 1 hardware 21 22 18 secure the radome fillers 23 to the edges of the support disc halves aligning them with the antenna feedstrap Figure 11 Installing the endseal radome ...

Страница 24: ...ide slots with the notches in the fillers slip the radome 24 over the fillers and onto the support disc Secure it in place using the 1 4 20 x 3 4 hardware 25 22 18 d Seal the gaps around the fillers using a room temperature vulcanizing RTV compound ...

Страница 25: ... all guylines and other obstructions b Using the galvanized 5 8 hardware attach the clamp halves 13 to the threaded rods 12 encircling the mounting pole as shown Do not tighten the hardware fully yet c Repeat for the other antenna bay s as applicable d Ensure the bays are located on the mounting pole at the locations you marked e Align the bays to the correct azimuth and vertically with each other...

Страница 26: ......

Страница 27: ...n page 20 Electrical specifications Table 2 on page 21 Bay junction box Figure 14 on page 22 Thermostat readings Table 3 on page 23 Your system may also include specially ordered items such as a ground mounted main control box a power cable extending up the tower or a tower mounted dual setting thermostat Electric power The de icer system requires 220 VAC 50 60 Hz single phase Table 2 shows approx...

Страница 28: ...nes NOTE A liquid tight conduit con nector 3 8 conduit size by 1 2 hub size for the harness entry to the tower junction box is packed loose with the de icer harness NOTE Shively recommends the use of shielded braided polyethylene covered wire or rubber sheathed flexi ble metal conduit or rigid conduit and weather tight fittings at all junctions ...

Страница 29: ...hermostat if applicable If you are using a thermostat you may locate and mount it at your discretion We recommend mounting it as close as practical to the antenna CAUTION Shively Labs s de icer control box Model 94068 is designed for interior installation only CAUTION When testing the thermostat be sure to have one or both thermostat leads disconnected before taking resistance readings Otherwise r...

Страница 30: ...Installing the De icer System if applicable 22 Figure 14 Bay junction box installation NOTE Wire nuts cover with screws and gaskets and tie wraps are provided with the de icer cable harness ...

Страница 31: ...rt circuit Resistance infinite ohms open circuit Leg to Ground Any Defective thermo stat or shorted leads OK Leg to Leg Above about 38 F 3 3 C Defective thermo stat or shorted leads OK Between about 10 and about 38 F 6 7 to 3 3 C OK Defective thermo stat or broken leads Below about 10 F 6 7 C Defective thermo stat or shorted leads OK ...

Страница 32: ......

Страница 33: ...ill soften the O ring Use only a light lubricating coat of O Lube provided or petroleum jelly too much may hamper electrical contact and contaminate the interior of the system Be sure the O ring is properly seated in its groove and not pinched between the flange contact surfaces b Coat the flange O ring Figure 15 26 lightly with O Lube then install it in the O ring groove in the flange c Before co...

Страница 34: ...s tight e Loop or drape any excess cable and secure it to the pole using tie wraps or customer supplied clamps to prevent wind damage to the cables and to ensure the weight of the cable is not carried by the antenna input NOTE The Model 6842 bay does not require pressurization or purging Installation of your Model 6842 single bay is now complete Please proceed to Startup on page 35 ...

Страница 35: ...he power divider outputs Tighten flange nuts evenly in accordance with Table 1 on page 1 CAUTION Stressing a coax connection after assembly can detune the system Therefore never make a connection and then bend or twist the cable or use the flange to force the coax into shape Form the cable first then attach it to the flange CAUTION The minimum bending radius for 1 2 coax is 10 0 25 m Do not bend i...

Страница 36: ...ansmission cable to the power divider or transformer input Tighten in accordance with Table 1 on page 1 c Secure all the cables to the mounting pole or tower leg using tie wraps or customer supplied cable clamps d Loop or drape any excess cable and tie wrap it to the pole to prevent wind damage to the cables and to ensure the weight of the cable is not carried by the antenna input NOTE The Model 6...

Страница 37: ...29 Connecting the Antenna 2 bay Figure 17 Two way power divider mounted and connected ...

Страница 38: ......

Страница 39: ... power divider a Assemble the power divider mounts Figure 18 34 1 Using 1 2 stainless hardware 35 and 36 attach the threaded rods 37 to the mount channel 38 Figure 18 Power divider mounted and connected 3 1 8 four way power divider shown 5 way 6 way 7 way and 8 way power dividers are similar ...

Страница 40: ...ented in whichever direction you wish Make it easy for yourself to reach for adjustment at startup Install the transformer at your antenna array input This will be at the input flange of the power divider 29 45 48 49 50 or 51 Transformer mounts are generally similar to feedline mounts and should be installed in the same manner Connect the antenna cables CAUTION All O rings are made of silicone Do ...

Страница 41: ...ntenna bay cables to the antenna bay input flanges e Secure the cables to the mounting pole or tower leg using tie wraps 29 or customer supplied cable clamps Connect the tower transmission line a Provide a gas stop between the tower transmission line and the power divider or transformer if necessary The antenna bays are not pressurized The feed system up to the power divider may be pressurized b C...

Страница 42: ...damage to the cables and to ensure the weight of the cable is not carried by the antenna input NOTE The Model 6842 antenna does not require pressurization or purging The feed system up to the power divider may be pressurized Installation of your Model 6842 3 to 8 bay is now complete Please proceed to Startup on page 35 ...

Страница 43: ...djusting A high transmission line VSWR may indicate damaged transmission line and is likely to cause problems in the future including serious damage to your equip ment Read transmission line VSWR The first step is to characterize the transmission line by itself a Briefly disconnect the transmission line from the antenna system input Seal the antenna system input to prevent the entry of moisture b ...

Страница 44: ...ormer c Read the VSWR If the reading went down move the control rod again in the same direction If the VSWR went up move the same rod in the opposite direction Repeat until no further improvement is seen d Adjust the second and third tuning stubs in the same manner NOTE If you get lost return all three tuning stubs to the factory setting all the way out and start over e Return to the first tuning ...

Страница 45: ...initial characterization data have been recorded The system is gas tight purged and pressurized Check out Check the system out as follows a Bring up RF power slowly and observe transmitter readings stability and general operation b Run at about half power for at least an hour reading forward and reflected power stability etc c If the system is stable and seems to be operating properly bring it up ...

Страница 46: ...Startup 38 Figure 21 Apply the signal ...

Страница 47: ...k to you at your expense if you don t do this Troubleshooting Broad spectrum RF noise This indicates that some component is not in good electrical contact with the tower Make sure mounts are tight that tower paint has been removed from under the mounts and that components of other systems are likewise in good contact with the tower High VSWR This is caused by any factor that changes the impedance ...

Страница 48: ......

Страница 49: ...0 Rod full threaded 5 8 11 galvanized 4 13 DCP Clamp half 5 75 bolt spacing 2 Table 5 Components 6842 bay with de icers per antenna bay Part Number Description Qty 14 99718 G504 Bay assembly with arms mounting bracket and de icers 1 2 01 4 20SS028HM Screw hex head 1 4 20 x 1 3 4 SS 10 3 01 4 20MSN Nut 1 4 20 locking SS 10 4 01 4SSF Washer flat 1 4 regular SS 21 5 99744 G501 Arm weldment 4 15 97353...

Страница 50: ...40SC Screw socket head 1 4 20 x 2 1 4 SS 2 18 01 4SSS Washer lock 1 4 SS 10 19 99718 03 01 Disc radome support half 1 20 99718 03 02 Disc radome support half 1 21 01 4 20SS016HM Screw hex head 1 4 20 x 1 SS 4 22 01 4SSFN Washer flat 1 4 narrow SS 8 23 99718 04 Filler radome 2 24 86708 02 Radome 1 25 01 4 20SS012HM Screw hex head 1 4 20 x 3 4 SS 4 ...

Страница 51: ...43 Parts Figure 23 Endseal radome components ...

Страница 52: ...hardware for 7 8 EIA flange 2 28 TY529MX Tie wrap a r 32 9068 328 O ring for 1 5 8 EIA flange 1 33 82912 G501 Kit hardware for 1 5 8 EIA flange 1 Table 9 Components feed system for 3 bay antenna Part Number Description 3 bay Qty NOTE Feed system for 3 to 8 bay arrays is shown in Figure 18 on page 31 34 98141 G504 Mount 3 1 8 power divider 2 35 01 2 13SS Nut hex 1 2 13 SS 5 36 G12SSF Washer flat 1 ...

Страница 53: ...lvanized 2 38 98141 03 Channel power divider 1 39 01 2SSS Washer lock 1 2 galvanized 5 40 DCP Clamp half 5 75 bolt spacing 1 41 G1205 Bolt hex head 1 2 13 x 5 galvanized 1 42 98359 05 Spacer universal mount transformer transmission line 1 43 98359 G503 Saddle assembly power divider mount 2 44 6114 400 Clamp hose 4 48 318F 078F x 4 Power divider 4 way 3 1 8 EIA to 7 8 EIA 1 26 9068 215 O ring for 7...

Страница 54: ...to 7 8 EIA 1 26 9068 215 O ring for 7 8 EIA flange 10 27 82912 G507M Kit hardware for 7 8 EIA flange 10 31 99715 G5xx Coax cable section HCA78 50J 7 8 EIA to 7 8 EIA 5 28 TY529MX Tie wrap a r 46 9068 340 O ring for 3 1 8 EIA flange 1 47 82912 G503 Kit hardware for 3 1 8 EIA flange 1 Table 12 Components feed system for 6 bay antenna Part Number Description 6 bay Qty NOTE Feed system for 3 to 8 bay ...

Страница 55: ...2SSF Washer flat 1 2 SS 6 37 G12R 8 Rod threaded 1 2 13 x 8 galvanized 2 38 98141 03 Channel power divider 1 39 01 2SSS Washer lock 1 2 galvanized 5 40 DCP Clamp half 5 75 bolt spacing 1 41 G1205 Bolt hex head 1 2 13 x 5 galvanized 1 42 98359 05 Spacer universal mount transformer transmission line 1 43 98359 G503 Saddle assembly power divider mount 2 44 6114 400 Clamp hose 4 51 318F 078F x 8 Power...

Страница 56: ... Table 16 Accessories and optional items for 3 bay antenna Part Number Description Qty 59 56009 G503 Harness de icer main 3 bays 1 57 99952 G501 Fine matcher 3 1 8 1 45 9068 340 O ring silicone 3 1 8 EIA flange 1 60 Various Mount assembly 3 1 8 fine matcher 2 Table 17 Accessories and optional items for 4 bay antenna Part Number Description Qty 61 56009 G504 Harness de icer main 4 bays 1 57 99952 G...

Страница 57: ...her 3 1 8 1 45 9068 340 O ring silicone 3 1 8 EIA flange 1 60 Various Mount assembly 3 1 8 fine matcher 2 Table 20 Accessories and optional items for 8 bay antenna Part Number Description Qty 64 56009 G508 Harness de icer main 8 bays 1 57 99952 G501 Fine matcher 3 1 8 1 45 9068 340 O ring silicone 3 1 8 EIA flange 1 60 Various Mount assembly 3 1 8 fine matcher 2 ...

Страница 58: ......

Страница 59: ...51 Appendix A Selected Assembly Drawings The following are excerpts from selected assembly drawings ...

Страница 60: ...52 Figure A 1 22 Feed Strap with Endseal Radome Deicer ...

Страница 61: ...53 Figure A 2 6842 Exploded View with Endseal Radome ...

Страница 62: ...54 Figure A 3 Bay Arm Stickers ...

Страница 63: ...55 Figure A 4 Power Divider Mount Detail ...

Страница 64: ......

Отзывы: