FreeScan UE_ User Manual _V1.2.0.0 15
⚫
The pre-scan mode can be switched on after operations such as creating a new project, importing a
project, pausing scanning, and finishing scanning.
Click
or press the Scan button on the Device again to exit the pre-scan mode and start scanning.
3.4.3 Parameter Setting
Scanning parameters can be set during pre-scan or scanning, including setting of scanning distance, light
source modes, scanning objects, brightness and data settings.
⚫
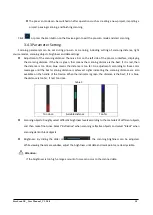
Adjustment of the scanning distance: There is a bar on the left side of the pre-scan interface, displaying
the scanning distance. If the bar is green, that means the scanning distance is the best; if it is red, then
the distance is too close; blue means the distance is too far. Do adjustments according to these color
messages until the best scanning distance is achieved. Lights indicating the scanning distance are also
available on the handle of the Device. When the indicator is green, the distance is the best; if it is blue,
the distance is too far; if red, too close.
Table 3
Too close
Suitable distance
Too far
⚫
Scanning objects: Roughly select different brightness levels according to the materials of different objects,
and then make fine-tunes.
Select “
Reflective
”
when scanning reflective objects
and select “B
lack
”
when
scanning dark or black objects.
⚫
Brightness: By sliding the slider on
, the scanning brightness can be adjusted.
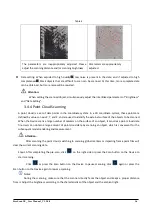
While viewing the camera window, adjust the brightness until data and mark points are clearly visible.
Attention:
If the brightness is too high, a large amount of noise can occur to the scanned data.


