Shindaiwa C254 Скачать руководство пользователя страница 26

26

PURCHASED REPAIR PARTS AND ACCESSORIES

•  90-day all applications

ATTENTION ENGINE POWERED PRODUCT OWNERS

This Shindaiwa engine powered product is a quality-engineered unit which has been manufactured to exact tolerances to provide 

superior performance.  To help ensure the performance of the unit, it is required to use engine oil which meets the ISO-L-EGD 

Standard per ISO/CD 13738 and JASO M345/FD Standards.  Shindaiwa Red Armor

TM

 and Shindaiwa One

TM

 are a premium engine 

oil specifically formulated to meet ISO-L-EGD (ISO/CD 13738) and JASO M345/FD Standards.  The use of engine oils designed 

for other applications, such as for outboard motors or lawnmowers can result in severe engine damage, and will void your engine 

limited warranty. 

THIS WARRANTY DOES NOT COVER DAMAGE CAUSED BY:

•   Lack of lubrication or engine failure, due to the use of engine oils 

that do not meet the ISO-L-EGD (ISO/CD 13738) and JASO    

    M345/FD Standards. Shindaiwa Red Armor

TM

 and Shindaiwa One

TM

 Engine Oil meets the ISO-L-EGD and JASO M345/FD        

    Standard. Emission related parts are covered for 2 years regardless of engine oil used, per the statement listed in the EPA or  

    California Emission Control Warranty Explanation. 

•   Damage caused by use of gasohol, containing methanol (wood alcohol), or gasoline containing 

less than 89 octane.  Only use 

gasoline which contains 89 octane or higher

. Gasohol which contains a maximum 10% ethanol (grain alcohol) or 15% MTBE 

(methyl/tertiary/butyl/ether) is also approved. The prescribed mixing ratio of gasoline to oil is listed on the Shindaiwa oil label and 

covered in your operator’s manual.

•   Engine damage caused by use of ether or any starting fluids.  

•   Damage caused by tampering with engine speed governor or emission components, or running engines above specified and 

recommended engine speeds as listed in your operator’s manual.

•   Operation of the unit with improperly maintained/removed cutting shield or removed/damaged air filter.  

•   Damage caused by dirt, pressure or steam cleaning the unit, salt water, corrosion, rust, varnish, abrasives, and moisture.

•   Defects, malfunctions or failures resulting from abuse, misuse, neglect, modifications, alterations, normal wear, improper servic

-

ing, or use of unauthorized attachments. 

•   Incorrect storage procedures, stale fuel, including failure to provide or perform required maintenance services as prescribed in 

the operator’s manual.  Preventative maintenance as outlined in the operator’s manual is the customer’s responsibility.

•   Failures due to improper set-up, pre-delivery service or repair service by anyone other than authorized Shindaiwa servicing 

dealer during the warranty period.

•   Certain 

parts and other items are not warranted, including but not limited to: lubricants, starter cords, and engine tune-ups. 

•   Use of spark plugs other than those meeting performance and durability requirements of the OEM spark plug listed in the Opera

-

tor’s Manuals.

•   Overheating or carbon scoring failures due to restricted, clogged exhaust port or combustion chamber, including damage to 

spark arrester screen.

•   Adjustments after the first (30) thirty days and beyond, such as carburetor adjustment and throttle cable adjustment.

•   Damage to gears or gear cases caused by contaminated grease or oil, use of incorrect type or viscosity of lubricants, and/or 

failure to comply with recommended grease or oil change intervals.

•   Damage caused by pump or sprayer running dry, pumping or spraying caustic or flammable materials, or lack of or broken 

strainers. 

•   Additional damage to parts or components due to continued use after operational problem or failure occurs. Should operational 

problem or failure occur, the product should not be used, but delivered as is to an authorized Shindaiwa servicing dealer.

It is a dealer’s and/or customer’s responsibility to complete and return the warranty registration card supplied with your Shindaiwa 

product or by visiting WWW.SHINDAIWA.COM. Your receipt of purchase including date, model and serial number must be main-

tained and presented to an authorized Shindaiwa servicing dealer for warranty service. Proof of purchase rests solely with the cus-

tomer. Some states do not allow limitations on how long an implied warranty lasts, so the above limitations may not apply to you. 

Some states do not allow the exclusion or limitation of incidental or consequential damages, so you may also have other specific 

legal rights which vary from state to state. This limited warranty is given by ECHO Incorporated, 400 Oakwood Rd., Lake Zurich, IL 

60047.

DISCLAIMER OF IMPLIED WARRANTIES

This limited warranty is in lieu of all other expressed or implied warranties, including any warranty of FITNESS FOR A PARTICU-

LAR PURPOSE OR USE and any implied warranty of 

MERCHANTABILITY

 otherwise applicable to this product. ECHO, INC. and 

its affiliated companies shall not be liable for any special incidental or consequential damage, including lost profits.  There are no 

warranties extended other than as provided herein. This limited warranty may be modified only by ECHO, INC.

99922201031

06/2010

Содержание C254

Страница 1: ... OWNER S OPERATOR S MANUAL WARNING Minimize the risk of injury to yourself and oth ers Read this manual and familiarize yourself with the contents Always wear eye and hearing protection when operating this unit X7502825601 06 10 ...

Страница 2: ...l procedures described in this manual are intended to help you get the most from this unit as well as to protect you and others from harm These procedures are guidelines for safe operation under most conditions and are not intended to replace any safety rules and or laws that may be in force in your area If you have questions regarding your H4 series hand held power equipment or if you do not unde...

Страница 3: ...nd fast in a cut shut off the engine imme diately Push the branch or tree to ease the bind and free the blade Work Safely Trimmers and brushcutters operate at very high speeds and can do serious damage or injury if they are misused or abused Never allow a person without training or instruction to operate this unit Stay Alert You must be physically and mentally fit to operate this unit safely Safet...

Страница 4: ...ting attachment parallel to the ground Always operate with both hands firmly gripping the unit Wear close fitting clothing to protect legs and arms Gloves offer added protection and are strongly recommended Do not wear clothing or jewelry that could get caught in machinery or underbrush Secure long hair so that it is above shoulder level NEVER wear shorts Wear hearing protection devices and a broa...

Страница 5: ...ht Without guard and strap 6 1 kg 14 1 lb Bore x Stroke 34 x 27 mm 1 3 x 1 1 in Displacement 24 5 cc 1 5 cu in Fuel Oil Ratio 50 1 with ISO L EGD or JASO FD class engine oil Fuel Tank Capacity 590 ml 20 0 oz Carburetor Type Diaphragm type Ignition One piece electronic program controlled Spark Plug NGK CMR5H Plug Gap 0 6 mm 0 024 inch Torque 16 7 18 6 N m 148 165 in lbs Air Cleaner Type Foam pre fi...

Страница 6: ... position for 3 operator comfort Firmly tighten both lower cap retaining 4 screws Securethecabletotheouterpipewiththe 5 2 bands as the illustration shows The 2 bands are in the tool bag Outer tube Lower cap retaining screws Handlebar Ignition switch Throttle trigger Hanger Mounting the brushcutter handlebar Handle positioning label Bands Assembly This unit comes fully assembled with the exception ...

Страница 7: ...t adapter plate C 4 Remove locking tool D IMPORTANT Semi automatic nylon line heads must be used only with plastic debris shield with cut off knife Using nylon line heads with metal debris shield can result in trimmer damage caused by operation with excessive line length D To advance trimmer line Tip To advance trimmer line tap trimmer head against the ground while the head is turning at normal op...

Страница 8: ...ade conversion parts Blades are not provided with trimmer brushcutters and must be selected for type of cutting being performed Install Metal Shield Tools Required 8 x 10 mm Open end Wrench Screwdriver 17x19 mm Wrench 4 mm Hex Wrench Parts Required Metal Shield Shield Bracket 3 5 x 10 mm screws w captivated flat and lock washer metal shield to gear housing 2 5 x 8 mm screws 2 5 mm nuts 2 5 mm lock...

Страница 9: ...Blade installa tion requires Adapter Plate D with 25 mm pilot 2 Install Blade K on adapter plate pilot Blades must be installed so that rota tion arrow on blade matches rotation of unit teeth toward direction of rotation See debris shield decal Secure blade with Lower Plate H and 10 mm L H nut G Turn nut counter clockwise on PTO shaft to tighten 3 Align hole in adapter plate with notch in gear hou...

Страница 10: ...EGD ISO CD 13738 and J A S O M345 FD certified oil will void the engine warranty Handling Fuel DANGER Fuel is VERY flammable Use extreme care when mixing storing or handling or serious personal injury may result Use an approved fuel container DO NOT smoke near fuel DO NOT allow flames or sparks near fuel Fuel tanks cans may be under pressure Always loosen fuel caps slowly allowing pressure to equa...

Страница 11: ...Clear any dirt or other debris 2 from around the fuel filler cap Remove the fuel cap and fill 3 the tank with clean fresh fuel Reinstall the fuel filler cap and 4 tighten firmly Wipe away any spilled fuel 5 before starting engine CAUTION Slowly remove the fuel cap only after stopping the engine Storage Fuel storage laws vary by locality Contact your local government for the laws affecting your are...

Страница 12: ...n Starting the Engine IMPORTANT Engine ignition is controlled by a two position switch mounted on the throttle housing labeled I for ON or START and O for OFF or STOP Slide the ignition switch to the ON 1 position Set the throttle lever to the fast idle 2 Squeeze the throttle lever toward a the handgrip on the shaft tube Depress and hold the throttle lock b button While depressing the throttle loc...

Страница 13: ...ARNING The cutting attachment must NEVER rotate at engine idle If the idle speed cannot be adjusted by the procedure described here return the unit to your Shindaiwa dealer for inspection Idle Speed Adjustment Place the unit on the ground then start 1 the engine and then allow it to idle 2 3 minutes until warm If the attachment rotates when the 2 engine is at idle reduce the idle speed by turning ...

Страница 14: ... into trees wire fences or any material that could tangle or break line ends CAUTION Operation at low rpm can lead to premature clutch failure Hold the grass trimmer so the trimmer head is angled slightly into the area to be cut To ensure maximum trimmer line ser vice life cut only with the tip of the trim mer line Cut grass by swinging the unit s trimmer head from left to right Keep the trimmer h...

Страница 15: ...bove DO NOT cut between the 10 o clock and 5 o clock positions WARNING When cutting wood with a blade feed the blade slowly never strike or slam a spinning blade against the wood WARNING DO NOT use 2 tooth or non Shindaiwa approved 4 tooth cutting blades with Shindaiwa trimmers and brushcutters Using a blade WARNING Blade thrust can occur with out warning if the blade snags stalls or binds WARNING...

Страница 16: ...ICE CEN TER AUTHORIZED BY ECHO INC THE USE OF PARTS THAT ARE NOT EQUIVALENT IN PERFORMANCE AND DURABILITY TO AUTHORIZED PARTS MAY IMPAIR THE EFFECTIVE NESS OF THE EMISSION CONTROL SYSTEM AND MAY HAVE A BEARING ON THE OUTCOME OF A WARRANTY CLAIM Muffler This unit must never be operated with a faulty or missing spark arrester or muffler Make sure the muffler is well secured and in good condition A w...

Страница 17: ... the area around the plug to prevent dirt and debris from getting into the engine s internal parts 10 15 Hour maintenance Maintenance continued 10 Hour maintenance more frequently in dusty conditions Remove the air filter cover by loos 1 ening the cover screw s and lifting IMPORTANT Direct the air stream at the inside face of the filter only CAUTION Never operate the unit if the air cleaner assemb...

Страница 18: ...not damaged the old gasket may be reused Never use cracked or damaged gaskets Turn adjustment screw clockwise 4 tighter counter clockwise looser until feeler gauge is almost snug Back off just enough to allow gauge to slip out with limited resistance While holding the adjustment 5 screw in place with the Allen driver tighten the locknut with a wrench Turn engine over several times and 6 returnthe ...

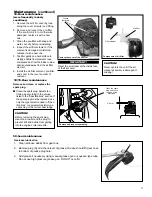
Страница 19: ...park arrester muf 6 fler and engine cover in the reverse order of disassembly Maintenance continued NOTE Every unit is run at the factory and the carburetor is set in compliance with emission regulations Carburetor adjustments other than idle speed must be performed by an authorized Shindaiwa dealer Carburetor Adjustment Engine Break In New engines must be operated a minimum duration of two tanks ...

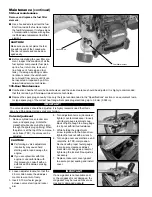
Страница 20: ...intenance continued Blade Sharpening Adjusting Engine Idle The engine must return to idle speed whenever the throttle lever is released Idle speed is adjustable and must be set low enough to permit the engine clutch to disengage the cutting attachment WARNING The cutting attachment must NEVER rotate at engine idle If the idle speed cannot be adjusted by the procedure described here return the unit...

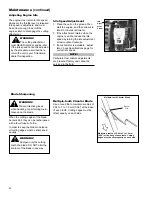
Страница 21: ... expect to use in thirty 30 days ninety 90 days when a fuel stabilizer is added 1 Prime the primer bulb until no more fuel is passing through 2 Start and run the engine until it stops running 3 Repeat steps 1 and 2 until the engine will no longer start CAUTION Gasoline stored in the carburetor for extended periods can cause hard starting and could also lead to increased service and maintenance cos...

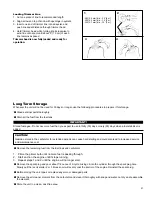
Страница 22: ...ilter and or vent Priming pump not functioning properly The ignition switch is in O OFF position Shorted ignition ground Faulty ignition unit If the plug is wet excess fuel may be in the cylinder The plug is fouled or improperly gapped The plug is damaged internally or of the wrong size Consult with an authorized Shindaiwa servicing dealer Tighten and re test Consult with an authorized Shindaiwa s...

Страница 23: ...ed oils at 50 1 gasoline oil ratio Clean repair or replace as necessary Consult with an authorized Shindaiwa servicing dealer Service the air cleaner element Tighten or replace the spark plug Check the Specifications section for the correct plug and gap for your unit Repair or replace fuel filter and or fuel line Refill with fresh clean unleaded gasoline with a pump octane of 89 or higher mixed wi...

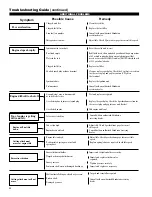
Страница 24: ...ired Replace the spark plug Check the Specifications section for the correct plug and gap for your unit Restart Idle engine until cool Symptom Possible Cause Remedy Engine stops abruptly Engine difficult to shut off Troubleshooting Guide continued Valve cover is leaking Consult with an authorized Shindaiwa servicing dealer Top of engine is getting dirty and oily Engine idle too high Broken clutch ...

Страница 25: ...ve questions concerning Shindaiwa s Warranty Statement you can contact our Consumer Product Support Department at 1 800 673 1558 or contact us through the web at WWW SHINDAIWA COM PRODUCT WARRANTY PERIOD RESIDENTIAL APPLICATION 2 YEAR WARRANTY Units for residential or non income producing use will be covered by this limited warranty for two 2 years from date of purchase EXCEPTIONS For engine power...

Страница 26: ...he operator s manual is the customer s responsibility Failures due to improper set up pre delivery service or repair service by anyone other than authorized Shindaiwa servicing dealer during the warranty period Certain parts and other items are not warranted including but not limited to lubricants starter cords and engine tune ups Use of spark plugs other than those meeting performance and durabil...

Страница 27: ...gned built and equipped to conform with applicable EPA and C A R B emissions standards and that your equipment SORE is free from defects in material and workmanship that would cause it to fail to conform with applicable requirements for 2 years or the length of the ECHO Inc warranty whichever is longer The warranty period begins on the date the product is purchased by an end user HOW WILL A COVERE...

Страница 28: ...28 NOTES ...

Страница 29: ...29 NOTES ...

Страница 30: ...30 NOTES ...

Страница 31: ...31 NOTES ...

Страница 32: ...ealer nearest you ask your retailer or call 1 877 986 7783 Dealer information is also available on WWW SHINDAIWA COM When presenting your unit for Warranty service repairs proof of purchase is required Consumer Product Support If you require assistance or have questions concerning the application operation or maintenance of this product you may call the Shindaiwa Consumer Product Support Departmen...

Отзывы: