-6
IMPORTANT SAFEGUARDS
Be sure to read the following safeguards when setting up
your projector.
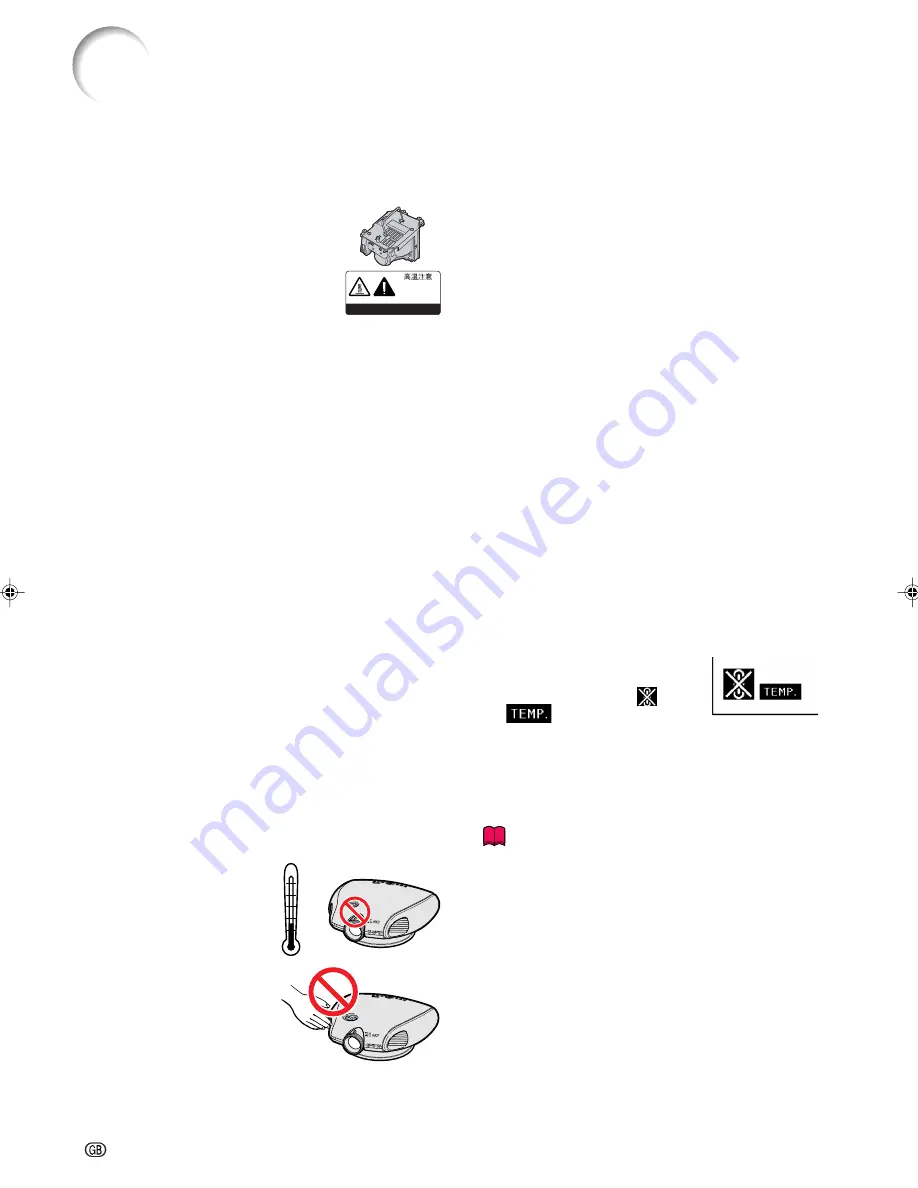
Caution concerning the lamp unit
■
There is a potential hazard of glass
particles if the lamp ruptures. In case
of lamp rupture, contact your near-
est Sharp Authorised Projector
Dealer or Service Centre for replace-
ment.
See “Replacing the Lamp” on page
59
.
Cautions concerning the setup of the projector
■
For minimal servicing and to maintain high image qual-
ity, SHARP recommends that this projector be installed
in an area free from humidity, dust and cigarette smoke.
When the projector is subjected to these environments,
the lens and part of filter must be cleaned more often
than usual. As long as the projector is properly main-
tained in this manner, use in these environments will
not reduce the overall operation life. Please note that
all internal cleaning must be performed by a Sharp
Authorised Projector Dealer or Service Centre.
Do not set up the projector in places exposed to
direct sunlight or bright light.
■
Position the screen so that it is not in direct sunlight or
room light. Light falling directly on the screen washes
out the colours, making viewing difficult. Close the cur-
tains and dim the lights when setting up the screen in a
sunny or bright room.
Do not subject the projector to hard impact and/
or vibration.
■
Take care with the lens so as not to hit or damage the
surface of the lens.
Rest your eyes occasionally.
■
Watching the screen for long hours continuously will make
your eyes tired. Be sure to occasionally rest your eyes.
Do not expose the projector to extreme heat or
cold.
■
Operating temperature:
+5°C to 35°C
■
Storage temperature:
–20°C to +60°C
Notes on Operation
■
The exhaust ventilative
holes, the lamp unit cover
and adjacent areas may
get extremely hot during
projector operation. To pre-
vent injury, do not touch
these areas until they have
sufficiently cooled down.
■
Allow at least 30 cm of space between the exhaust
ventilative hole and the nearest wall or obstruction.
■
If the cooling fan becomes obstructed, a protection
device will automatically turn off the projector lamp. This
does not indicate a malfunction. Remove the projector
power cord from the wall outlet and wait at least 10
minutes. Then turn on the power by plugging the power
cord back in. This will return the projector to the normal
operating condition.
Cautions regarding the transportation of the pro-
jector
■
When transporting the projector, be sure not to subject
it to hard impact and/or vibration, as this can result in
damage. Take extra caution with the lens. Before mov-
ing the projector, be sure to unplug the power cord from
the wall outlet, and disconnect any other cables con-
nected to it.
Other connected equipment
■
When connecting other audio-visual equipment or a
computer to the projector, make the connections AF-
TER turning off the projector and the equipment to be
connected.
■
Please read the operation manuals of the projector and
the equipment to be connected for instructions on how
to make the connections.
Temperature monitor function
■
If the projector starts to overheat
due to setup problems or blockage
of the air vents, “
” and
“
” will blink in the lower left
corner of the picture. If the tem-
perature continues to rise, the lamp will turn off, the
temperature warning indicator on the projector will blink,
and after a 90-second cooling-off period the projector
will enter the standby mode. Refer to “Maintenance In-
dicators” on page
58
for details.
Info
•
The cooling fan regulates the internal temperature, and
its performance is automatically controlled. The sound
of the fan may change during projector operation due
to changes in the fan speed. This does not indicate
malfunction.
CAUTION
PRECAUCIÓN
PRÉCAUTION
BQC-+1
+
35˚C
+
5˚C
XV_Z201E_E_p04_12.p65
03.10.30, 12:16AM
6
Содержание XV-Z201E
Страница 15: ...Connections and Setup Connections and Setup ...
Страница 31: ...Basic Operation Basic Operation ...
Страница 39: ...Adjustments and Settings Adjustments and Settings ...
Страница 59: ...Appendix Appendix ...
Страница 70: ... 68 327 153 8 118 368 Front View Bottom View Side View Top View Side View Rear View Dimensions Units mm ...
Страница 73: ......


