10
VC-G20SM/G200SM
VC-G201SM/G401SM
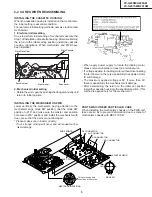
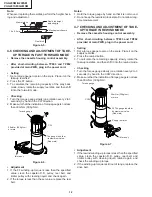
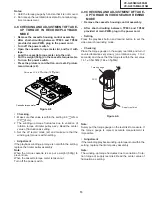
Figure 4-1.
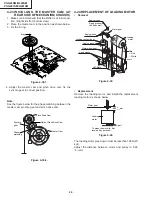
• Reassembly
1. Before installing the cassette housing control, short-
circuit between TP803 and TP802 provided at main
PWB, press the eject button. The master cam turns and
stop in eject position. Fit the drive lever to master cam
through main chassis, push down and slide the drive
lever towards to master cam.
*Eject position: Pinch Drive Cam positioning hole paral-
lel to center of Synchro Gear (Synchro gear marking
line). Synchro Gear positioning mark parallel to center
of master cam.
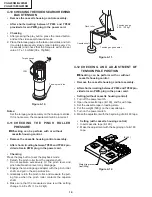
Figure 4-2.
2. Install in the reverse order of removal.
Notes
1. In the case when you use the magnet screw driver, never
approach the magnet driver to the A/C head, FE head,
and drum.
2. When installing or removing, take care so that the
cassette housing control and tool do not contact the
guide pin or drum.
3. After installing the cassette housing control once per-
form cassette loading operation.
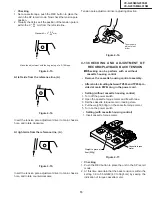
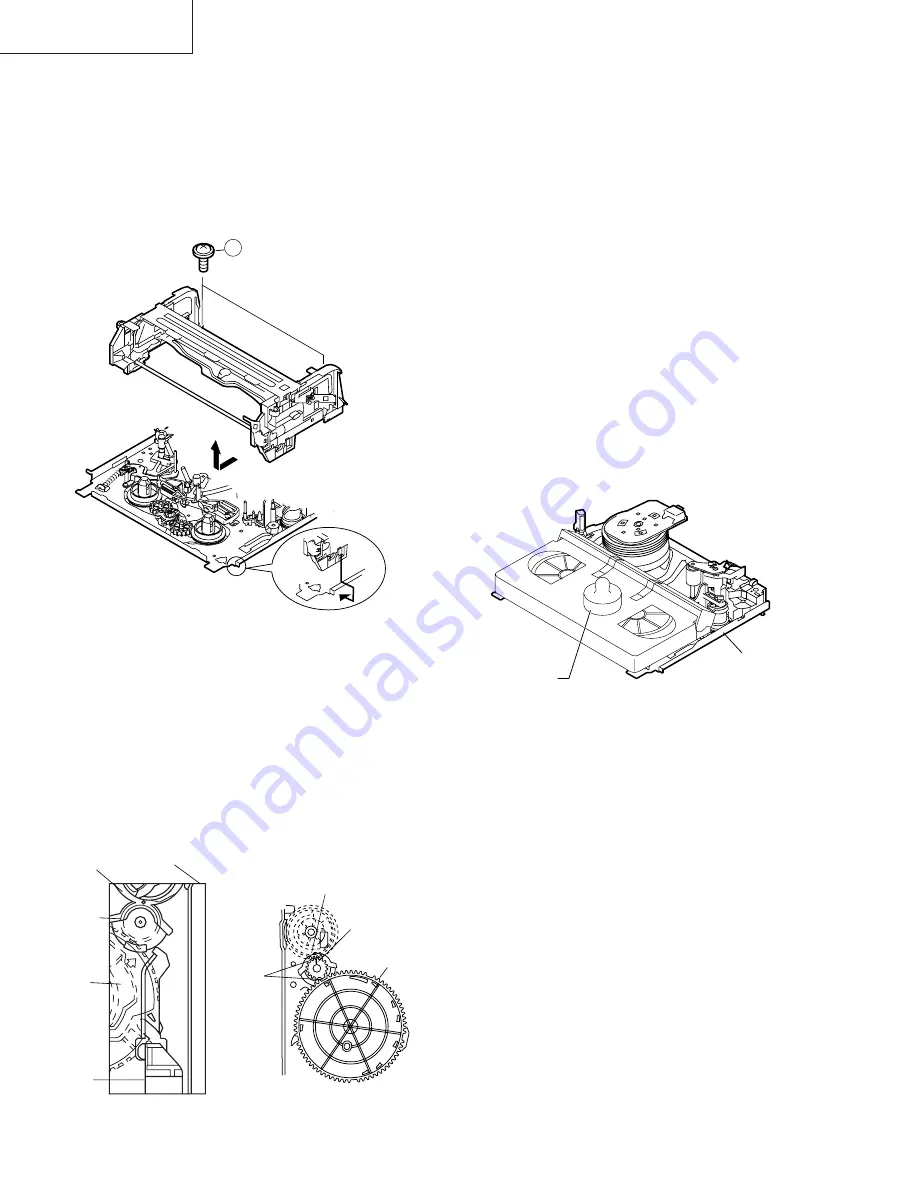
4-4 TO RUN A TAPE WITHOUT THE CASSETTE
HOUSING CONTROL ASSEMBLY
1. Remove the full-surface panel.
2. Short-circuit between TP803 and TP802.
3. Plug in the power cord.
4. Turn off the power switch.
(The pole bases move into U.L.position.)
5. Open the lid of a cassette tape by hand.
6. Hold the lid with two pieces of vinyl tape.
7. Set the cassette tape in the mechanism chassis.
8. Stabilize the cassette tape with a weight (500g) to
prevent floating.
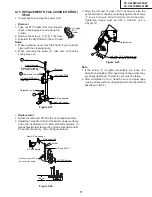
4-3 REMOVING AND INSTALLING THE CAS-
SETTE HOUSING
• Removal
1. In the cassette removing mode, remove the cassette.
2. Unplug the power cord.
3. Remove in the following numerical order.
a) Remove two screws
1
.
b) Pull and circle the drive lever and pull up the cassette
housing control.
Figure 4-3.
9. Turn on the power switch.
10. Perform running test.
Note:
The weight should not be more than 500g.
To take out the cassette tape.
1. Turn off the power switch.
2. Take out the cassette tape.
1
500g
Weight to prevent
float (500g)
Mechanism chassis
From Bottom View
Pinch Drive
Cam
Synchro
Gear
Master
cam
From top view
Main chassis
Drive
Lever
Phase
matching
Master cam
Line of
synchro
gear.
Hole of Pinch
drive cam.
Содержание VC-G200SM
Страница 103: ...103 VC G20SM G200SM VC G201SM G401SM ...
Страница 104: ...104 VC G20SM G200SM VC G201SM G401SM SIGNAL FLOW BLOCK DIAGRAM SIGNALVERLAUF BLOCKSCHALTBILD ...
Страница 106: ...106 VC G20SM G200SM VC G201SM G401SM AUDIO BLOCK DIAGRAM AUDIO SCHALTKREIS BLOCKSCHALTBILD VC G20SM G201SM G401SM ...
Страница 107: ...107 VC G20SM G200SM VC G201SM G401SM EE Signal PB Signal REC Signal E E Signal Wiedergabe signal Aufnahme sihnal ...
Страница 108: ...108 VC G20SM G200SM VC G201SM G401SM AUDIO BLOCK DIAGRAM AUDIO SCHALTKREIS BLOCKSCHALTBILD VC G200SM ...
Страница 109: ...109 VC G20SM G200SM VC G201SM G401SM EE Signal PB Signal REC Signal E E Signal Wiedergabe signal Aufnahme sihnal ...
Страница 110: ...110 VC G20SM G200SM VC G201SM G401SM POWER CIRCUIT BLOCK DIAGRAM HAUPTSTROMKREIS BLOCKSCHALTBILD ...
Страница 113: ...113 10 11 12 13 14 15 16 17 18 19 VC G20SM G200SM VC G201SM G401SM ...
Страница 115: ...115 10 11 12 13 14 15 16 17 18 19 VC G20SM G200SM VC G201SM G401SM ...
Страница 117: ...117 10 11 12 13 14 15 16 17 18 19 VC G20SM G200SM VC G201SM G401SM ...
Страница 119: ...119 10 11 12 13 14 15 16 17 18 19 VC G20SM G200SM VC G201SM G401SM ...
Страница 123: ...123 10 11 12 13 14 15 16 17 18 19 VC G20SM G200SM VC G201SM G401SM ...
Страница 125: ...125 10 11 12 13 14 15 16 17 18 19 VC G20SM G200SM VC G201SM G401SM ...
Страница 127: ...127 10 11 12 13 14 15 16 17 18 19 VC G20SM G200SM VC G201SM G401SM ...
Страница 143: ...143 VC G20SM G200SM VC G201SM G401SM ...


