30
E
Menu Items
n
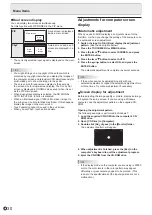
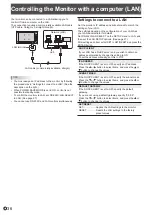
Dual screen display
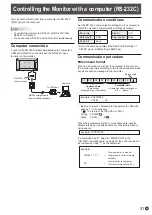
You can display two screens simultaneously.
Set this function with PIP MODES in the PIP menu.
PIP
Main screen
Sub
screen
A sub screen is displayed
inside a main screen.
PbyP
Main
screen
Sub
screen
A main screen and a sub
screen are displayed in a
line.
* The currently selected input signal is displayed on the main
screen.
TIPS
• You might infringe on a copyright of the author which is
protected by copyright law when you display the images of
the computer screen and television/VCR simultaneously for
profit-making or to show the image to the public.
• The screen size for dual-screen display is the same as
the screen size for single-screen display. The Dot by Dot
screen is displayed in NORMAL size except when it is set
as the PIP main screen.
• When dual-screen display is selected, the NO SIGNAL
AUTO INPUT SEL. function is disabled.
• When an interlaced signal (1080i, 480i, video) is input to
the sub screen, horizontal lines may flicker. If this happens,
display the image on the main screen.
• Touch operation cannot be used in the sub screen.
• When you set PbyP, touch action deviate.
Adjustments for computer screen
display
n
Automatic adjustment
When you use D-SUB to display a computer screen for the
first time, or when you change the setting of the computer, use
the automatic screen adjustment.
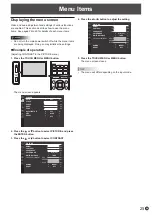
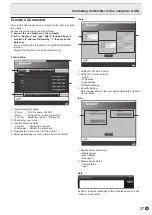
1. Switch the input to D-SUB and display the adjustment
pattern.
(See the description below.)
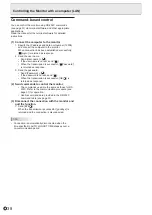
2. Press the TOUCH MENU or MENU button.
3. Press the or button
to select SCREEN, and press
the ENTER button.
4. Press the or button to select AUTO.
5. Press the or button
to select ON, and press the
ENTER button.
The automatic adjustment is complete in several seconds.
TIPS
• If the screen cannot be adjusted properly with one
automatic adjustment, repeat the automatic adjustment two
or three times. Try manual adjustment if necessary.
n
Screen display for adjustment
Before adjusting the image quality or picture, display an image
to brighten the entire screen. If you are using a Windows
computer, use the adjustment pattern on the supplied CD-
ROM.
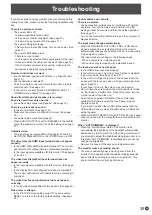
Opening the adjustment pattern
The following example is performed in Windows 7.
1. Load the supplied CD-ROM into the computer’s CD-
ROM drive.
2. Open [CD Drive] in [Computer].
3. Double-click [Adj_uty.exe] in the [Monitor] folder.
The adjustment pattern will appear.
4. When adjustment is finished, press the [Esc] on the
computer’s keyboard to quit the adjustment program.
5. Eject the CD-ROM from the CD-ROM drive.
TIPS
• If the display mode on the computer you are using is 65000
colors, the color levels in the color pattern may appear
differently or grayscale may appear to be colored. (This
is due to the specifications of the input signal and is not a
malfunction.)


