2-14
2
Installing a Drive in the Drive Bay
The drive bay on the right side of your computer can be installed with a CD-ROM
drive or a floppy disk drive. Change the drives in the bay by following the steps
below.
1.
Remove any floppy disks or CD-ROMs from the drive that is currently installed
in the drive bay.
2.
Shut down your computer and disconnect the AC adapter if it’s connected.
Close the upper cover of the computer.
3.
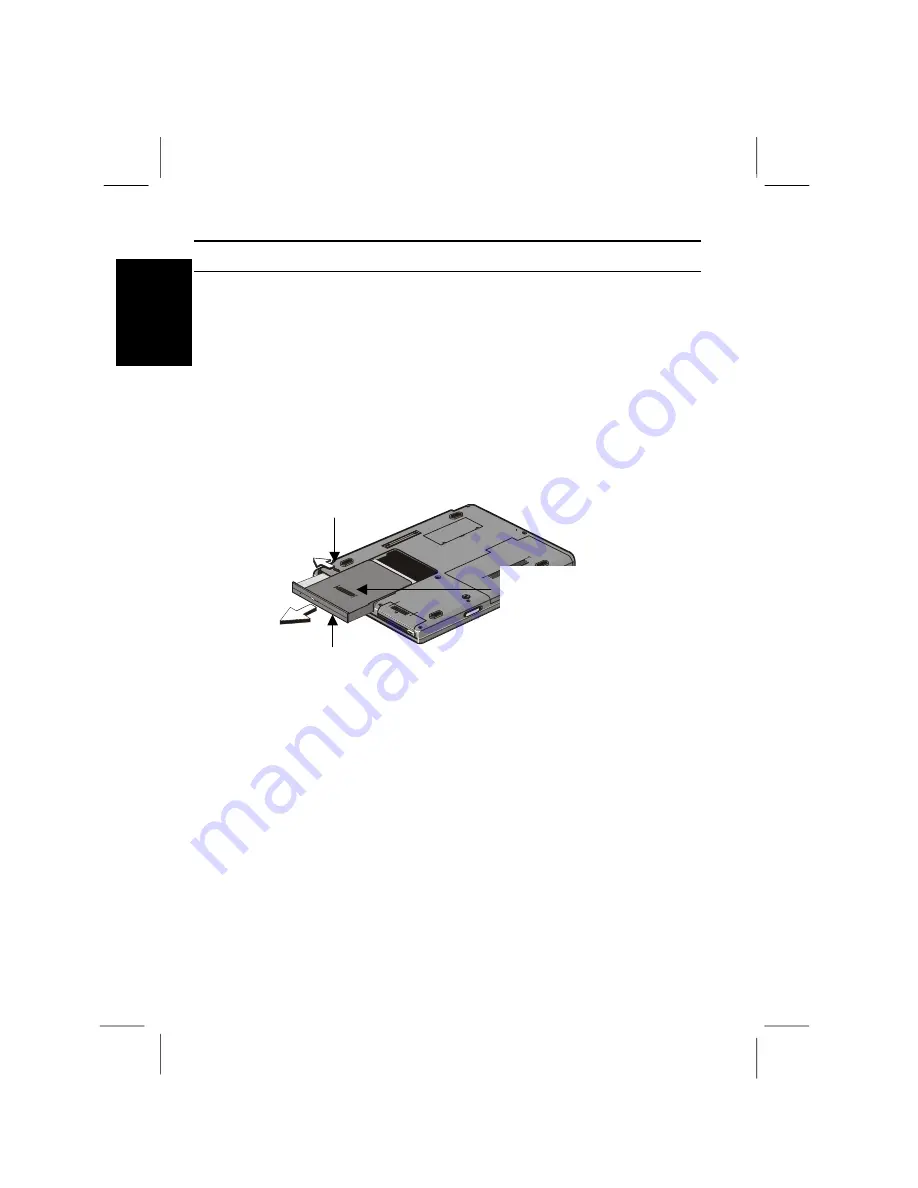
Turn the computer over and locate the drive bay lock latch. Slide the latch
towards the rear edge of the computer and hold.
Drive lock latch
Raised ribs to push
drive unit out of the
bay
CD-ROM drive
4.
Slide the drive out by pushing on the raised ribs on the bottom of the drive. You
can release the lock latch once the drive is partly removed from the drive bay.
Pull the drive all the way out of the drive bay.
5.
Position the replacement drive correctly and insert it into the drive bay. Push it
all the way in so that you feel the connector on the rear edge of the drive engage
with the connector inside the bay. Verify that the drive lock latch is in the
locked position.
6.
Turn your computer over, open the upper cover, and restart the system. Your
computer automatically registers and configures the new drive.

