


SETTING THE DATE AND TIME
The date and time appear in the display, in reports, are printed at the top of each page
you transmit, and are used for timer operations. Set the date and time by pressing the
keys on the operation panel as shown below.
♦
To correct a mistake, press the SPEED key to move the cursor back to the mistake,
and then enter the correct number.
♦
The day of the week is set by entering a code number. Code numbers are as follows:
Day
SUN
MON
TUE
WED
THU
FRI
SAT
Code
0
1
2
3
4
5
6
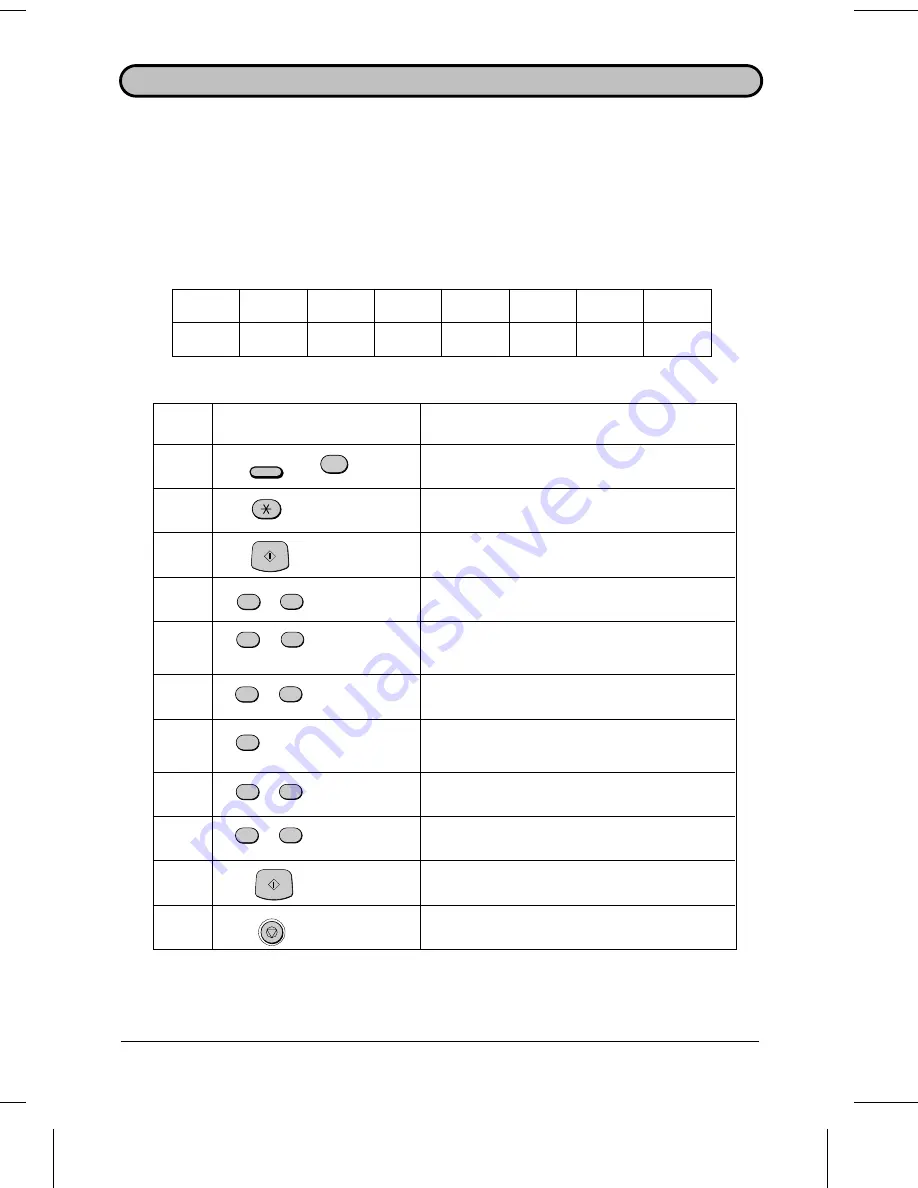
Step
Press these keys:
Comments
1
ENTRY MODE will appear in the display.
2
DATE & TIME SET will appear in the display.
3
4
(Example)
Enter the day of the month (2 digits: "01" to "31").
5
(Example: January)
Enter the month (2 digits: "01" for January, "02"
for February, "12" for December, etc.).
6
(Example: 1995)
Enter the last two digits of the year.
7
(Example: Thursday)
Enter the day of the week by entering the
appropriate code number (see above table).
8
(Example)
Enter the hour (2 digits: "00" to "23").
9
(Example)
Enter the minute (2 digits: "00" to "59").
10
The clock will now start.
11
Exit.
FUNCTION
S T A R T
STOP
3
S T A R T
0
1
1
2
1
0
2
5
9
5
4
INITIAL SETTINGS
2-5
Содержание FO-2600
Страница 8: ...Notes TABLE OF CONTENTS iv ...
Страница 20: ...Notes LOADING PRINTING PAPER 1 12 INSTALLATION ...
Страница 36: ...Notes USING THE MERCURY FUNCTION 2 16 INITIAL SETTINGS ...
Страница 82: ...Notes ANTI JUNK FAX 5 24 SPECIAL FUNCTIONS ...
Страница 100: ...Notes CLEARING PAPER JAMS 9 8 TROUBLESHOOTING ...
Страница 104: ...Notes INDEX Index iii ...


