5 – 3
AY-XPC15PU
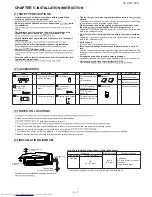
Not running wavy.
Not left in water.
No trap
allowed.
Not to rise.
Connecting the drain hose
(1) Glue and Connect a drain hose.
(2) Tape over the connecting part.
Drain hose
ø16 mm
4 CONNECTING THE DRAIN HOSE
No trap allowed.
Notes:
Be careful not to allow the drain hose to rise, form a trap or leave its end in water,
as shown below.
Coil thermal insulation around a drain hose extension, if running in the room.
Checking drainage
(1) Open the open panel.
(2)
(3) Pour some water into the drain pan.
(4) Check the water drains smoothly.
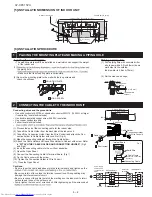
ATTACH THE CABLE HOLDER AND CONNECTION HOLDER
Attach Wire conduit to Cable Holder with Lock Nut.
The thread of the installed Wire Conduit should be
less than 3/8 in. (10 mm)
Fig.2
Fig.3
Fig.4
Less than 3/8 in.
(10 mm)
Lock Nut
Wire Conduit
Connection Holder
Screw
Screw
Cable Holder
(AY-XPC15PU, A3-XPC18PU, AY-XP24PU)
(AY-XPC07PU, AYXPC09PU, AY-XPC12PU)
3 SETTING UP THE INDOOR UNIT
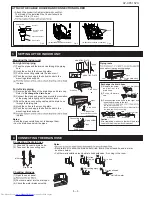
Mounting the indoor unit
For right side piping
(1) Pass the pipes and the drain hose through the piping
hole.
(2) Hook the unit onto the mounting plate.
(3) Pull the connecting cable into the indoor unit.
(4) Push the unit and apply the bottom hooks to the
mounting plate's support.
(5)
in place.
For left side piping
(1) Reverse the positions of the drain hose and drain cap.
Refer to “
Exchange the drain hose
”.
(2) Connect the pipes and wrap tape around the insulation
of the piping joints tightly not to become thick.
(3) Pass the pipes, connecting cable and the drain hose
through the piping hole.
(4) Hook the unit onto the mounting plate.
(5) Push the unit and apply the bottom hooks to the
mounting plate's support.
(6)
in place.
Notes:
Bend the pipes carefully as not to damage them.
Lay the drain hose below the pipes.
MOUNTING PLATE
Taping
Piping route
zone without leaving any sharp edge.
Plate
Cut the plate along
notch.
Plate
Plate
Hook
MOUNTING PLATE
Piping holder
(Only for AY-XPC15/18PU
AY-XP24PU)
Tape
Pipes
Drain Hose
Exchange the drain hose
(1) Remove the screw
a n d p u l l o u t t h e
drain hose.
(2) Pull out the drain
cap.
(3) Reconnect the drain hose to the right and
insert the drain cap to the left.
the screw removed in (1).
Insert a hexagon wrench (4 mm diagonal) into
the drain cap, and press it fully.
Caution:
After replacing, make sure that both the drain
Drain Hose
Drain Cap
Drain Hose
Hexagon wrench
Drain cap
Drain Hose
Screw
Drain Cap
Screw
Plate
1
2
3
4
5
Drain hose
Piping holder
Connecting cable
Pipes
Содержание AY-XP24PU
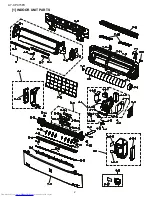
Страница 33: ...AY XPC15PU 2 1 INDOOR UNIT PARTS ...

