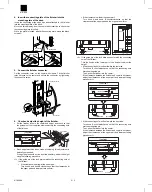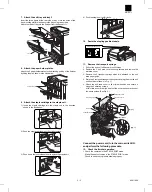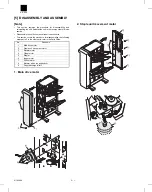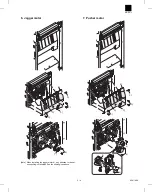
7. Attach the exit tray and tray 3.
Insert the three pawls at the rear side of tray 3 into the holes of the
tray mounting platform and secure the tray using two screws.
Attach the two exit trays to the finisher from the boss at <1>.
8. Attach the paper holder plates.
Attach the 2 paper holder plates to the attaching portion of the finisher
by fitting them as shown in the illustration.
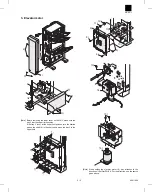
9. Attach the staple cartridge to the staple unit.
1) Insert the staple cartridge into the staple unit in the direction
shown in the illustration.
2) Push the staple cartridge in until it clicks in place.
3) Push down the lock release lever to unlock the staple unit.
4) Push the staple unit until it locks.
10. Paste the stapling position labels.
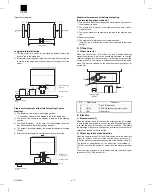
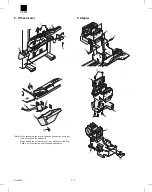
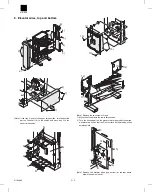
11. Remove the transport springs.
1. Pull out the exit unit of the copier until it stops.
2. Remove the 2 exit area cover securing screws and remove the
exit area cover.
3. Remove the 2 transport springs which are attached to the exit
area paper guide.
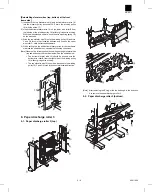
4. Store the 2 removed transport springs by hanging them on the exit
unit front frame (shown in Fig. 1).
5. Attach the exit area cover to its original position and secure it
using the 2 securing screws.
At this time, ensure that the pawls of the exit area cover are under
the paper guides. (See Fig. 2.)
Connect the power cord, turn the main switch ON,
and perform the following procedure.
12. Check the finisher operation.
•
Check the operation in the STAPLE SORT mode.
Make 10 sheets of copies in the STAPLE SORT mode.
Check to see if the copies are stapled properly.
Exit trays
Screws D
Tray 3
Pawl
Pawl
Pawl
2
1
Paper holder plates
Stapling position label B
[Fig. 1]
[Fig. 2]
Transport spring
Exit area cover
Exit unit
Securing screw
Securing screw
Paper guides
AR-FN3
2 – 3
8/19/1999
Содержание AR-FN3
Страница 20: ...15 15 15 15 16 AR FN3 8 19 1999 5 7 ...
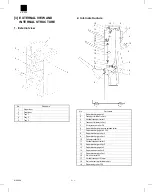
Страница 27: ... Rollers Paper guides AR FN3 7 2 8 19 1999 ...
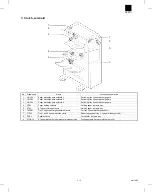
Страница 28: ...AR FN3 8 19 1999 7 3 ...
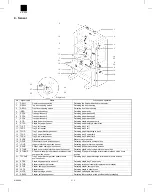
Страница 29: ... Gears Others Sensors Belts AR FN3 7 4 8 19 1999 ...
Страница 51: ...3 Main PWB page arrangement 1 2 AR FN3 10 9 8 6 1999 ...
Страница 52: ...Main PWB page arrangement 2 2 AR FN3 8 6 1999 10 10 ...

