32
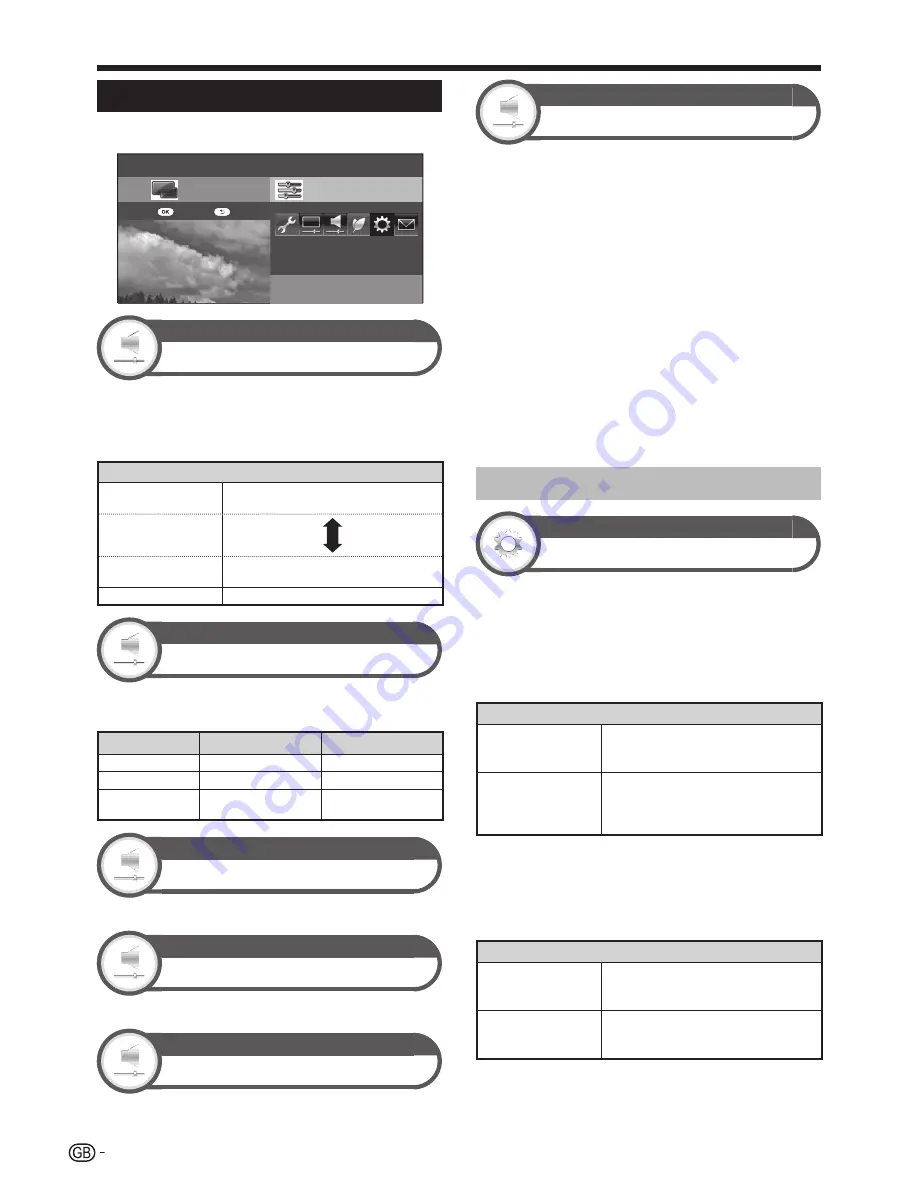
Audio settings
Go to “Menu” > “Setup” > “Audio”.
Setup
Auto volume
Audio
[Off]
STANDARD
CH list
:Back
:Enter
Menu
Audio
Auto volume
Different sound sources sometimes do not have the
same volume level, such as a programme and its
commercial breaks. This function reduces this problem
by equalizing levels.
Item
High
Strongly reduces the volume gaps
among different sound sources.
Middle
Low
Slightly reduces the volume gaps among
different sound sources.
Off
Does not adjust the volume gaps.
Audio
Audio adjustment
You can adjust the sound quality to your preference with
the following settings.
Item
c
(Cursor)
d
(Cursor)
Treble
For weaker treble
For stronger treble
Bass
For weaker bass
For stronger bass
Balance
Decrease audio from
the right speaker
Decrease audio from
the left speaker
Audio
Surround
This function allows you to enjoy realistic live sound.
Audio
Bass enhancer
This function allows you to enjoy bass-enhanced sound.
Audio
Clear voice
This function emphasises speech against background
noise for greater clarity.
Audio
Audio description setting
This function allows you to enable output of audio
description if the TV receives a signal including audio
description.
NOTE
• When the “Audio description” is set to “On”, the audio
description sound is superimposed on the main audio when
you select a broadcast compatible with audio description.
• If you do not clearly hear the sound for the visually impaired, go to
“Menu” > “Setup” > “Audio” > “Audio description setting” > “Mix
level”, and select the upper level to turn up the volume.
• This function is available only for DTV broadcasts. This “Audio
description setting” menu is not displayed for the ATV or the
external inputs.
• The audio description sound is superimposed on the main
audio only when the sound is output on the speaker sound
output, headphone sound output and sound for audio out
output. The sound is not output on the S/PDIF sound output
and the SCART sound output.
• This function is not available for the AQUOS Audio speaker
system.
• This function does not work during time shift playback.
Setting audio input
Option
Audio select
When using the EXT 3 terminal or HDMI 2 terminal, you
must select which terminal uses the AUDIO (R/L) jack for
analogue audio input.
Go to “Menu” > “Setup” > “Option” >
“Terminal setting” > “Audio select”.
When selecting “HDMI 2” from the “INPUT” menu
Item
HDMI (Digital)
When connecting devices (including
a PC) with HDMI cable to the HDMI 2
terminal.
HDMI+Analog
When connecting devices (including a
PC) with DVI/HDMI cable to the HDMI
2 terminal and inputting analogue audio
signals from the AUDIO (R/L) jack.
NOTE
• You must set this to “HDMI+Analog” when connecting devices
(including a PC) with an HDMI-certified cable to the HDMI 2
terminal. If “HDMI (Digital)” is set, there will be no sound output.
When selecting “EXT 3” from the “INPUT” menu
Item
Video
When connecting devices with AV cable
to the EXT 3 terminal, display images
without audio.
Video+audio
When connecting a PC to the EXT 3
terminal, and inputting analogue audio
signals from the AUDIO (R/L) jack.
NOTE
• You must also set “COMPONENT” from the “Input select” menu
when selecting “EXT 3” from the “INPUT” menu (Pages 19 and 44).
Basic adjustment
Содержание AQUOS LC-40LE814E
Страница 65: ...63 Appendix ...
Страница 72: ...70 End of life disposal Appendix ...
Страница 73: ......


