


Introduction
5
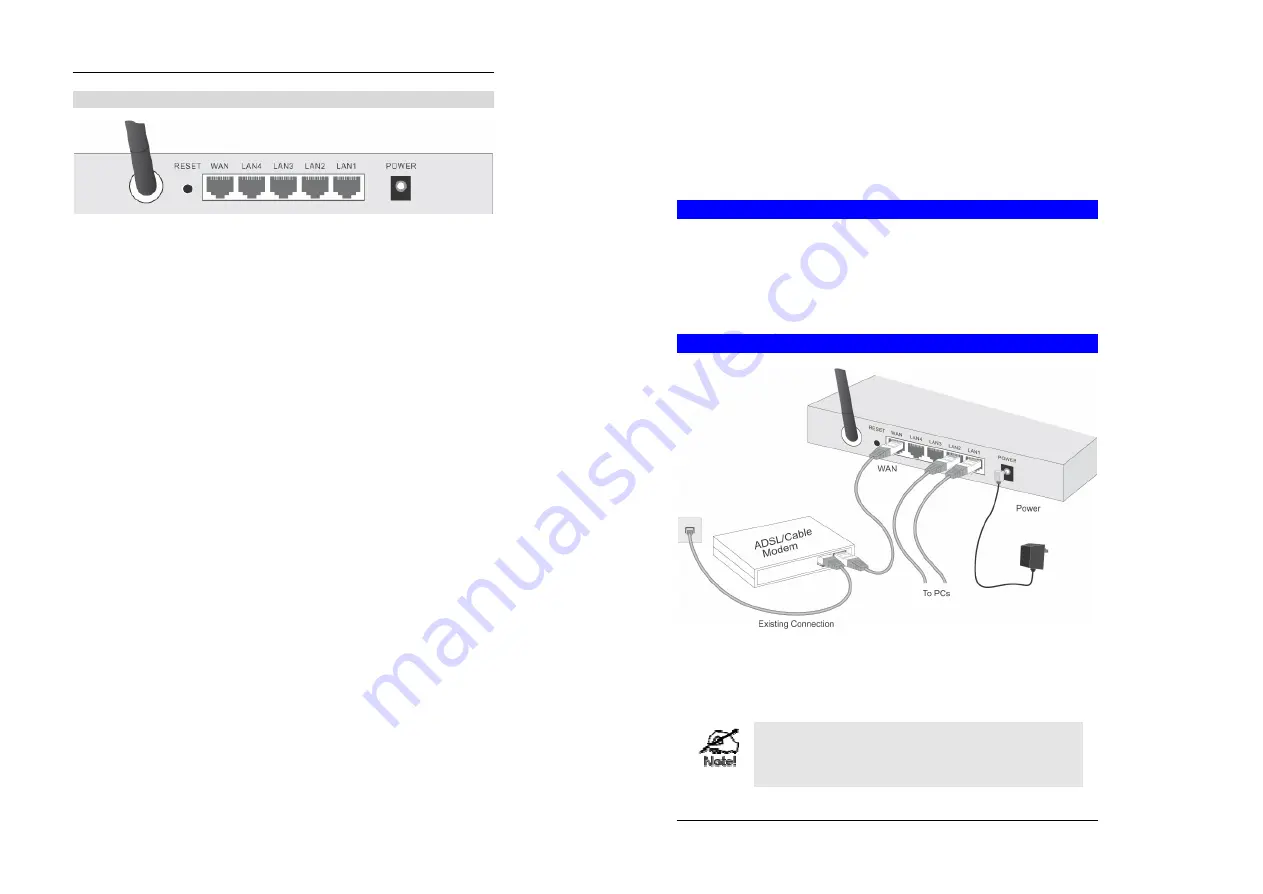
Rear Panel
Figure 3: Rear Panel
Reset Button
This button has two (2) functions:
•
Reboot
. When pressed and released, the Wireless Router will
reboot (restart).
•
Clear All Data
. This button can also be used to clear ALL data
and restore ALL settings to the factory default values.
To Clear All Data and restore the factory default values:
1.
Power Off.
2.
Hold the Reset Button down while you Power On.
3.
Keep holdin g the Reset Button for a few seconds, until the RED
LED has flashed TWICE.
4.
Release the Reset Button. The Wireless Router is now using the
factory default values.
WAN port
(10/100BaseT)
Connect the DSL or Cable Modem here. If your modem came with a
cable, use the supplied cable. Otherwise, use a standard LAN cable.
10/100BaseT
LAN connections
Use standard LAN cables (RJ45 connectors) to connect your PCs to
these ports.
Power port
Connect the supplied power adapter here.
6
Chapter 2
Installation
This Chapter covers the physical installation of the Wireless Router.
Requirements
•
Network cables. Use standard 10/100BaseT network (UTP) cables with RJ45 connectors.
•
TCP/IP protocol must be installed on all PCs.
•
For Internet Access, an Internet Access account with an ISP, and either of a DSL or Cable
modem (for WAN port usage)
•
To use the Wireless Access Point, all Wireless devices must be compliant with the
IEEE802.11b specifications.
Procedure
Figure 4: Installation Diagram
1. Choose an Installation Site
Select a suitable place on the network to install the Wireless Router.
Ensure the Wireless Router and the DSL/Cable modem are powered OFF.
For best Wireless reception and performance, the Access
Point should be positioned in a central location with mini-
mum obstructions between the Access Point and the PCs.
Also, if using multiple Access Points, adjacent Access Points


